AIM / NetRate Guide
Requirements
Integration between AIM and NetRate was introduced for the Commercial General Liability line of business in AIM Release 22.2, and in NetRate Version 3.
-
User IDs are created within the NetRate system and will not expire unless the client sets them up to expire.
-
NetRate Version 3 is hosted in the cloud. Integration with AIM is only supported at this version or higher.
-
Version 1: Desktop only
-
Version 2: Browser client
-
-
Recommended use is with the Chrome browser, but this product also works with other browsers.
-
Logging in from AIM into NetRate is not needed. However, users will need to log in if they go directly to the NetRate URL.
NetRate Setup
Setup in the Data Maintenance Utility (DMU) is required for the integration between AIM and NetRate.
-
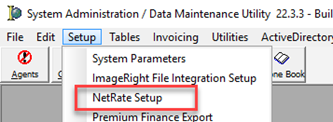
Log into DMU
-
From the Setup menu, select "NetRate Setup"
-
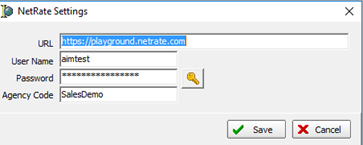
Enter the NetRate URL for the clients.
-
This URL will be provided by your NetRate consultant during the build configuration process.
-
The prefix https:// must be placed in front of the NetRate URL in the DMU setup.
-
-
Enter the Username and Password, along with the Agency Code.
-
NetRate will set up a generic user ID and password to eliminate the need for each user to be set up in the system or for mapping to be done for each user.
-
Coverage Table
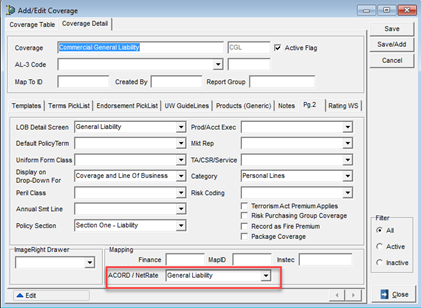
Each coverage setup being integrated with NetRate must first have its ACORD / NetRate mapping completed.
-
From the Tables menu, select "Coverage."
-
Click the Pg. 2 tab.
-
Select the applicable ACORD / NetRate coverage in the Mapping box at the bottom of the window.
-
General Liability for Commercial General Liability coverage.
-
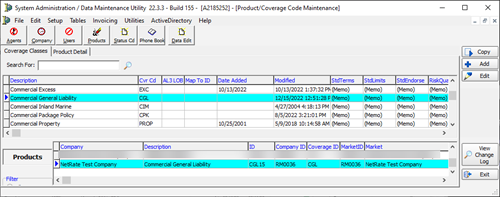
Company Table
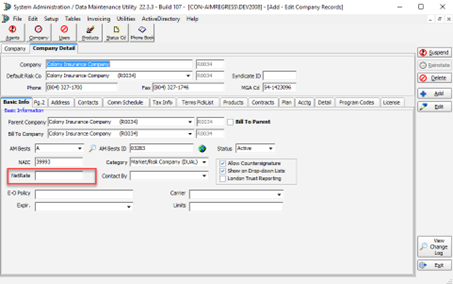
At the company level, the NetRate company code and its Program Code must be added.
The NetRate CompanyName must match the NetRate Company Code.
-
From the Table Menu, select "Company"; you may also select "Company" from the speed bar.
-
On the Basic Info tab, enter the NetRate code for the selected company.
-
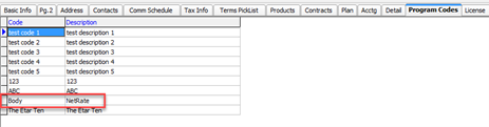
Click the Program code tab to set up the Program.
-
Enter the program code and description for the selected company, as supplied by your NetRate consultant .
-
Both the name and description must be the same as how they are set up in NetRate. Both are checked on the return from NetRate.
-
|
NOTE: If the client is using VPI, the program code(s) mapped in NetRate should be the same.
|
Product Table
Once the programs are set up on the Company Table, you must select them on any applicable products.
-
Click on the Products icon in the spree bar or the "Tables - Products" menu.
-
Select "Coverage" in the top grid.
-
Select the Product that is applicable, if already set up.
-
Click on the Programs tab.
-
Click the down arrow and select the applicable Program Code(s) for the selected product.
-
Click Save

Agent Table
No setup at this level.
Document Designer
When ImageRight is integrated with the AIM instance, an additional step is required for mapping the NetRate proposals and worksheets.
-
Open AIM.
-
From the Module menu select :Document Designer."
-
Expand out the Virtual Documents folder.
-
Click the "IR Virtual Setup" folder.
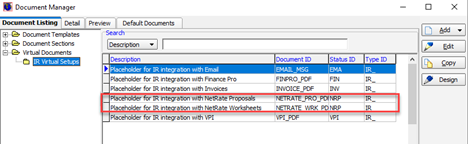
-
Select the ‘Placeholder for IR integration with NetRate Proposals’ row and then click "Edit."
-
The proposal row can be used to capture the Condensed Worksheet from NetRate, if being used.
-
-
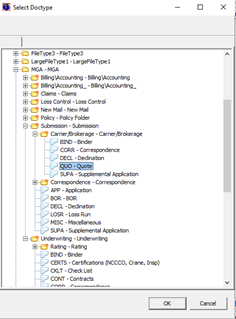
Click the IR Template document icon to open the window.
-
If this is your first time accessing ImageRight, you will be asked to log in.
-
-
Expand the File Type, Folder to find the desired document type and select it.
-
The line will be blue.
-
Repeat these steps for all applicable file types.
-
-
Click "OK" when you are ready to save your work.
-
Select the "Placeholder for IR integration with NetRate Worksheet" row and click "Edit."
-
Repeat the above steps to set up the document default type for the worksheet.
Integration between AIM and NetRate allows users to start a quote in AIM, access NetRate, enter the coverage information, and then rate the quote. When the user returns to AIM, this rate and premium information is sent back to the Unit At Risk (UAR) screens and the Quote Detail window. At present, Commercial General Liability is the supported Line of Business.
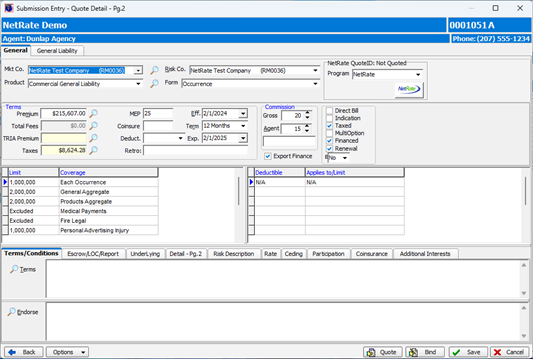
AIM — Quote Detail
When a Risk company is selected that has been set up, NetRate will be displayed to the right of the Risk Company.

-
Select "Market" and "Risk Company."
-
Select "Program" from the NetRate box.
-
Confirm that the correct Effective and Expiration dates are displayed in the window.
-
Click the "NetRate" button to begin the rating process.
-
The connection to NetRate will start. Please wait until the connection is completed before proceeding.

-
Once connected, the Home screen will display.
-
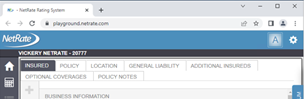
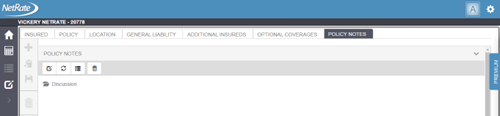
The black bar will show the insured's name and the Quote ID from NetRate.
-
In the screenshot below, the Quote ID is 20777, and the insured is Vickery NetRate.
-
NetRate Toolbar Icons
 — Returns the user to the Home screen
 — Calculates the Premium, when selected
 — Forms
 — Policy notes
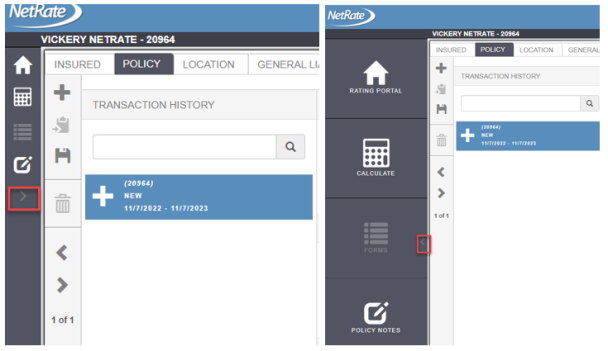
 — Collapses the Navigator window
Standards
Several standards are used by NetRate. In this section we will discuss a few that are available.
A red exclamation point  next to a field indicates the field is required.

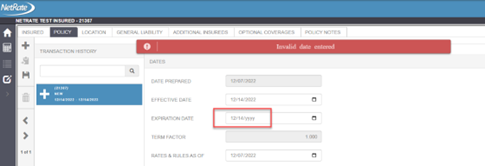
When an entry is invalid, an error message will display across the top of the screen. This is merely a temporary message, which will disappear after a few seconds. In the example below, the year is missing in the expiration date.
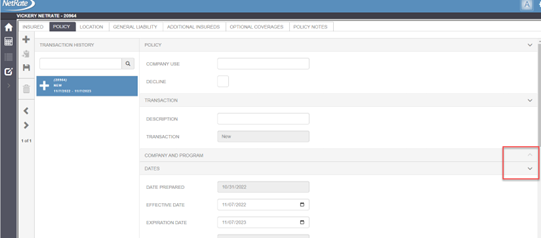
NetRate allows the user to collapse or expand sections of a window by using the "up" or "down" arrows.
The arrow on the Navigator can also be expanded or collapsed by using these arrows.
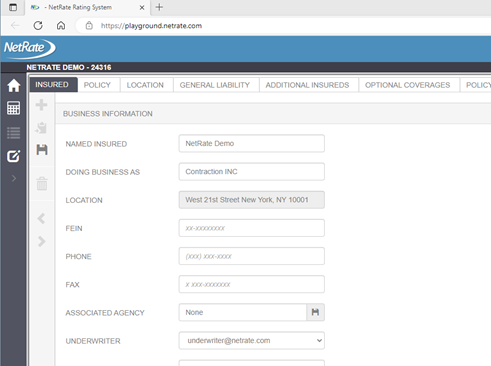
Insured Tab
The insured's information entered into AIM is transferred to NetRate and populates the Insured tab.
Toolbar Icons on the Insured Tab:
 — Add insured
 — Clone insured
 — Import Locations: Allows the user to import locations from an Excel spreadsheet.
 — Save insured (Ctrl + Alt + S)
 — Delete insured
Import Locations:
-
Click the
 icon to access the Import window.
 -
Click the
icon to locate the Excel template with the locations or vehicles. -
Click the
 icon to download the Import template.
 -
Click the
icon to save the imports.
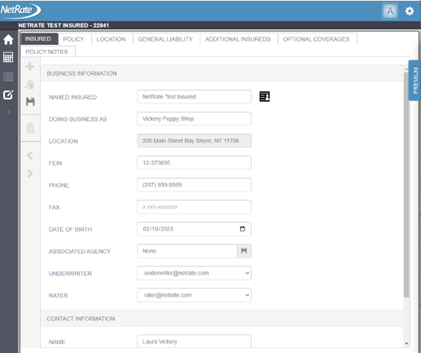
Insured Information:
Business Information:
-
Named Insured: Insured from AIM.
-
Doing Business As: DBA name from AIM.
-
Location: Physical location from AIM.
-
FEIN: Exports from AIM if the field has 10 numbers.
-
Phone: Transfers phone number from AIM.
-
Fax: Transfers fax number from AIM.
-
Date of Birth: Transfers from AIM.
-
Associated Agency: Not needed for Rating, so no import from AIM.
-
Underwriter: Transfers as AcctExec email address.
-
Rater: Transfers from AIM with the Market Rep’s email address.
Contact Information
-
Name: Not transferring from AIM
-
Email: Not transferring from AIM
-
Phone: Not transferring from AIM
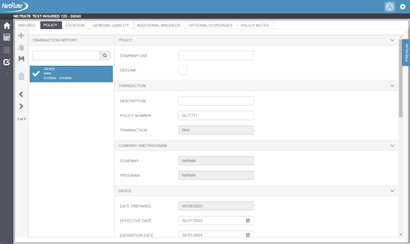
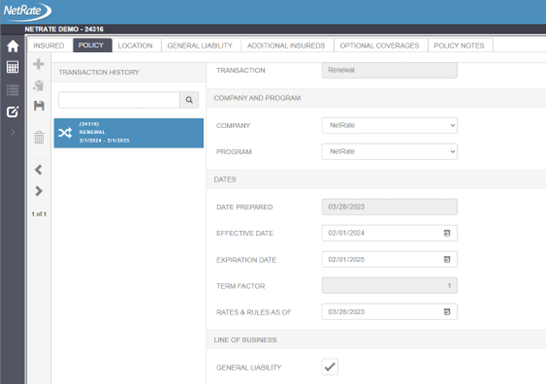
Policy Tab
Company, Program, Date Prepared, Effective Date, Expiration Date, Line of Business (Coverage), and Legal Entity are transferred from AIM to NetRate.
Users should add any additional required information. For example, check the box for "Terrorism" if it should be included in the quote.
Policy Section
-
Company Use: Free-form field.
-
Decline: No longer used.
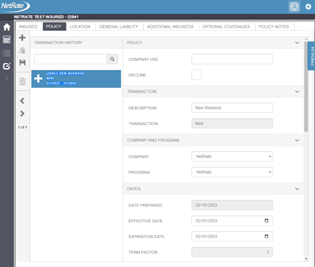
Company And Program Section
-
Company: Free-form field; Risk Company transferred from AIM.
-
Program: Program transferred from AIM.
Dates Section
-
Date Prepared: Date quote was started in NetRate.
-
Effective Date: Effective date of the policy; transfers from AIM.
-
Expiration Date: Expiration date of the policy; transfers from AIM.
-
Term Factor: Based on the effective and expiration date the prorate will be shown; a full-year policy is a term factor of 1.
-
Rates & Rules As Of:
-
This field is set up on a state-by-state basis in NetRate.
-
This field indicates which rating rules will be used.
-
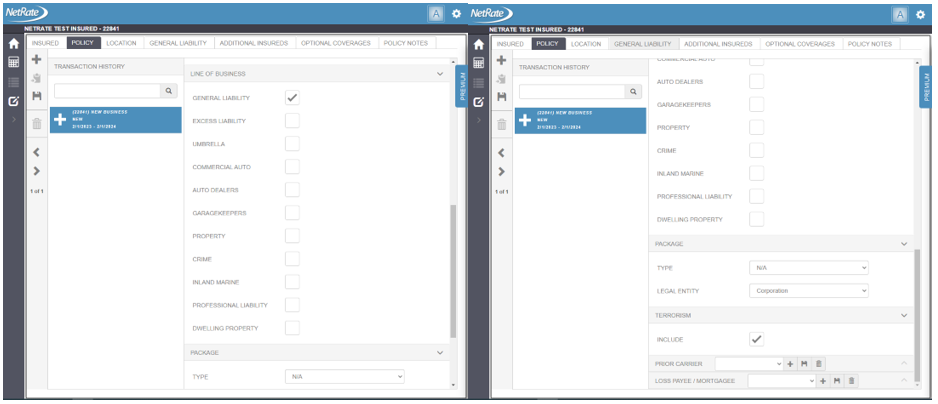
Line of Business
-
Line-of-business transfer from AIM.
-
Currently supported: General Liability
-
ISO standards are the defaults, with customizations based on clients’ requirements.
Package
-
Type: If a package policy, select the type of package from the drop-down list.
-
Legal Entity: Transfers from AIM, if available.
Terrorism
-
Include: Check the box if TRIA should be included in the quote.
Prior Carrier

-
If the Prior carrier is known, the user can select from the drop-down list.
-
Click the
to add a carrier. -
Click the
to save the carrier. -
Click the
 to delete the carrier.
-
Loss Payee / Mortgagee
Loss payee / mortgage must be added here so as to be selected at the coverage level.

-
• Click the
 to add a loss payee / mortgagee.
 -
• Click the
to save a loss payee / mortgagee. -
• Click the
to delete a loss payee / mortgagee.
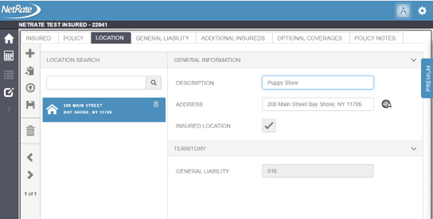
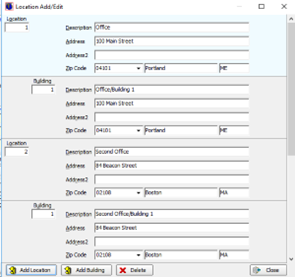
Location Tab
The location tab is used to capture all locations on a policy. A user will be able to select one of the locations at the line-of-business tab, if applicable. AIM will transfer the default location as the Physical Location. Do not change the location sent from AIM.
It is important that the location address returns the territory codes before leaving this window. If the territory codes are missing, the rating will not be completed.
-
Description: Enter the description of the location.
-
Address: Add the applicable address.
-
Click the
 icon to open the address information panel.
 -
Leave the “Manually Override Location” check-box checked.
-
Enter the address information.
-
To use the address as entered, simply press the TAB key until the address information panel closes; the entered information will be posted to the Address field and displayed in the Location list on the left side of the screen.
-
To verify the address using Google Maps, uncheck the “Manually Override Location” check-box after entering the address information.
-
Google Maps will find the closest match to the address entered and then return it to the address information panel. This information will be posted to the Address field and displayed in the Location list on the left side of the screen.
-
-
-
-
Insured Location: Check this box if the location is the main address of the insured.
-
The first location must not be changed, since it is mapped to the insured location—even if no exposure is at that location.
-
-
Territory: Based on the line of business, the Territory will automatically populate once you tab away from the address field.
-
Click the
icon in the toolbar to add additional addresses-
If an address is invalid, the location box will display red. If the address is valid, the box will display blue while on that location.
-
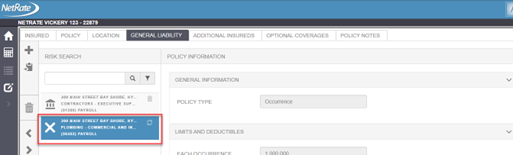
General Liability Tab
General Information
-
Policy Type: Select either Occurrence or Claims Made from the drop-down list.
Limits and Deductibles
-
Default limits can be set up.
-
Select each of the limits and deductibles applicable to the coverage.
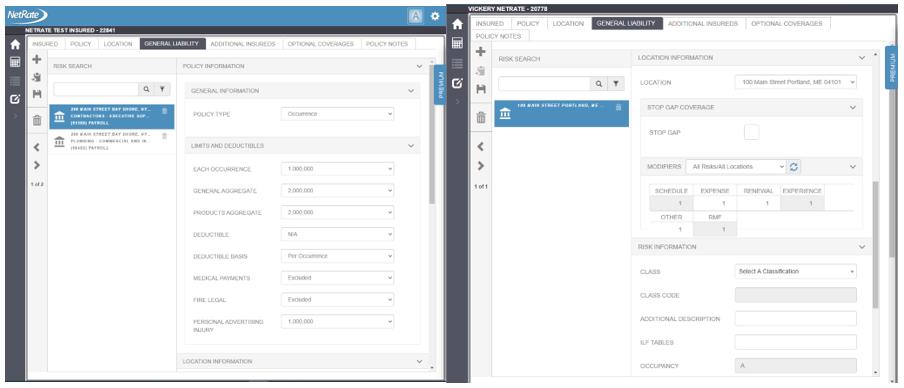
Location Information
-
Location: Select the Location from the drop-down list.
-
If a location is missing, the user will need to go back to the Location tab to add any missing locations.
-
-
Stop-Gap Coverage:
-
Check the Stop-Gap box, if that coverage is applicable.
-
-
Modifiers:
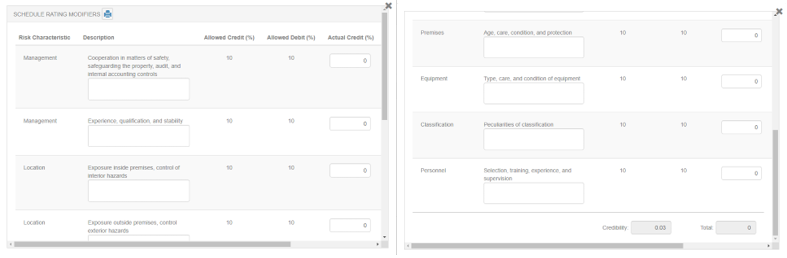
-
Schedule: Click the modification box to display the Schedule Rating Modifiers window.
-
Expense: Click the box and enter factor.
-
Renewal: Click the box and enter factor.
-
Experience: Click the box to enter information for calculating the experience modification factor.
-
Check "Apply Experience Rating," if applicable.
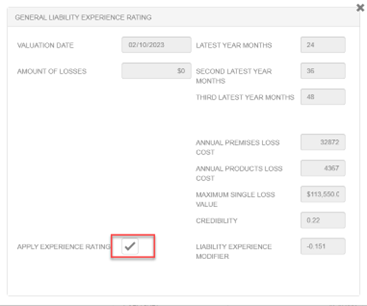
-
-
Other: Click the box and enter factor.
-
RMF: Click the box and the factors are multiplied to determine the Rate Modification Factor.
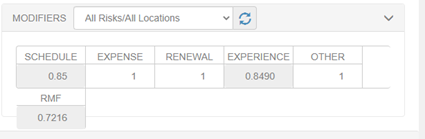
-
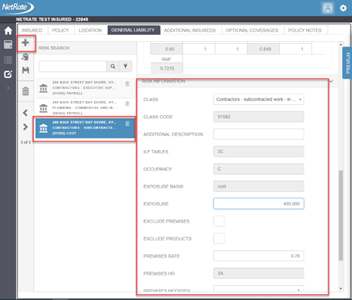
Risk Information
-
Class: Click the down arrow to search for the classification code by name and number; select the class.
-
Class Code: Populates based on the classification selected.
-
Additional Description: Free-form description field.
-
ILF Tables: Identifies the increase-limits tables that will be used in rating.
-
Occupancy: Identifies what the occupancy will be on the risk.
-
Exposure Basis: Identifies the type of exposure bases used in rating.
-
Exposure: Enter the exposure value, based on the exposure type.
-
Premises Modifier: Allows the user to enter a factor; it will be multiplied in the rates, if applicable.
-
Click the
icon to save the liability class code before leaving the screen; any additional class codes can be added to the coverage by using the or icons.
Additional Insureds
All additional insured form types and form code are entered on this tab. A premium charge can be made for each additional insured.
-
Line of Business: Select the line of business to which the additional insured should apply.
-
Additional Insured Type: Select the type of additional insured needed.
-
Based on the type selected, the fields will change for the information needed.
-
-
Modifier: Enter the modifier that would be used if a Premium is applicable.
-
Premium Included: If the premium for the additional insured is included in the coverage premium, check this box.
-
Premium: Enter the applicable premium to be charged for the Additional insured.

Optional Coverages
This tab is used for custom coverages; for example Hired Auto and Non-Owned Auto Liability, or Employee Benefits Liability. These coverages are typically customized on a client-by-client basis.
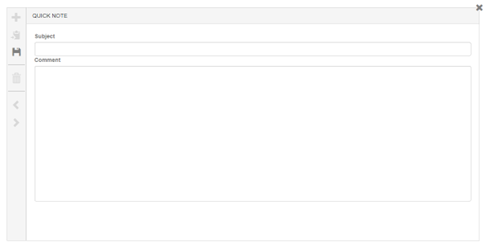
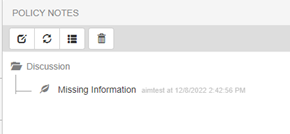
Policy Notes (If Applicable)
The note is captured in XML format.
-
• Double-click the word "Discussion" to open a text box.
-
Enter a subject and a comment in the box.
-
Click the "Save" icon to save and close the policy note.
Rating Coverage(s)
When all the coverages and other data have been entered, it is time to rate your quote.
-
Click the
 (rating icon) to begin the rating process. The Premium tab title will flash while calculating.
 -
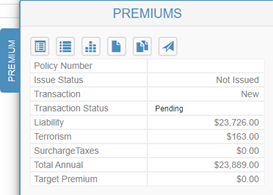
Click the Premium tab on the right side of the window to display the Premium.
-
Premium by coverage party, TRIA and any taxes will display in the Premiums box.
Icons on the Premiums Window
 — Worksheet
 — Condensed worksheet
 — Target premium
 — Issue (replaces the Target Premium when the transaction status changes to Accepted)
 — XML export
 — Life cycle XML export
 — Return to AIM
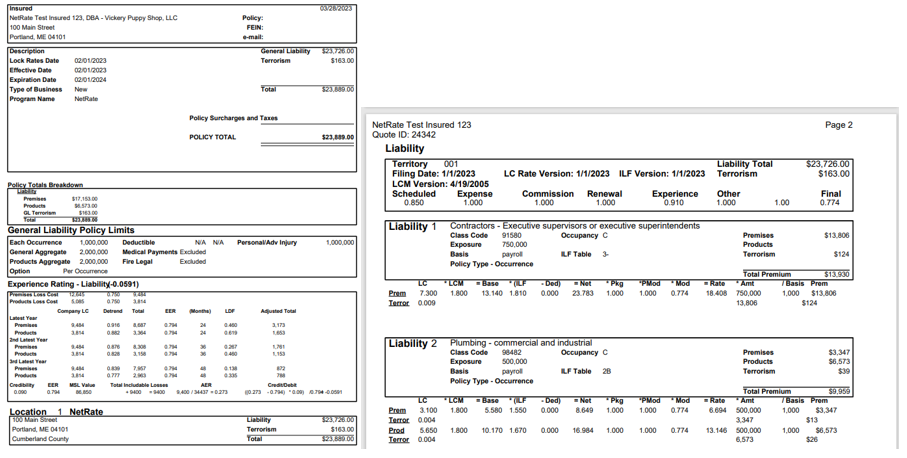
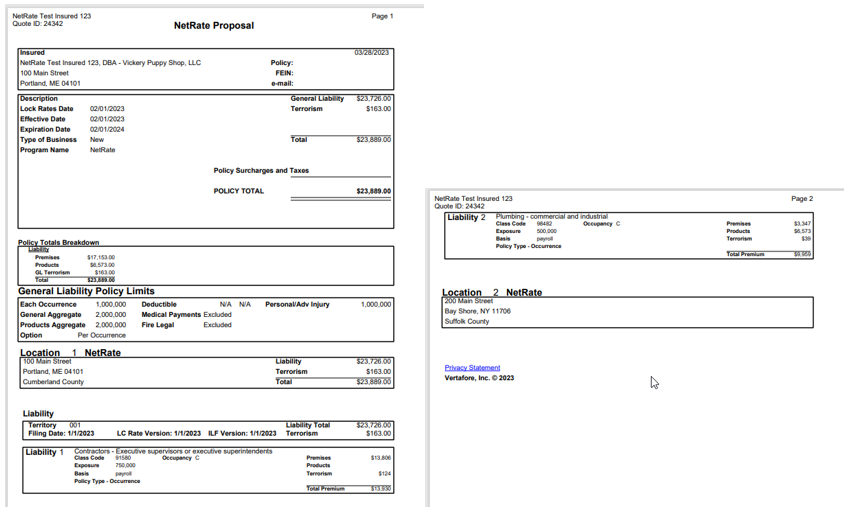
Worksheet
-
Clicking the Worksheet icon will display the NetRate Worksheet for the policy, with complete rating algorithms.
-
The template is not customized unless there are deviations to the formulas.
-
A user can download or print the worksheets, if applicable.
-
The worksheet will be saved in AIM for each the quote in NetRate.
Condensed Worksheet
-
This is a high-level worksheet that does not include the coverage calculations.
-
AIM will transfer this worksheet over with each quote returned to AIM. Documents will be saved in the Attachment folder, unless ImageRight integration has been switched on.
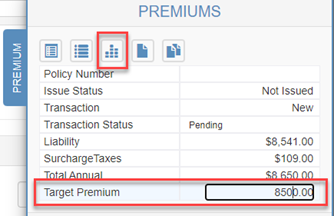
Target Premium
-
To obtain a target premium, enter the desired premium in the Target Premium field on the Premium flyout, then click the Target Premium icon at the top of the Premium flyout.
-
The factor used to obtain the target premium will be displayed as the Policy Target Mod at the upper left corner of the worksheet.
-
Premiums will be updated in NetRate to match the worksheet and equal Target Premium.
XML Export
-
All rows for rating display in the XML export.
-
A file is created for the currently selected transaction that the user can save or open.
Lifecycle XML Export
-
All rows for rating display in the XML export.
-
A file is created for ALL transactions in the policy history that the user can save or open.
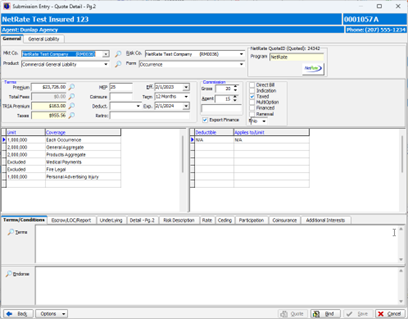
Return to AIM
-
When rating is complete, the user will click the Return to AIM icon to transfer the information back to the Units At Risk (UAR) screens, as well as to the Quote Detail window.
-
Not all fields in NetRate may be transferred back, since AIM may not have fields available to populate the data.
-
-
The user will be prompted to provide a NetRate user ID and password.
-
All Premiums, taxes and fees are returned to the AIM Quote Detail window.
-
Limits of liability are added to the Quote Detail grid.
-
-
The fields on the UAR screens will not be editable, which means that no changes can be made in AIM. Users will need to return to NetRate to make any quote changes.
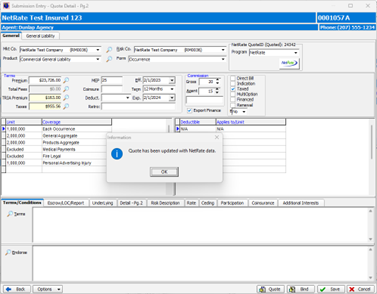
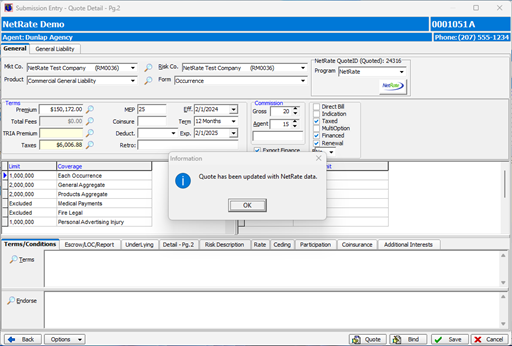
When the quote is complete and the information is returned to AIM from NetRate, the following information is updated.
-
The following message will appear: "Quote has been updated with NetRate data."
-
• Click OK off message.
-
The NetRate Quote ID will appear in the NetRate QuoteID box.
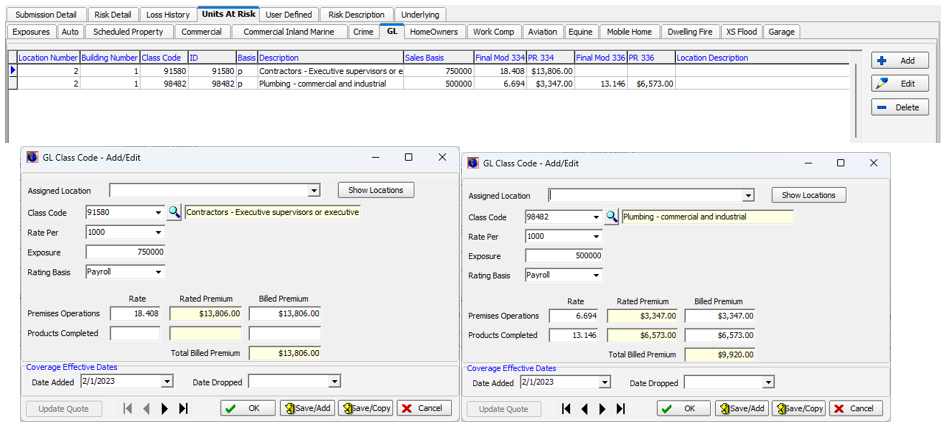
General Liability
For General Liability coverage (Commercial General Liability), the following UAR screens are updated.
UAR Screen — General Liability
-
For each class code entered in NetRate, a row is added to the GL tab in AIM.
-
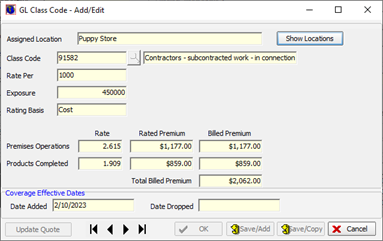
On the GL Class Code screen, all the information is populated with the applicable rate, exposure and premium.
During the binding process, the user must click the Bind button on the Quote Detail window in AIM. This will cause the program to automatically return to NetRate to complete the binding process. When the user returns to AIM, the UAR screens will be updated with the information from the selected Quote during binding.
-
Open AIM.
-
Find the Insured and the Submission.
-
Select the applicable quote on the Version table to bind, and the click the "Bind" button.
-
Enter the policy number when prompted in AIM.
-
The "NetRate" button in the Quote Detail window will remain locked down during the binding process.
-
Click the "Bind" button on the Quote Detail window, when ready.
-
Users will receive a message telling them that AIM is communicating with NetRate.

-
NetRate will open to the Insured’s quote.
-
A new quote ID will be created for the binding transaction.
-
The user will not see the new quote transaction in NetRate in the transaction history list.
-
-
The Policy Number entered in AIM will populate the policy number field in NetRate.
-
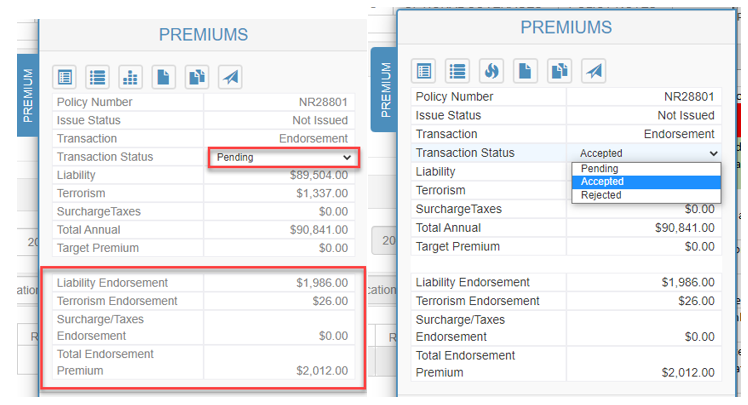
Click the "Premiums" tab on the right side of the window to open it.
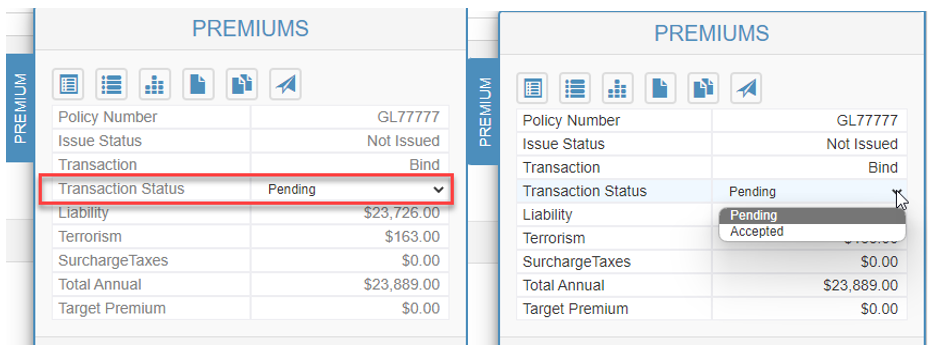
-
Click the "Transaction Status" drop-down list and select "Accepted."
-
The transaction status will change to "Accepted."
-
The target premium icon will change to a fire
icon, indicating the quote is ready to be issued. -
Click the
(Issue icon). -
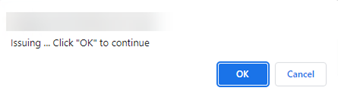
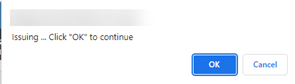
A confirmation message will be displayed. Click "OK" to continue with issuing the quote.
-
Click the
(Return to AIM) icon to be taken back to the Quote Detail window.-
If the "Return to AIM" icon is clicked before you click "Issue," the user will see the following message: “Please accept and issue in NetRate before importing into AIM.” The user must then start the binding process again and be sure to click the Issue icon button after accepting the quote.

-
You may close the open NetRate window.
-
-
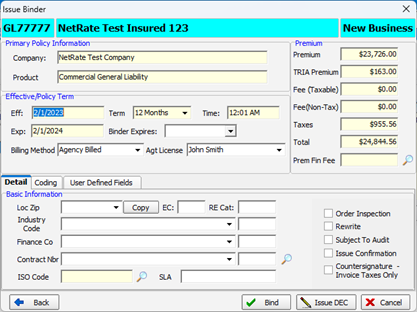
You will return to AIM on the Issue Binder window.
-
All UAR information will be updated to the selected quote that was bound.
-
Once the binder is processed, the fields on the UAR screen are not editable; therefore, changes can only be made through NetRate during endorsement processing.
-
-
Verify the premium, the billing method and the finance company, if applicable.
-
Click the "Bind" button.
-
AIM’s Binder document will then generate. Users can update the document, email it, save it, or discard the document.
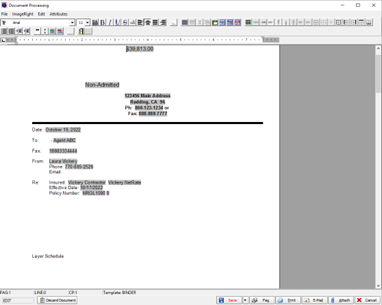
-
For this example, click "Save" and then "Close."
-
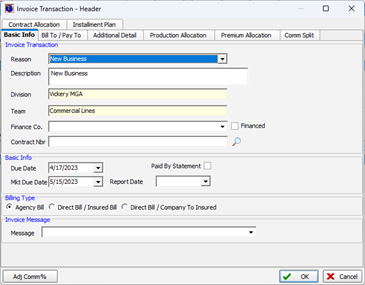
The Invoice Transaction window will be displayed. Verify the resulting information and then click "OK."
-
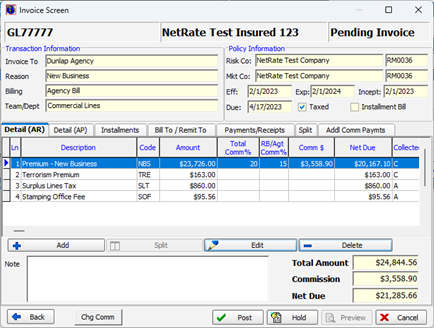
The Invoice Screen will be displayed. Verify the resulting information and then click "Post."
-
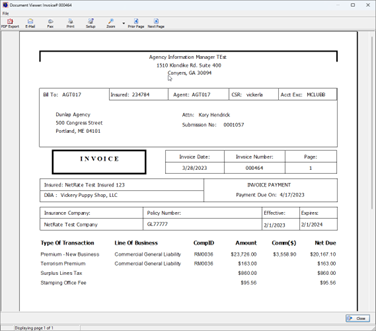
The Invoice will be displayed.
-
Save the invoice to the desired location, if applicable, and then close the window.
-
The invoice will be saved in AIM.
-
-
The policy status in AIM will then be changed to "Binder Issued."
-
Once the policy is received, change the policy to a Policy In Force status.
-
From the Policy menu, select Policy Mail Out, select the date, and click "OK." Users will have the option to attach a cover letter from AIM; select the desired option.
-
The policy status will then be changed from "Binder Issued" to "Policy In Force."
-
All endorsement changes should start from AIM. Changes to Units At Risk (UAR) data will be made in NetRate and then transferred to AIM.
Additional Premium Endorsement
-
From the Policy Menu in AIM, select "Endorsement."
-
Communicating with the NetRate window will show the connecting process. The user is then taken into NetRate to begin the endorsement process.

-
When in NetRate—with the appropriate policy on display—click the "Policy" tab.
-
Click the
to start an endorsement. A new Transaction history box will open that shows the Endorsement and its number.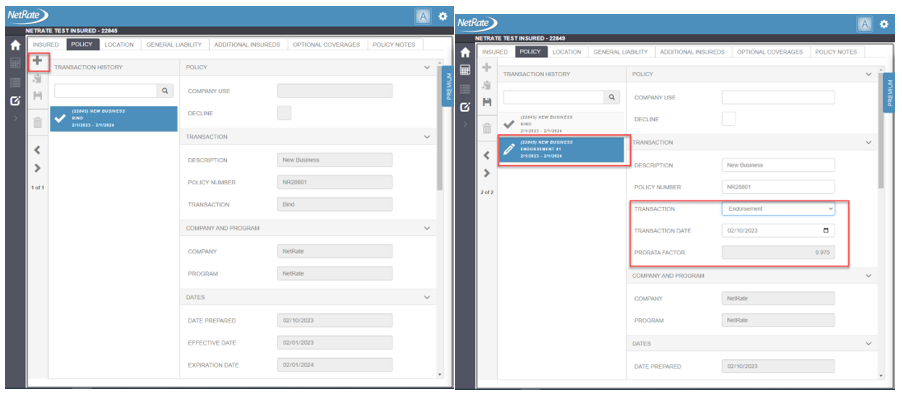
-
Change the entry in the "Transaction Date" field to equal the endorsement change date.
-
When you leave the field, the "Prorata Factor" field will update to include the rating factor.
-
Click the desired tab (e.g., "General Liability") and make the appropriate change.
-
When adding a coverage or class location, you must use the
on each tab.
-
-
For this example, to add a new class code to Location 1:
-
Click the
and select the location where the new class will be added.
-
-
Scroll to find the Class information.
-
Click in the "Class" field and select the code "91582 – Contractors – subcontracted work."
-
Enter the Exposure
-
Once all the changes are complete, click the
(Calculate Premium) icon.-
NetRate will rate the change(s) that were made.
-
-
Click on the "Premium" tab on the right-hand side of window.
-
Click on the worksheet icon to generate rating worksheets.
-
Save, download or print, if desired.
-
The rating worksheet will be automatically sent to AIM.
-
-
Close the rating worksheets when finished.
-
When finished with rating, click the "Transaction Status" drop-down menu and select "Accepted." Be sure to wait for NetRate to change the Target Premium icon to the
(Issue icon) . -
Click "Issue." A confirmation message will be displayed.
-
Click "OK" to complete the issuance in NetRate.

-
• Click the
(Return to AIM icon) to return to the endorsement window in AIM.-
You can now close all the NetRate windows.
-
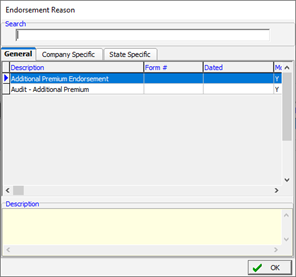
-
Next, AIM’s Endorsement Reason window will appear, with options applicable based on changes made in NetRate. For this example, the options being returned are "Additional Premium Endorsement" and "Audit – Additional Premium."
-
Select "Additional Premium Endorsement" and click "OK."
-
-
The Policy Change Endorsement window will open.
-
The Endorsement Premium will populate, based on changes made in NetRate.
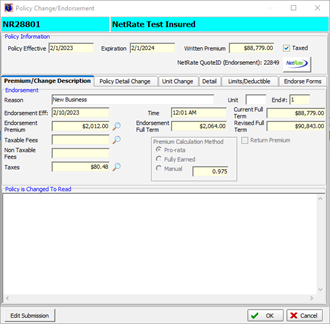
-
The "Units At Risk" windows will be updated with changed information.
-
Click "Edit Submission" on the endorsement window.
-
Select the "GL" tab for the coverage in this example.
-
You will see that the new class [91582] is displayed in the grid.
-
At this point no fields are editable, so only the View button is available to select.
-

-
-
The GL Class Code window will open to display information pushed from NetRate to AIM.
-
Click "Cancel" to exit the GL Class Code window and return to the Endorsement window.
-
Click "OK" to complete the policy change.
-
The Endorsement template will then be displayed.
-
Make any changes that are applicable and the email or save the template.
-
-
Click "Yes" on message to invoice endorsement.
-
Review and Post the invoice.
-
The invoice document will be displayed. Save the invoice as needed and close the window.
Non-Premium Endorsement
For this example, update the named insured that result in a non-premium-bearing endorsement.
NOTE: All non-premium-bearing and premium-bearing changes should be done starting in AIM.
-
From the Policy menu, select "Endorsement."
-
Communicating with the NetRate window will show the connecting process. The user is then taken into NetRate to begin the endorsement process.

-
When in NetRate, where the appropriate policy is displayed, click the "Policy" tab.
-
Click the
to begin an endorsement. A new Transaction history box will open that indicates the Endorsement and the number.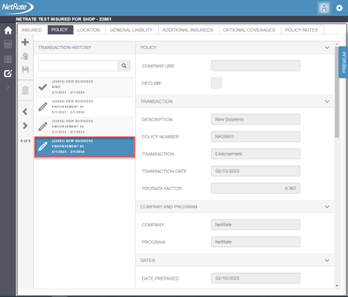
-
Change the entry in the "Transaction Date" field to be the same as the endorsement change date.
-
When you leave this field, the "Prorata Factor" field will be updated with the rating factor.
-
Make the change(s) that are needed.
-
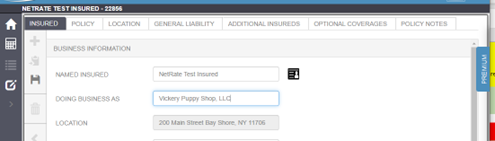
For this example, click the "Insured" tab and add in "LLC" to the "Doing Business As" field.
-
-
Click the "Premium" tab on the right-hand side of the window.
-
No rating is necessary. Click the "Transaction Status" drop-down menu and select "Accepted." Be sure to wait for NetRate to change the Target Premium icon to the
(Issue icon ) . -
Click "Issue." A confirmation message will be displayed.
-
Click "OK" to complete the issuance in NetRate.

-
• Click
(Return to AIM icon) to return to the endorsement window in AIM.-
At this point, you can close all the NetRate windows.
-
-
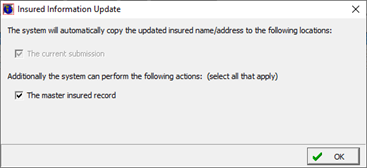
An Insured Information Update will appear, if you are changing the named insured.
-
Click "OK" to change the current submission and the master record.
-
If only the submission is to be changed, remove the check mark in the Master Insured record box.
-
-
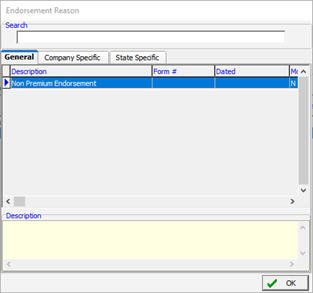
AIM’s Endorsement Reason window will next appear, with options applicable based on changes made in NetRate. For this example, the options returned are "Non Premium Endorsement."
-
Select "Non Premium Endorsement" and click "OK."
-
-
The Policy Change Endorsement window will open.
-
Update the "Reason" for the change and click "OK."
-
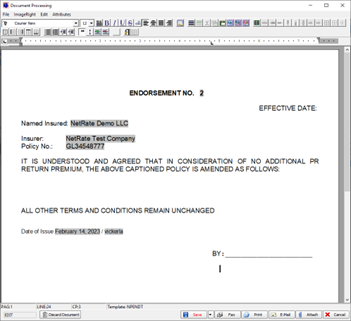
The Endorsement template will be displayed.
-
Make any necessary changes. Save or email the template.
-
Close the window.
Return Premium Endorsement
-
From the Policy menu, select "Endorsement."
-
Communicating with the NetRate window will show the connecting process. The user is then taken into NetRate to begin the endorsement.

-
When in NetRate, where the appropriate policy is displayed, click the "Policy" tab.
-
Click the
to begin an endorsement. A new Transaction History box will open that indicates the Endorsement and the number.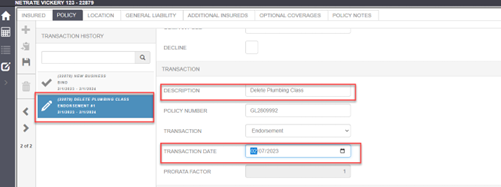
-
Update the "Description" field to describe the change and select the endorsement's effective date.
-
When you change the transaction date, the Prorate Factor field will be updated.
-
Navigate to the desired tab to make all necessary changes.
-
For this example, delete a General Liability class code.
-
-
Click the "General Liability" tab.
-
In the Risk Search column, select the location where the class code resides.
-
Click the
(trash can icon) to delete the class code from the policy.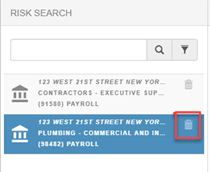
-
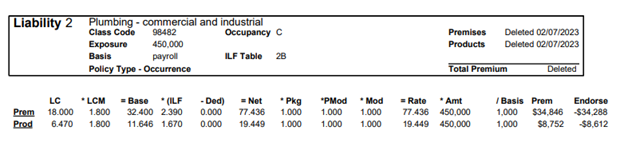
The class box will change to show an X, which indicates it has been deleted.
-
Click the
(Rate icon) to rate the change. -
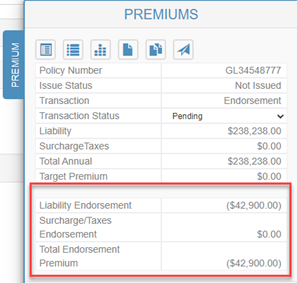
Click the "Premium" tab on the right-hand side of the window to view the endorsement change premium.
-
Click the worksheet icon to view the rating change.
-
Download or Print the full worksheet to the desired location, if needed.
-
A copy will be saved in AIM on the Attachment tab.
-
-
Click the "Transaction Status" drop-down menu and select "Accepted." Be sure to wait for NetRate to change the Target Premium icon to the
(Issue icon).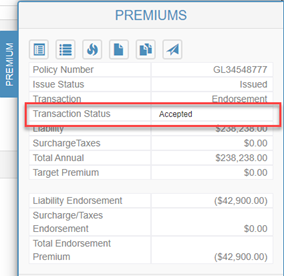
-
Click the "Issue" button. A confirmation message will be displayed.
-
Click "OK" to complete the issuance in NetRate.
-
Click
(Return to AIM icon) to return to AIM.-
You may now close all NetRate windows.
-
-
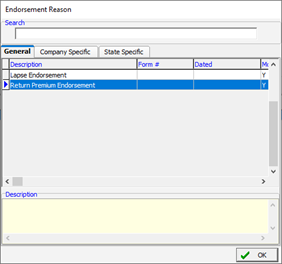
The Endorsement Reason window will be displayed, showing the available endorsement type based on changes made in NetRate.
-
For this example, select the "Return Premium Endorsement" and click "OK."
-
-
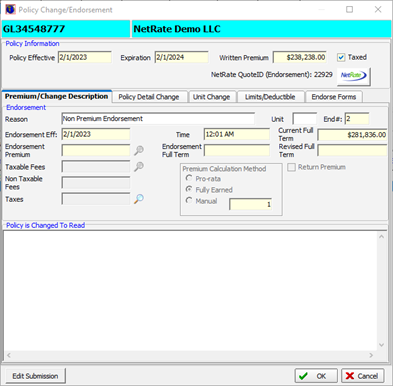
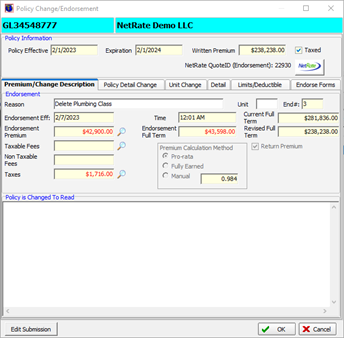
The Policy Change / Endorsement window will open. The Premium from NetRate will populate all fields.
-
The Endorsement Premium field on the Premium / Change Description window are locked down. Users will need to go back to NetRate to make any changes to the premium.
-
Click the NetRate button on the window to return and make any adjustments.
-
-
If Fees are applicable, click on the magnifying glass and add fees, as needed.
-
The Endorsement "Reason" field in AIM will be updated with the description entered in the "Description" field in NetRate.
-
The Endorsement Premium field will show the Endorsement Premium plus the TRIA premium—if applicable—for this change.
-
-
Click the "Edit Submission" button to verify that the change was made.
-
Using the Edit Submission button here is optional.
-
-
Any row where the class code has been deleted will show as "grayed out."

-
Click "OK" in the endorsement window.
-
Invoice the endorsement.
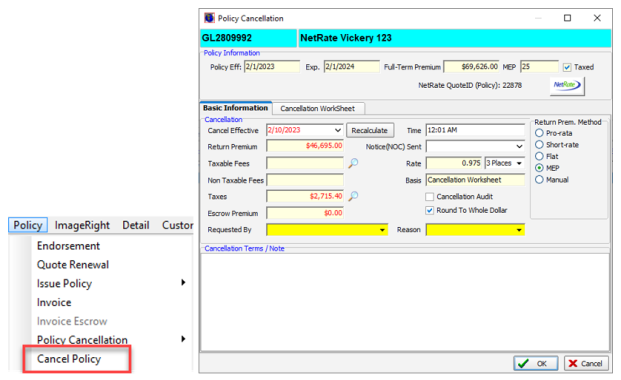
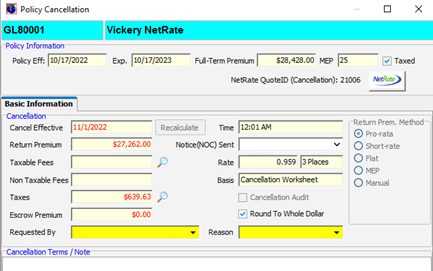
As with an endorsement, the cancellation process must begin in AIM. If a Minimum Earned Premium (MEP) or short-rate factor applies, NetRate must be built out, since ratings are all derived from NetRate. An AIM-calculated Return Premium will not be used.
NOTE: When the cancellation window appears in AIM, the premium shown includes the MEP. The user is not allowed to change the Return Prem. Method from this screen with system parameter 18 turned on.
-
From the Policy menu in AIM, select "Cancel Policy."
-
The Policy Cancellation window will open with the AIM cancellation premium calculated.
-
Users must still go through NetRate to ensure premiums are correct and to keep both systems in sync.
-
-
Before making any changes on the window, click "OK" or the "NetRate" button in the top right-hand corner of the window to access NetRate.
-
Within NetRate, click the "Policy" tab.
-
Click the
to start a new transaction on the policy. -
Select "Cancellation" from the Transaction drop-down list.
-
Enter the cancellation date in the "Transaction Date" field.
-
Check "Short Rate" if this is a short-rate cancellation.
-
-
Enter the MEP, if applicable.
-
For example, 25 percent would be entered as .25 in NetRate
-
-
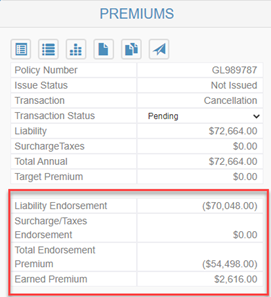
Click the
(Rate icon) to rate the cancellation.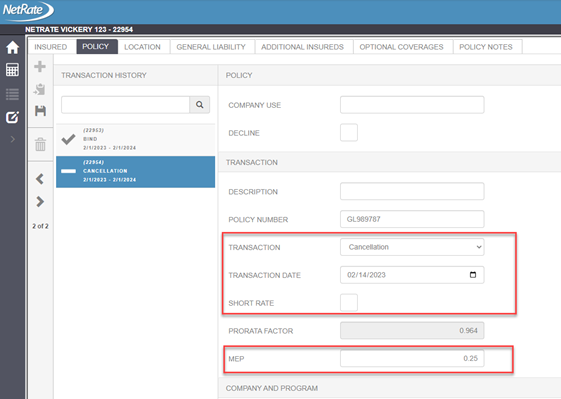
-
Open the "Premium" tab on the right-hand side of the window.
-
The Cancellation premium will be displayed.
-
Reminder: Taxes are not handled in NetRate. All taxes will be calculated when returned to AIM.
-
-
Click the down arrow in the Transaction Status field and select "Accepted."
-
When Accepted is displayed in the "Transaction History," the Target Premium icon will change to
(Issue icon). Click the icon to change the Issue Status from "Not Issued" to "Issued." -
A message will appear to confirm the issuance. Click "OK."
-
Click
(Return to AIM icon) to return the cancellation premium to AIM. -
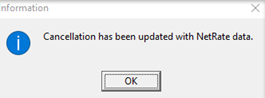
An informational message will appear that reads, "Cancellation has been updated with NetRate data." Click "OK."
-
The Cancellation premium is then updated in the Return Premium column.
-
The selection of a short-rate cancellation or a MEP cancellation must be selected within NetRate, since the Return Premium method is unavailable in AIM.
-
To make changes to the cancellation, click the "NetRate" button to be returned to NetRate.
-
-
Taxes are generated, if applicable, when in AIM.
-
Select the required "Requested By" and "Reason" fields.
-
Click "OK" to save your changes.
-
A Cancellation document template will be displayed. Save this in a file or in ImageRight.
-
Close the Document Processing window.
-
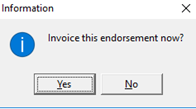
A window will appear to ask if the user wishes to invoice the endorsement. Click "Yes."
-
The "Invoice Transaction – Header" window will be displayed.
-
Update any information, if applicable.
-
-
Click "OK."
-
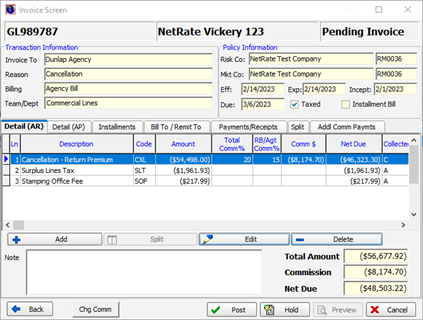
The Invoice screen will be displayed. Verify that the premiums being returned will match the Policy Cancellation amount.
-
Click "Post" to post the invoice to accounting for billing purposes.
-
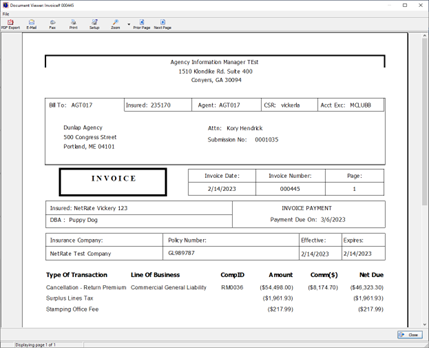
An Invoice is created. Save this invoice to AIM or to ImageRight and close the window, if applicable.
-
The policy status will be changed to "Policy Cancelled" in AIM.
As with cancellation, the reinstatement process must begin in AIM. The user must use NetRate to calculate the reinstatement premium.
-
Open the file you wish to reinstate.
-
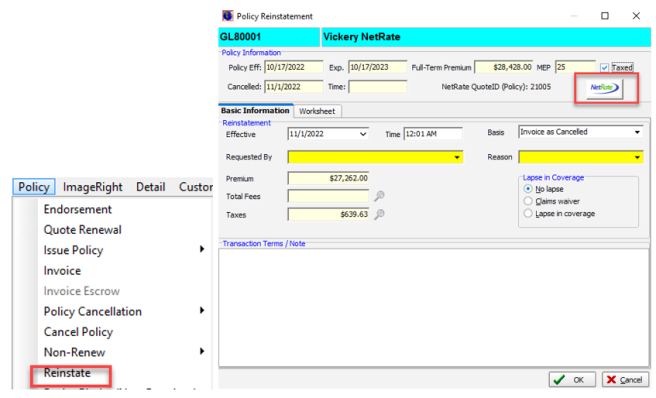
From the Policy menu, select "Reinstate."
-
The Policy Reinstatement window will be displayed. Do not make any changes in this window.
-
Click the "NetRate" button in the top right-hand corner of the window.
-
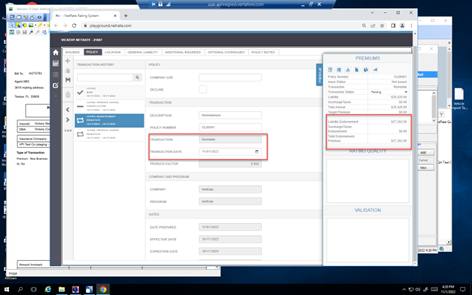
When in NetRate, click the "Policy" tab.
-
Click the
to start a new transaction on the policy.-
The user must click the most recent transaction on the list to activate the plus sign. In this example, it is the cancellation transaction.
-
-
Click the reinstatement transaction.
-
Select "Reinstate" from the Transaction drop-down list.
-
Enter the reinstatement date in the "Transaction Date" field, if different from the cancellation date.
-
Click the
(Rate icon) to rate the reinstatement. -
Click the "Premium" tab to open the Premiums window.
-
Click the down arrow on the "Transaction Status" field and select "Accepted."
-
When Accepted shows up in "Transaction History," the ‘Target Premium’ icon will change to
(Issue icon) . Click the icon to change the Issue Status from "Not Issued" to "Issued." -
A message will appear that confirms the issuance. Click "OK."
-
Click
(Return to AIM icon) to return the cancellation premium to AIM. -
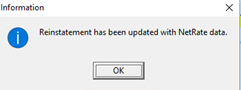
An informational message will appear to notify the user, reading: "Reinstatement has been updated with NetRate data." Click "OK."
-
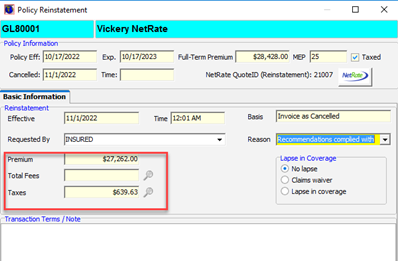
The Premium from NetRate will update the "Premium" field.
-
Taxes will be generated from AIM, based on NetRate-transferred data in the "Premium" field .
-
Select the required "Requested By" and "Reason" fields.
-
Click "OK" to process the reinstatement in AIM.
-
The "Reinstate" template will be displayed. Discard the document, save it in AIM or save it in ImageRight.

-
Close the window when finished.
-
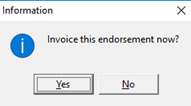
A message window will appear that reads, "Invoice this endorsement now?"
-
Click "Yes" to invoice the reinstatement.
-
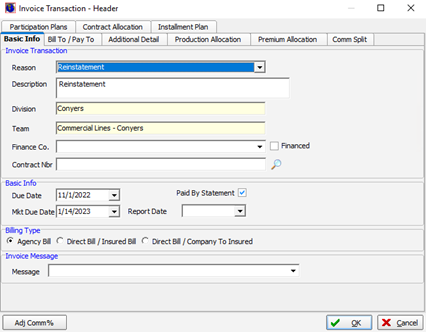
The Invoice Transaction Header window will be displayed for the reinstatement.
-
Make any needed changes, where applicable.
-
-
Click "OK" when ready.
-
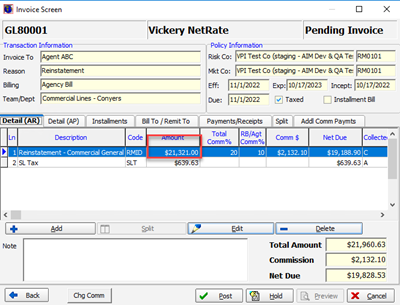
The Invoice screen will be displayed.
-
Verify that the reinstatement amount matches the premium amount in NetRate.
-
Click the "Post" button to send to Accounting.
-
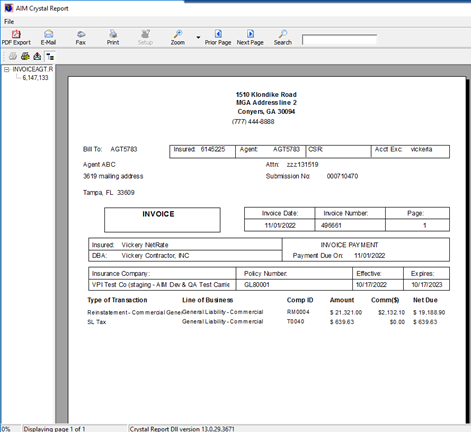
The Invoice is now created. Save it to AIM or ImageRight and close the window, if applicable.
-
Click "Close" when finished.
-
The policy status will be changed back to "Policy In Force" in AIM.
Renewals can be started in Renewal Manger or from the policy file. See below to review each type of renewal process.
Renewal Manager
-
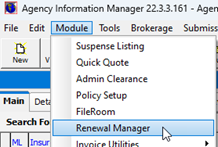
From the Module menu, select "Renewal Manager."
-
Select any filtering from the "Policy Information" pane.
-
Select the "Policy Expiring Between" dates. For this example, we are using 2/1/2024 to 2/26/2024.
-
Click the "Refresh Query" button to obtain a list of policies with the selected criteria.

-
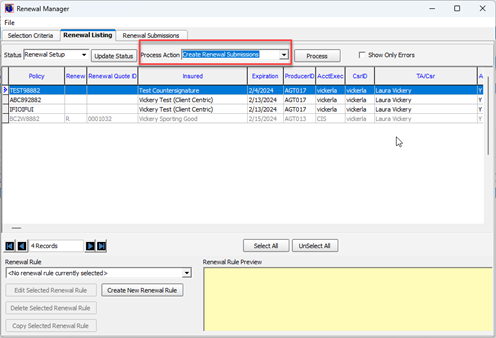
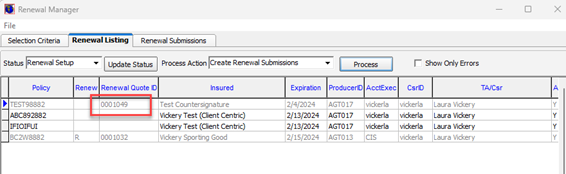
Click on the "Renewal Listing" tab to see a full list or policies that will expire with the date range selected.
-
Select the policy(s) you wish to set up in the "Renewal Setup" policy.
-
From the "Process Action" field, click the down arrow and select "Create Renewal Submissions."
-
Click the "Process" button to start creating the renewal setup submission numbers.
-
The system will complete all selected policies.
-
If any errors are returned, the Policy number will turn red and a message will be shown to the far right of the grid.
-
-
A confirmation message will appear that reads, "Create Renewal Submissions for the selected items?"
-
Click "Yes."
-
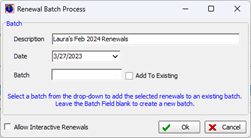
Enter a description of the renewals. For example, we have entered here Laura’s Feb 2024 Renewals.
-
Click "OK" to begin processing.
-
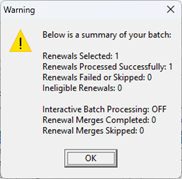
Once the process is completed, a summary message will appear to show how many renewals were successful and how many were skipped.
-
Write down the Renewal Quote ID, or export the renewal grid.
-
Close Renewal Manager.
Renewal Setup from the Policy Menu
Starting the renewal can be done on a policy-by-policy basis, as long as the policy status is "Policy Inforce Status."
-
From the main tab, retrieve the policy intended to be the active policy.
-
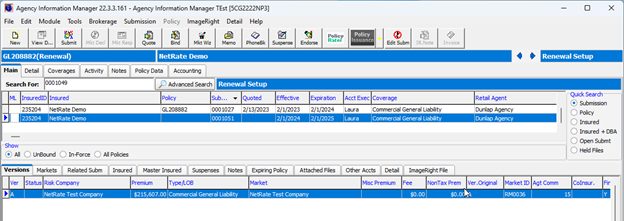
From the "Policy" menu, select the "Quote Renewal" option.
-
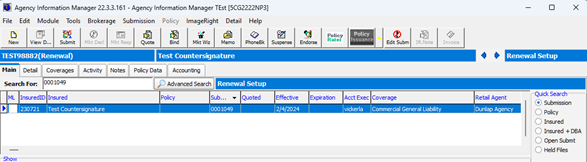
The "Submission Entry" window will appear for the new policy term. The "Type" field will be updated to read "Renewal."
-
Click on "Save" to generate the renewal term in the "Renewal Setup" status.
-
A message that reads, "Send renewal letter on this account?" will appear. Click either "Yes" or "No" to generate the template, or not.
-
This submission will now be ready to rate in NetRate.
Renewal Rating in NetRate
Once the renewal term has been created from Renewal Manager—or from the Policy menu—the steps to rating the renewal term are the same for NetRate.
All information from the expiring term is copied over to the renewal term.
-
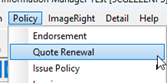
Click the "Quote" button on the "Renewal Setup" term submission.
-
The expiring premium, plus limits commissions and taxes, are all inserted into the renewal term "Quote Detail" window.
-
Users should not make any changes in this window or on the "Units At Risk" level. All changes should be performed in NetRate.
-
-
Click the "NetRate" button in the top right-hand corner of the screen.
-
NetRate will open with a new NetRate quote ID.
-
Click on the "Policy" tab to ensure the transaction type is "Renewal."
-
The new policy term dates will appear.
-
Users should update any information for the renewal term. For example, this would include updated exposures or adding / removing class codes.
-
Once all changes have been made, click the "Calculate" button to rate the renewal.
-
Click on the Premium flyout tab to see the resulting calculated premium.

-
When ready, click
(Return to AIM icon) . -
The user will then be returned to the AIM "Quote Detail" window. A message will appear that reads, "Quote has been updated with NetRate data." Click "OK" to acknowledge the message.
-
The NetRate quote ID will be displayed in the NetRate box.
-
Verify the information and click "Quote" to generate the AIM quote template.
-
The binding process is the same as with "New Business," shown above.