Workflow: AMS360 and WorkSmart New Integration
Use the following steps to send forms from AMS360 to WorkSmart and look up an AMS360 customer from WorkSmart.
|
To send forms from AMS360 to WorkSmart the client must exist in WorkSmart. To accommodate this requirement, a one time customer synchronization occurs when you set up the new integration. After that, when you enter a customer, AMS360 automatically shares the customer with WorkSmart. |
Sending Forms from AMS360 to WorkSmart
- In AMS360 with a customer open and a policy selected, click eForms Manager in the sidebar menu under the Actions section. Create any type of form or application. (If you have already created forms you want to send to WorkSmart you can skip this step.)
- Click the WorkSmart button on the toolbar.
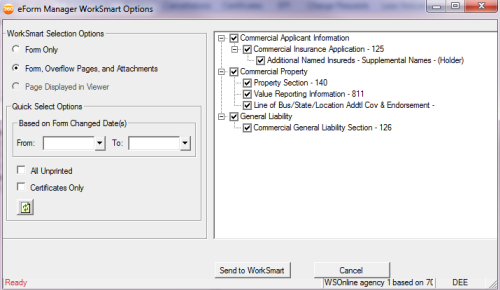
- On the eForms Manager WorkSmart Options dialog box choose from the options available. This dialog box may look familiar as it is the same one used for printing forms and documents.
- When you are finished making your selections, click Send to WorkSmart.
As the forms are being sent, you will see messages in the status bar in the lower left of the window. If you have an Activity checkpoint set for eForms, you will see an Activity dialog box that lists the forms being sent to WorkSmart.
When the files are transferred, the WorkSmart Desktop populates with the documents sent.
|
The AMS360 and WorkSmart integration also includes an embedded viewer that allows you to see a form sent from AMS360 by clicking on the form while in WorkSmart. The embedded view is available only for Online agencies with Vertafore Single Sign-On (VSSO). |
Working with the Customer and Policy in WorkSmart
In WorkSmart you can take advantage of the many features, such as workflows, tasks to-do lists, annotating documents, and filing forms and documents.
Scenario 1:While working in WorkSmart you may have received a renewal response from the insured. You need to update the application in AMS360 and create an eForm. You have the customer and policy open in WorkSmart andAMS360open in the background.
- In WorkSmart, from the file locate the policy term folder > submission folder where the application renewal packet is filed. Select the submission folder.
- Click the AMS360 button from the toolbar.
The declaration page opens in AMS360 for the customer and policy selected in WorkSmart. - You can verify the current policy data on the Dec page, open the policy to make the change, followed by creating the form in eForms Manager.
Scenario 2: You are working in WorkSmart and have just received a Loss Policy Release cancellation from the insured. You file the form for the customer in the policy folder in the file tree. Now you need to verify the policy term in AMS360.
With the Customer open and selected in WorkSmart, (and AMS360 open in the background) click the AMS360 button on the toolbar.
The customer information opens in AMS360 to the customer record selected in WorkSmart. Here you can see all policies with effective and expiration dates as well as the policy status and more.
Creating an AMS360 Activity while in WorkSmart
When you are working in WorkSmart, you can create an AMS360 activity without leaving the WorkSmart Desktop. To create an activity, do the following:
- On the WorkSmart Desktop toolbar, click the Create AMS360 Activity button.
- In the Activity window, enter the information for the Activity, and then click Save.
The activity appears in the customer’s Activity view in AMS360.
|
You can only create an Activity on the dialog box. You can't create a suspense. |