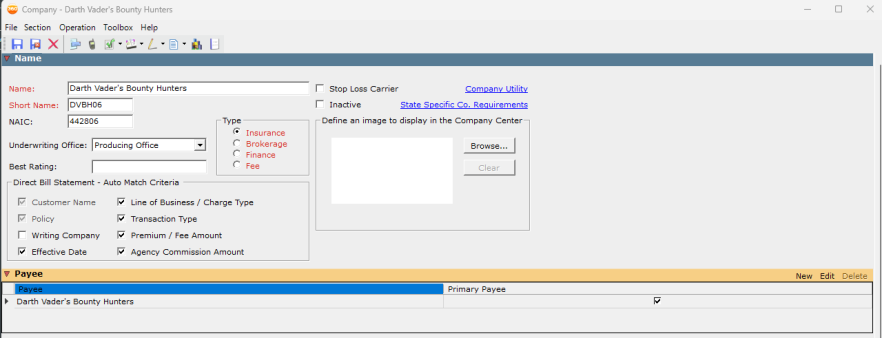
Add Payee Primary: Company, Broker and Vendor
Users may now designate a newly created payee or an already created payee as the "Primary" payee.
These instructions are the same for the Broker, Company, and Vendor sections within AMS360.
-
Navigate to the Broker Center and select the Broker you wish to edit, or else click on "New Broker."
-
If you are editing a Broker:
-
Once you click on your Broker, click on "Broker Overview" from the left-hand panel under "Views."
-
Edit Broker
-
Under General is the Payee section.
-
-
-
-
If you are creating a new Broker:
-
Click on the "New Broker" button, located on the main Broker page; a winform will open.
-
Under General is the Payee section.
-
-
-
-
Navigate to the Customer Center and select the Customer you wish to edit, or else click on "New Customer."
-
If you are editing a Customer:
-
Once you click on your Customer, click on "Customer Overview" from the left-hand panel under "Views."
-
Edit Customer
-
Under General is the Payee section.
-
-
-
-
If you are creating a new Customer:
-
Click on the "New Customer" button on the main Customer page; a winform will open.
-
Under General is the Payee section.
-
-
-
-
Navigate to the Vendor Center and select the Vendor you wish to edit, or else click on "New Vendor."
-
If you are editing a Vendor:
-
Once you click on your Vendor, click on "Vendor Overview" from the left-hand panel under "Views."
-
Edit Vendor
-
Under General is the Payee section.
-
-
-
-
If you are creating a new Vendor :
-
Click on the "New Vendor" button on the main Vendor page; a winform will open.
-
Under General is the Payee section.
-
-
-

These instructions are the same for the Broker, Company, and Vendor sections within AMS360.
-
In the Payee section:
-
Click on "New" to add a new Payee.

-
If creating a new Broker, Company or Vendor, you will be able to type in the Payee name and check the Primary Payee box to indicate this is the primary payee for the specific Broker, Company, or Vendor you are creating.
-
You can add additional payees to this list; however, there can only be one payee designated as the Primary Payee, whereas the other payees will appear in the drop-down box when creating a check, for example.
-
Once you have typed in the name of the Payee, click "Add" and you will see your newly created payee.

-
-
If you do not wish to create a payee during the time of setup, the system will create a default payee with the name of the Broker, Company or Vendor and then mark the Primary Payee box.
These instructions are the same for the Broker, Company and Vendor sections within AMS360.
-
The edit function can be used to uncheck or check the Primary Payee box and edit any manually added Payees.
-
In the Payee section:
-
Editing the designated Primary Payee:
-
Click on the Payee row you wish to edit and click "Edit":

-
You will be able to check and uncheck the Primary Payee box.
-
If this is the current Primary Payee, please ensure you edit this first before adding new payees, since you will need to click on the Primary Payee box to deselect it.


-
-
-
You will be able to edit the name of any manually created payees from this selection.
-
You will NOT be able to edit the default-created Payee, which contains the Broker, Company and Vendor as the name; however, you will be able to check or uncheck the Primary Payee box.

-
-
Once you have made your edits, click "Update" to see your changes.
-
-
These instructions are the same for the Broker, Company and Vendor sections within AMS360.
-
The delete functionality will only allow you to delete any manually added Payees. It will be grayed out on the default-created payee.
-
In the Payee section:
-
Deleting a manually created Payee:
-
Click on the Payee row you wish to delete and then click "Delete."
-
You will be able delete any manually created payees, even if the one you selected has been designated as the primary payee.

-
-
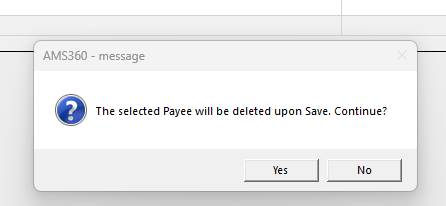
A pop-up validation message will appear that reads, "The selected payee will be deleted upon Save. Continue?" followed by "Yes" or "No" choices.

-
When "Yes" is clicked, the payee will be deleted.
-
When "No" is clicked, the payee will remain in the Payee section.
-
-
-