AMS360 2020 R1 Release Notes
We are pleased to release AMS360 2020 R1. With each release, we are improving and updating AMS360 to provide you with the best possible experience.
To print this topic in its entirety, in the upper-right corner of this Help page, click Expand all , and then click Print
 .
.
 System Requirements
Required
Minimum workstation requirements as shown in the AMS360 2019 R1 Configuration Guide (Doc ID:15470) on My Vertafore. You must be registered with My Vertafore and signed in to access this document.
Supported
Browser
- Microsoft Internet Explorer 11 (32-bit) with default settings
- Microsoft Edge
- Google Chrome
Operating Systems
- Microsoft Windows 7 (32-bit and 64-bit)
As Microsoft will discontinue support for Windows 7 as of January 2020, we will plan on discontinuing support for Windows 7 with the AMS360 20R2 release.
- Microsoft Windows 8.1 (32-bit and 64-bit)
- Microsoft Windows 10 (32-bit and 64-bit)
Microsoft Office
- Office 2016 (32-bit)
- Office 2019 (32- and 64-bit)
.Net
- .NET 4.7 (required)
For more information about AMS360 recommended and supported configurations, see the Supported Configurations Matrix (Doc ID: 12604) on My Vertafore. You must be registered with My Vertafore and signed in to access this document.
Supported Systems
Microsoft Office
- Office 365 (32-bit and 64-bit)
- We only support Microsoft Word, Excel, and Outlook locally.
Technical Requirements
XPS message
Microsoft has changed the way that they are giving customers the XPS viewer which is used for some functionality in eForms manager.
Depending on the build number of the OS that you have, you may need to install the new viewer. Click here for more details.
-
You will receive the following error message when the system is logging an activity using print functionality vs. fax or email.
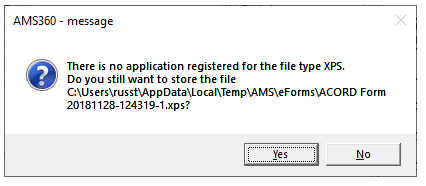
AMS360 Message
Feedback
We value your feedback to ensure we are working on what is most important to you. If you have an idea to improve the product, you can suggest and vote on product enhancement requests on Vertafore Ideas. On My Vertafore, click Submit Idea in the upper right corner of the page. We appreciate your input to help us provide you with the highest quality product.
For more information on using Ideas, please see the following documents. You must be registered with My Vertafore and signed in to access these documents.
• Ideas Overview (Doc ID: 13054)
• How to Submit Ideas (Doc ID: 13049)
• What are the statuses in Vertafore Ideas? (Doc ID: 13055)
What's New
|
Vertafore intends to stop supporting Windows 7 with the release of AMS360 20R2 as Microsoft stopped supporting it in January 2020. |
Admin Updates
Writing Company Address
Before
Addresses could only be added to parent companies.
Now
You can now add and update an address for a writing company that exists on any parent company. In addition, a pop up will allow you to select other parents with the same writing company to update the writing company address there as well.
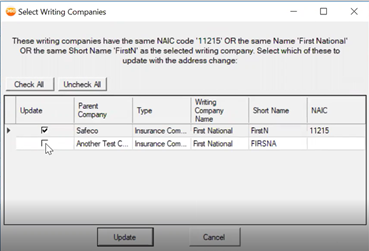
Change Address form
Writing Company Setup
- In the Company Center, select a writing company, click on Company Overview and then click on Edit Company.
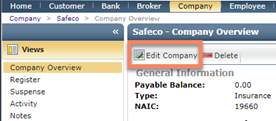
Company Overview: Edit Company
-
In the Company winform, scroll down to the Writing Company Setup section, then click on Edit. You’ll now see a section for address, fill in your information and then click on Update.
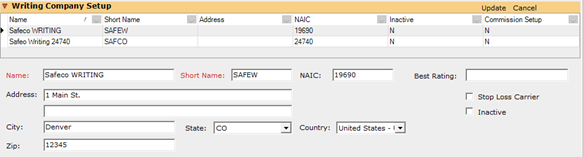
Writing Company Setup

Writing Company Address
Attach The Writing Company to Another Company
- In the Company Center, select a different company, click on Company Overview and then click on Edit Company. In the Company winform, scroll down to the Writing Company Setup section, then click on New. Fill in the required information and click on Add.

Company: Writing Company Setup
Attach the Writing Company to a Brokerage
- In the Company Center, select a brokerage, click on Company Overview and then click on Edit Company. In the Company winform, scroll down to the Writing Company Setup section, then click on New. For brokerages you can create a new Writing Company or select an existing Writing Company. Click on the Refresh button to fill in the existing company’s information. When finished, click on Add.
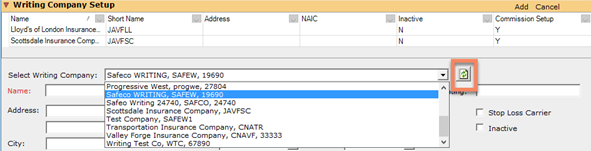
Brokerage: Writing Company Setup
-
You will notice a change address form pop up when you try to save. This will give you the ability to update the writing companies address across any/all policies that share the writing company.
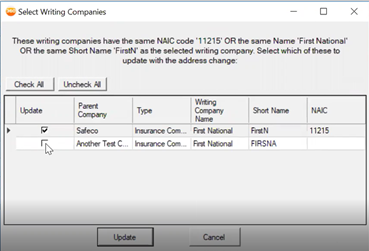
Change Address form
Security Item – restrict ability to delete transaction rows from assign winform
Before
Anyone had the ability to delete transaction rows in a policy no matter their security group.
Now
Every existing security group will be given full access to a new security item that has been added. This item will show the delete button in Policy/Customer Assignment for those security groups with Full Access (default for all existing security groups). For security groups with No Access the delete button will not be visible. This update will give agencies control over who can and cannot delete rows out of policy assign which helps prevent erroneous deleting.
- This applies for Policy and Accounting Transactions
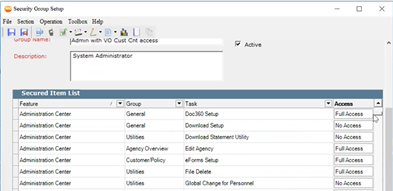
Full Access vs. No Access
Require 100% Production Credit
Before
Production Credit could be set at either 0% or 100%.
Now
You have the option to require the production credits to total 100% for Execs and Brokers, and to total 100% for Reps. You will have better quality control if your division requires 100% of agency revenue to be allocated to personnel.
This feature can be applied to the following:
-
Policies
-
Invoices
-
Service Agreements
Production Credit Setup
- In the Administration center, click on Edit Agency. Then navigate to the Business Unit Setup section. Finally, click on Business Unit Setup.
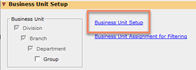
Business Unit Setup
-
In the Business Unit Setup winform, click on a division and then click Edit. You’ll notice a new check box in the Division Options section. Check the box for Require 100% PC (Production Credit). Click on Save & Close.
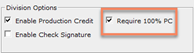
Require 100% PC
Policies
- In the Policy winform, under the Personnel tab you will see the Production Credit section.
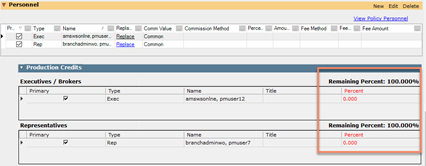
Personnel: Production Credit
-
You’ll Notice the Percent column is in red, this is to indicate that 0% is not an option.
-
If you try and save this policy with 0% Production Credit you will get a pop up explaining that the Production Credit cannot be 0%. Before continuing you must click on and type in 100 in the percent columns so the at the Remaining Percent is 0.
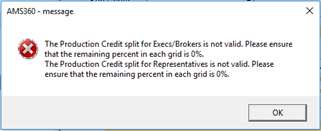
Warning Message
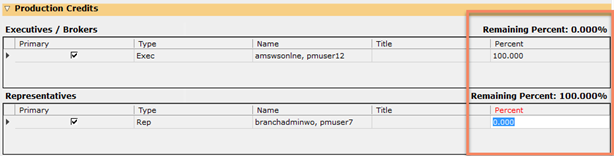
Production Credit: 100%
Invoices
- In the Invoice winform, click on Edit in the Invoice Transactions section to view the Production Credit.

Invoice: Production Credits
-
You can make edits to the Production Credit by clicking on the Amount column and typing in new numbers. However, if the Remaining percent is not 0 then you will not be able to continue. When you are ready, click on the post button at the top.
Service Agreements
- In the New Service Agreement winform scroll down to the Service Personnel section to view the Production Credit.
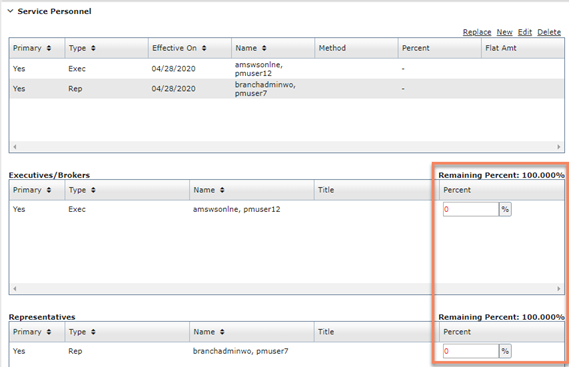
Service Personnel: Production Credit 0%
-
Click on the Percent columns and enter in 100 so that the Remaining Percent is 0. When you are ready, click on Save or Save & Close.
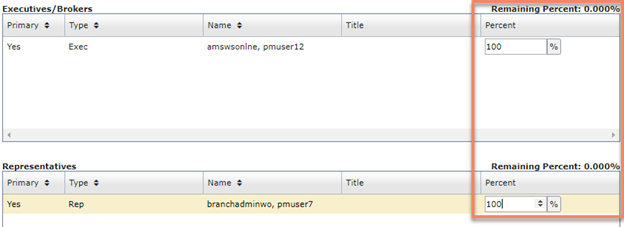
Service Personnel: Production Credit 100%
Carrier Status "Not Approved" and Add Carrier Status component to the Subscription Company form
Before
Carrier Status setup was added in 19R2 with Admitted and Not Admitted status.
Now
A Not Approved status and Carrier Status Last Edit Date to State Setup has been added. In addition, we added Carrier Status to Subscription policies. This allows you to identify companies that may not do business in a specific state and reduces risk of adding those companies to a policy.

Carrier Status
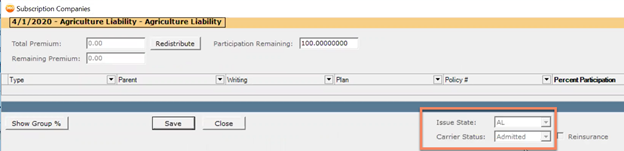
Subscription Policy
Enhancements
- 1. In the State Specific Company Requirements winform we added new columns for Carrier Status and Carrier Status Change Date. When you’re satisfied with your changes click on Update.
Under Carrier Status you have multiple options to choose from:
Admitted
Non-Admitted
Not Approved

Carrier Status
POLICY/REPORT UPDATES
-
Create a New Policy winform:
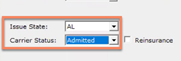
Create a New Policy
-
Policy winform:

Policy Winform
-
Change Company winform:
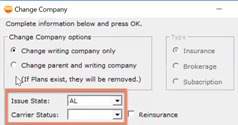
Change Company
-
Subscription Policy winform:.
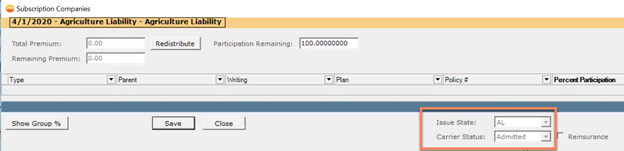
Subscription Policy
-
Company Carrier Status Report:
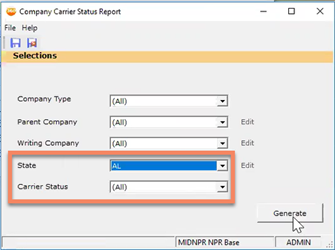
Company Carrier Status Report

Generated Report
Notification Service Setup Update
Now
A new notification version (3.0) has been added for use with our new API strategy. This will allow EMS to handle the management and delivery of notifications, Version 1 and 2 are for WSAPI use only.
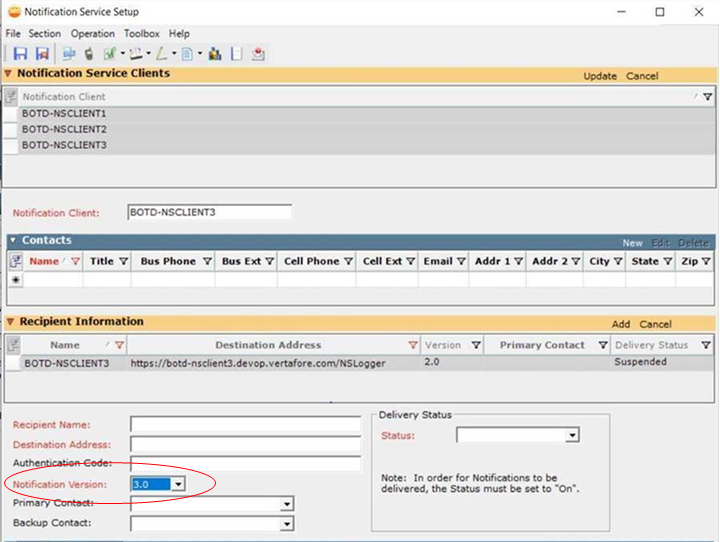
Notification Version
Custom/Policy Service
Service Agreement Enhancements – Commission Credit transaction
Before
Service agreement had transactions for New Business, Renew, Change, Cancel and Reinstate.
Now
A new transaction and charge type have been added in Service Agreement called Commission Credit that will apply to the commission from an associated policy. This will help prevent double charging by a Service Agreement fee and by a commission on an associated policy.
- On an Endorsement, you may select the Transaction as Commission Credit.
- On any Transaction, you may also select Commission Credit from the Charge Type drop down.
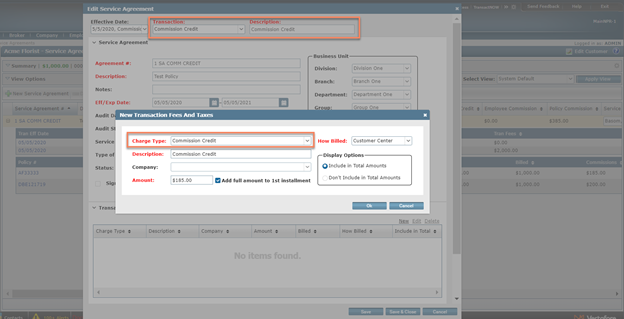
Charge Type
-
The Commission Credit total amount will display in the Service Agreement list view.
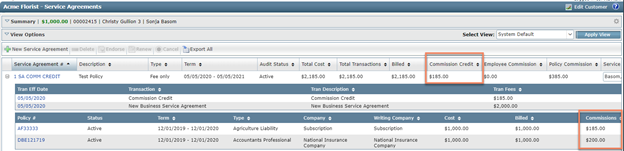
Commission Credit
Service Agreement Enhancements – Multiple Transactions
Before
AMS only allowed one transaction per Service Agreement.
Now
You will be able to add multiple transactions in a new section grid. AMS now has the flexibility to have multiple fees on one Service Agreement.
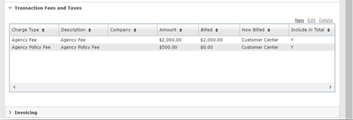
Multiple Transactions
Service Agreement Enhancements – Update List View and add Agreement Amount
Before
View had previous Service Agreement fields.
Now
New fields have been added to the list view and a new field has been added for you to type in the Agreement Amount on the Service Agreement form. You’ll also notice more useful information has been added for you to know the Service Agreement status.
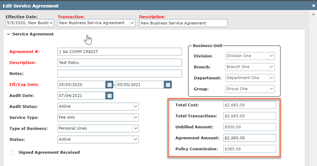
Agreement Amount
The Service Agreement list view has been updated to show the Commission Credit total and the Commission Total from the associated policies.
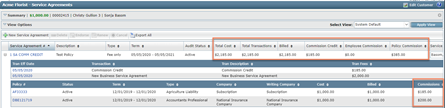
Service Agreement: List View
Service Agreement Income Report
Before
The Service Agreement Income report showed the selected service agreements with amounts and totals. It also had an option to add an additional sheet to list the invoices.
Now
The Income Report now has new filters for As of Date to show only invoices through that date on the Invoices sheet and Business Unit. In addition, AMS added new columns for Agreement Amount, Business Unit, and detail information that was in the Detail report.
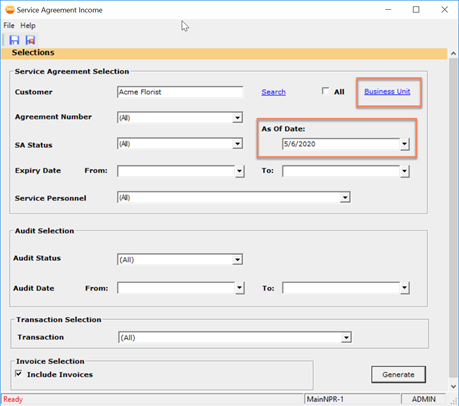
Service Agreement Income winform
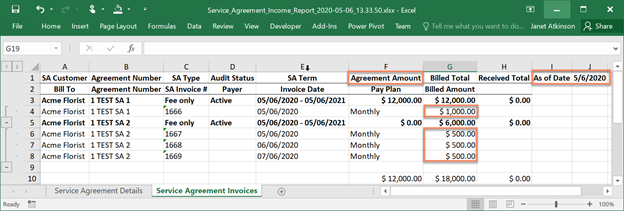
Excel Report
Agency Negotiated Commissions on a Subscription Policy
Before
Agency commission for Subscription policies came from company setup.
Now
You can now add Agency Negotiated Commissions to subscription and multi entity subscription policies.
Policy Setup
-
In the Customer Center, select a customer that you would like to add a new subscription policy to. Then click on New Policy. Fill in your required fields and then in the Company fields, click on Subscription. When you are ready to continue, click on OK.
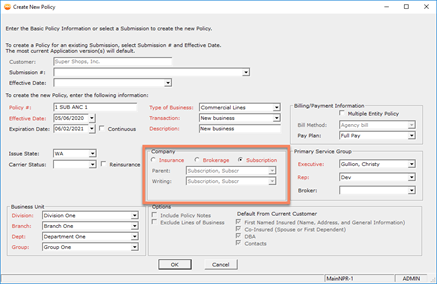
Create New Policy: Subscription
-
In the Policy winform, open the Basic Policy drop-down. Scroll down to the Additional Policy Information section and you’ll see the Agency Negotiation Commissions field. Here you have the option to set your agency commissions. For this example, we’ll click on Percent of Premium/Fees, and enter an amount. You have the option to enter a Valid Through date.
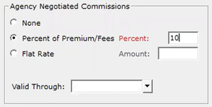
Agency Negotiation Commissions
-
In the Policy winform, scroll down to the Transaction Premiums/Billing section and then add a new Transaction Premium by clicking on New. Enter the required fields including a Premium, then when you are ready click on Add.
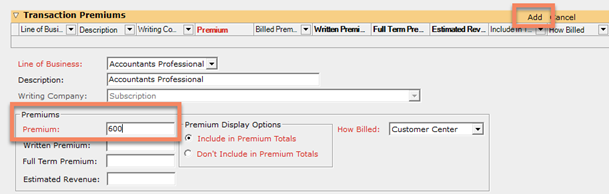
Transaction Premium
-
Next, enter a fee underneath the Premium by clicking on New. Enter the required fields including an Amount, then when you are ready click on Add.
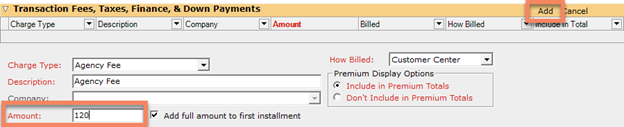
Transaction Fees
-
Now, scroll to the Invoice section underneath Transaction Fees and click on Create Invoice. In your Invoice winform you will now be able to see the negotiated commissions under the Invoice Transactions section. When you are ready click on Save and Post.

Invoice Transactions
Change Prospect to Customer when entering a policy
Before
You could apply a policy to a prospect which would lead to data confusion due to the prospect not being labeled correctly.
Now
A new prompt will display when you either attempt to create a policy on a prospect or attempt to convert a submission into a policy on a prospect. The prompt will ask if you want to change the prospect into a customer. If you select Yes, you will be asked if you would like to update the entry date for this customer as well.
Feature Overview
-
When you try to add a policy or submission to a prospect you will get the below message.
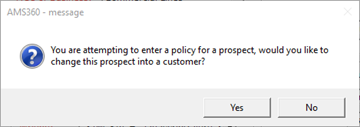
Policy Prompt
-
If you click on Yes, then you will be promoted to change the added date.
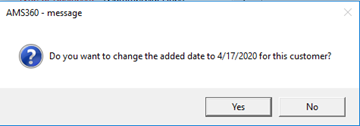
Added Date Prompt
-
Finally, when you come back out to Customer Overview you will see that your Prospect has been updated to a Customer.
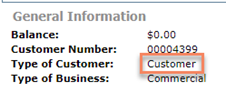
Updated Customer
Policy Endpoint Updates Notation Accurately
Before
Currently the AgencyNotationId and Notation fields are present in the model definition but are ignored by the code and are not persisted.
Now
Provided a valid NotationID, the Notation can be updated through the Notation property in the Policy/PUT endpoint. Policy Notations can now be updated through the Odata Policy/PUT endpoint to reflect the workflow available in the UI.
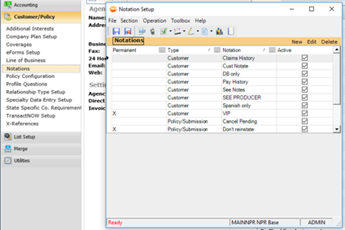
Notation Setup winform
Policy Contact - Contact Method
Before
The Contact Method was previously located only in the Customer Setup section.
Now
The Contact Method has been added to the Policy Contacts section, so it is now in both spots.
In addition, an area for Notes and an option for entering Text Message as a Contact Method was added.
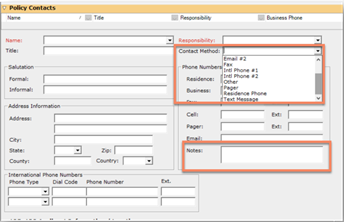
Policy Contacts
Additional fields available on Customer Overview and Policy Summary View
Before
You were limited on the fields you could add to the Policy Summary and Customer Overview sections.
Now
We added new fields for second email, other phone, international phone 1 & 2 with dialing codes and extensions, and NAICS & SIC to the Customer Overview and Policy summary sections.
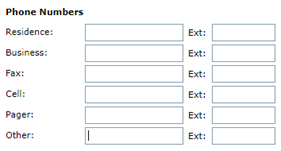
Phone Numbers
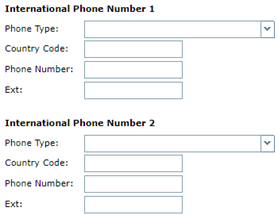
International Numbers
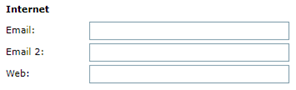
Internet
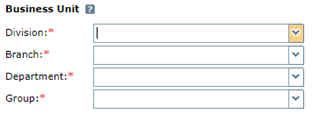
NAICS & SIC
Opt-in/Opt-out – customer communication preferences
Before
End insureds did not have a way to indicate to their agency whether they would like to be contacted by the Agency for anything other than required communications.
Now
You can track if contacts have opted-in to email or mail marketing materials or if contacts have declined. You will also be able to track if it is okay to send electronic documents. Now you can easily sort through customers with various contact preferences, and ensure they are reaching out using the most effective contact method.
Fields added to Customer Setup include:
-
Preferred Method
-
Marketing/Solicitation
-
Electronic Delivery
-
A free text notes field (all non-mandatory)
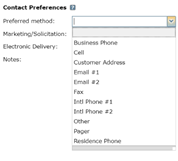
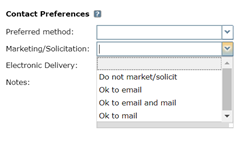
Contact Preferences pt. 1
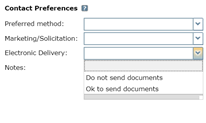
Contact Preferences pt.2
Feature Access Points
Customer Center
- In the Customer center, select a customer and click on Customer Overview.
Customer Overview: These fields will display regardless if you have specified a value or not. It’s important to note that these fields are Not Mandatory.
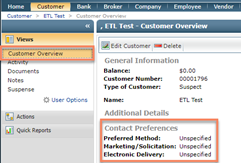
Customer Overview: Contact Preferences
-
Click on Edit Customer to make updates to your Contact Preferences.
- Preferred Method:
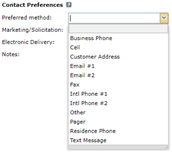
Contact Preferences: Preferred Method
-
Marketing/Solicitation:
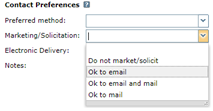
Contact Preferences: Marketing/Solicitation
-
Electronic Delivery:
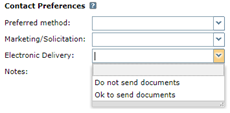
Contact Preferences: Electronic Delivery
Classic Reports
- Click on the Toolbox at the bottom right corner, then click on Classic Reports. Search for the Customer List report and Generate a report. You will see the new fields in your Excel Report.
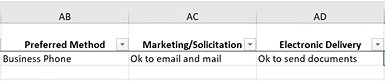
Classic Reports: Customer List
-
Classic Customer list report and MAR Customer Analysis reports: These fields (Preferred Method and Marketing/Solicitation) have also been added to target lists so you can create custom lists with specific values for Preferred Contact and Marketing/Solicitation.
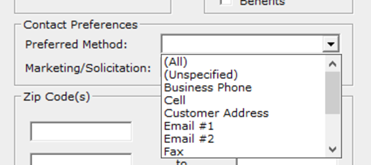
Classic Customer List
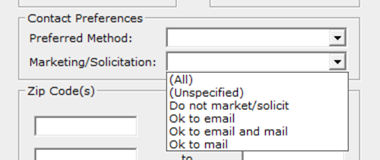
MAR Customer Analysis reports
Exclude from download will be carried over for policy renew and copy actions
Before
Exclude from download was not carried over when you copied or renewed a policy.
Now
The Exclude from Download value will now be carried over when a policy is renewed, copied or if any of these processes is initiated through Odata. Automatically removing the notation on renewal not only created duplicate work but allowed for too many errors in having policies downloaded that you already chose not to.
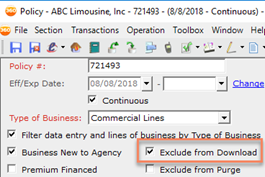
Exclude from Download
Second Limit for Watercraft LOB
Before
There was space for a second limit on the Watercraft application, but nowhere to enter that information on the Policy.
Now
A second limit has been added for Boats, Motors, and Trailer coverages in the Watercraft LOB that maps to the Watercraft ACORD 82. These fields have also been added to the merge field editor so that they can be used in Form letters and Schedules/Proposals. Finally, these fields have been added to the Dec page view and can be seen on the Summary of Insurance Classic Report.
You can utilize the data mapping between a policy and the application and use these fields when creating marketing documents.
Updating The Policy
-
In the Policy Winform, navigate to the Line of Business drop-down, click on Watercraft in the Line of Business field.
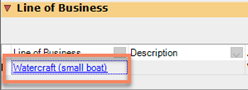
LOB: Watercraft
-
Under the Boats/Motors/Trailers drop down click on New. You will now see that under the Boats/Motors/Trailers drop downs that a Limit 2 filed has been added under the Coverage Section.

Limit 2 Field
-
Click on New and enter your required fields. You will now see the new field for Limit 2. Finally click on Add. You can repeat this action for Motors and Trailers.
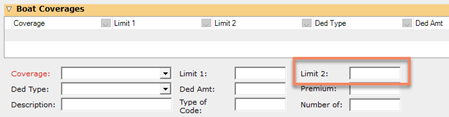
Limit 2 Field
Mapping To Policy
• eForms: Open the Watercraft policy you just created, click on App Preview at the top of the winform. Scroll down to the bottom of the Coverages/Limits of Liability section and you will now see that the limit 2 field has been mapped correctly from the policy.
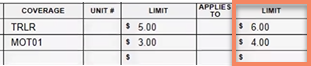
eForms: Limit 2
-
Dec Page View: Click on View Dec Page box next to the Watercraft policy you just created. Scroll down and you will see a section for your new Limit 2 field.

View Dec Page

Dec Page: Limit 2
-
Merge Field Editor: You will now see Limit 2 as an option in the Merge Field editor.
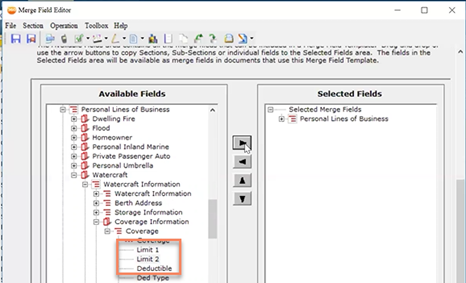
Merge Field Editor: Limit 2
Accounting
Check Signature Option with Employee Signing Limit
Before
Checks were printed for a manual wet signature.
Now
AMS360 has added a check signature option by Division. You will also notice a signing limit has been added to employee setup and a drop down has been added on the check to select an approved signer that will print on the check. A pop-up message will appear when posting if the check amount exceeds the signing limit.
This feature will speed up the check process with e-signatures and provide security for those who can approve up to a limit amount.
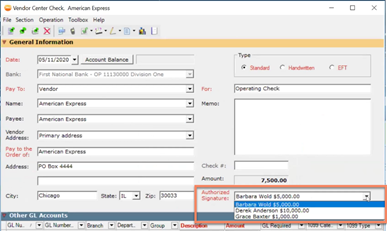
Authorized Signature
Admin Setup
- In the Administration Center, click on Agency Overview under the General section and then click on Edit Agency. Scroll down to the Business Unit Setup drop-down and click on Business Unit Setup. Choose a Division in the Business Unit Setup winform and then click on Edit. You’ll notice a new option to Enable Check Signature under Division Options.
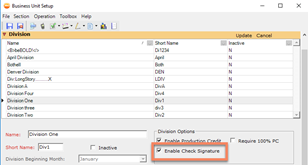
Enable Check Signature
-
Once you check the new box for Enable Check Signature, click on Save and Close. Now you will need to set your employees up.
Employee Setup
- In the Employee Center, select an existing employee and then click on Employee Overview under the Views section. Then click on Edit Employee. You will notice some changes to the Employee winform including a Signatures and Signature Setup drop-down.
Signatures
- This is a list of people that the employee has authorized to give signatures
- The check boxes to the left indicate who has permission
- You will also notice the Amount Limit column to the right. This is their check signing limit. If this person does not have a limit, they will not be able to sign checks.
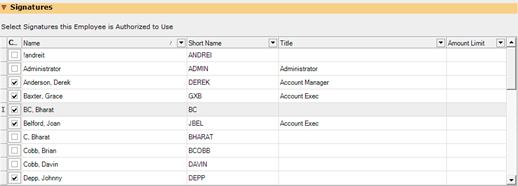
Signatures
Signature Setup
-
This is where the employee will set up their signature and Amount Limit.
-
The check boxes to the left indicate who has permission to use your signature.
-
When you go to any winform that involves checks you will now see the Authorized signature user that you just set up.
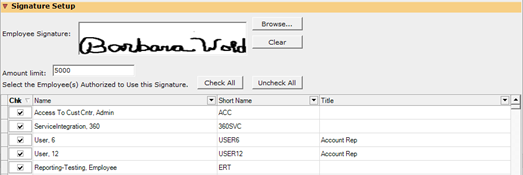
Signature Setup
Import Payments for Brokers and Finance Companies
Before
Import Payments currently are available for payments received from Insured and Other.
Now
Broker and Finance Company payments will now be imported from a bank .csv file. This feature will speed up the check receipt process with less risk of errors.
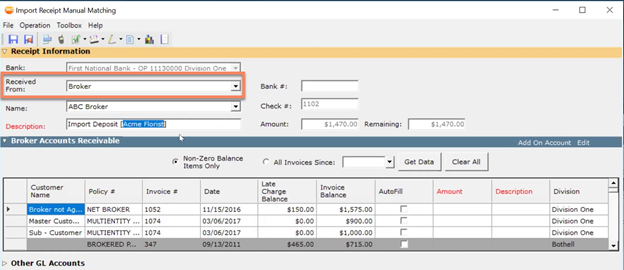
Received From: Broker
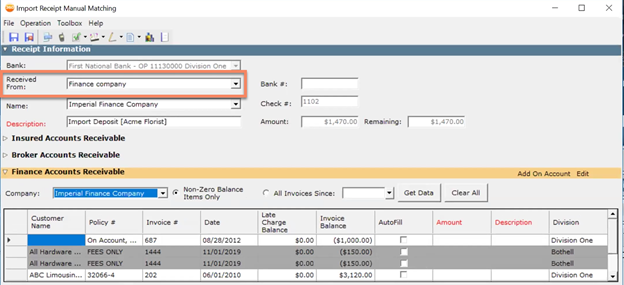
Received From: Finance Company
Subscription Company Form updated for Parent Groups (Syndicates)
Before
Subscription policies only allowed parent and writing company splits.
Now
You will not be able to add parent groups that have multiple writing companies and put the percentages in as a percent of a group total of 100%, making it easier to enter groups.
New Additions
-
New Columns have been added for Percent of Risk total, Company column, and Group column
-
% of Risk: The percent of the offered risk that this policy has taken
-
% of Risk is for a single company and is the Percent of Risk that a company has taken
-
-
% of Group: This is for a writing company in a group and is the percent of that group out of 100% that a writing company has taken
-
Group % of Risk: The percent for a group of companies under one parent and is the Percent of Risk that a group has taken
-
-
Remaining percent totals for Group and Percent of Risk
-
A Sort Order column which is a manual sort option for reporting and a Number button to renumber by increments of ten
-
Show/Hide Group % button to toggle between a view
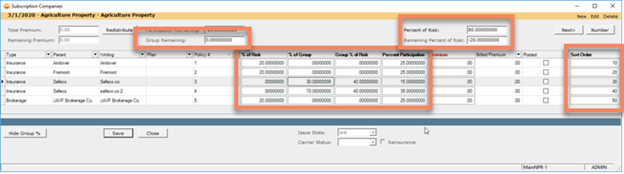
Subscription Company Winform
Feature Overview
- Navigate to a Subscription Policy and click on Subscription.

Transaction Premium
-
You will notice that the Subscription Companies winform has been updated.
-
The Winform is bigger in size
-
Show Group % button has been added
-
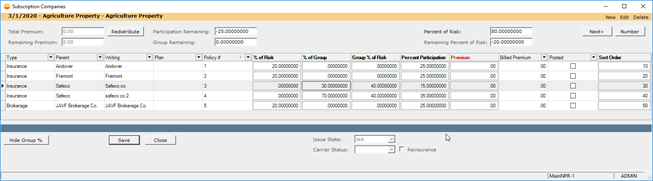
Subscription Company Winform
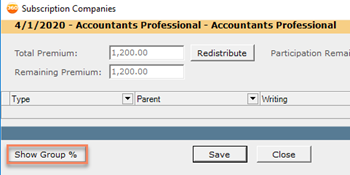
Show Group %
-
Click on Show Group % and you will notice four additional columns in the winform.
-
% of Risk
-
%of Group
-
Group % of Risk
-
Sort Order
-

New Columns
-
When you click on Show Group % you will also notice three new fields at the top of the winform.
-
Group Remaining
-
Percent of Risk (defaults to 100%)
-
Remaining Percent of Risk
-

New Fields
-
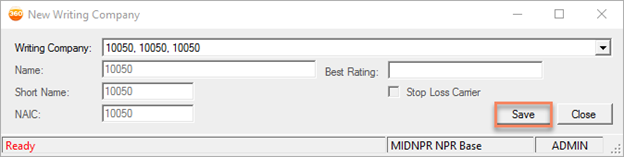
Click on New in the top right-hand corner of the winform, then select Brokerage and fill in the required information for your company. To add a new writing company, click on New. Finally, select your writing company form the drop-down and click Save.

Subscription Companies: Company
New Writing company
-
Assign a Policy # to your company. You have the option to add a Percent Participation or Premium to your company. When ready click on Add in the top right corner.

Company
|
Note: In the next example we created three companies to show how this feature would work in real time. |
-
Now you can start to enter data into the new Columns.
-
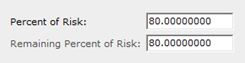
Enter a Percent of risk in the top right.
Percent of Risk
-
Next, enter the Group % of Risk between your three companies.
-
In this example we see that the Group % of Risk is 50% of the 80% featured above. You’ll now see that 30% is the Remaining Percent of Risk, you’ll need to get this number down to 0%.

Group % of Risk

Remaining Percent of Risk
-
-
Assign the remaining 30% to your last company in the % of Risk column.

% of Risk
- You’ll notice that your Remaining Percent of Risk field now says 0%.

Remaining Percent of Risk
-
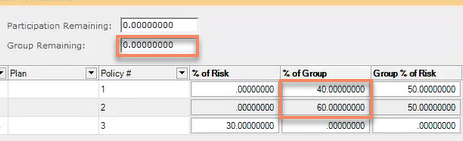
Now you need to assign how much of the 50% from the Group % of Risk will go to each of the companies. You will do this in the % of Group column.

Group % of Risk
-
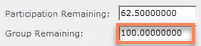
You’ll notice the Group Remaining field is at 100%, you’ll need to get this number down to 0%. Assign percentages to your companies so that the % of Group column totals 100%. You’ll now see that the Group Remaining filed is 0%.
Group Remaining 100%
Group Remaining 0%
-
Finally, when you are ready, click on Save and Close at the bottom.
-
Redistribute the Premium
-
If someone opened the previous example policy and decided to add a Premium you would be able to redistribute the Premium according to the metric’s you already have in place. In the Policy Winform enter a Premium and then click on Subscription.

Transaction Premiums
-
You will now see the Total and Remaining Premium, click on Redistribute and you will see how the premium is spit up between the three companies. When finished, click on Save and then Close.
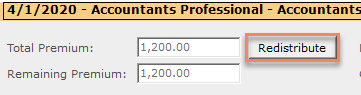
Redistribute Button

Redistribute Premium
Subscription Multi-Entity Policy
Before
In order to create a Multi-Entity policy today you would need a Master customer with sub customers.
Now
You will have the option to create a Multi-Entity Policy when creating a Subscription Policy. This enhancement combined the subscription policy and multi-entity policy into one. Several views were altered to accommodate both types.
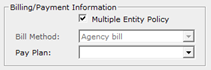
Multi-Entity Policy
Policy Setup
-
In the Customer Center, select a customer that you would like to add a new subscription policy to. Then click on New Policy. Fill in your required fields and then in the Billing/Payment Info fields, click on Multi-Entity Policy. Next, in the Company fields, click on Subscription. When you are ready to continue, click on OK.
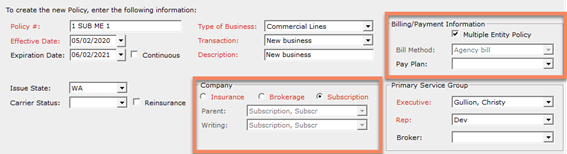
Create New Policy: Multi-Entity
-
In the Policy winform, scroll down to the Transaction Premiums/Billing section and then add a new Transaction Premium by clicking on New. Enter the required fields including a Premium, then when you are ready click on Add.
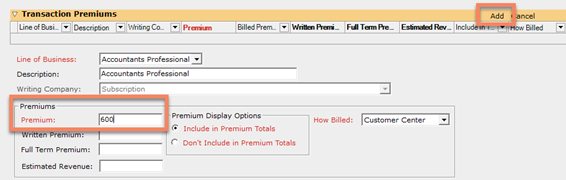
Transaction Premium
-
Next, enter a fee underneath the Premium by clicking on New. Enter the required fields including an Amount, then when you are ready click on Add.
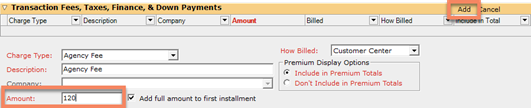
Transaction Fees
-
Under the Transactions Premiums section, click on Subscription. In the Subscription winform, click on new to add a subscription company. Fill in the required fields then click Add. Repeat this process so you have at least two subscription companies. When you are ready, click on Save and Close.

Transaction Premiums: Subscription

New Subscription Companies pt. 1

New Subscription Companies pt. 2
-
Under the Transactions Premiums section, click on Split Premium. Then click on Get Sub Customers in the top left corner. Select your Sub-Customers and then click OK.

Transaction Premiums: Split Premium
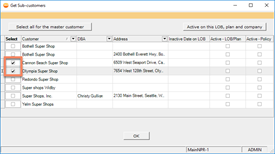
Get Sub-Customers
-
In the Multiple Entities winform, enter the Premium for your sub-customers. Then, click Next to setup up your Agency Fee.

Premium
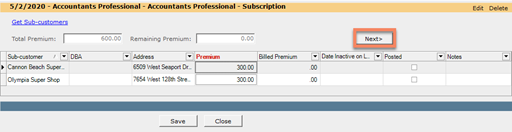
Next
-
Click on Get Sub Customers in the top left corner. Select your Sub-Customers and then click OK. In the Multiple Entities winform, enter the Agency Fee Amount for your sub-customers. When you’re ready click on Save and Close.
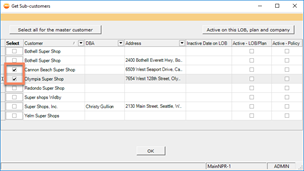
Get Sub-Customers
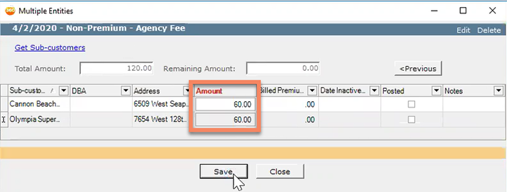
Agency Fee Amount
-
Now, scroll to the Invoice section underneath Transaction Fees and click on Create Invoice. In your Invoice winform you will now be able to see your Premiums and Fees under the Invoice Transactions section.
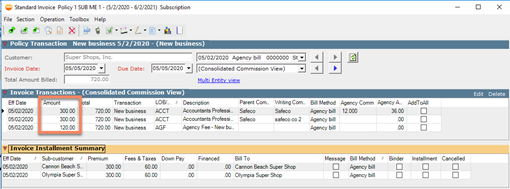
Invoice Transactions
-
Click on Multi-Entity View. This is a new function that allows you to view your multi entity transaction details. Here you can view your Account and Agency fees by click the arrow to the right. When you are ready exit out of the Multi-Entity winform and click on Save and Post.
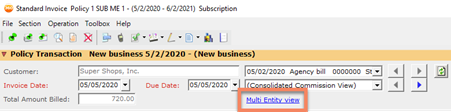
Multi-Entity View
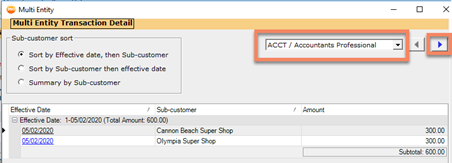
Account Fee
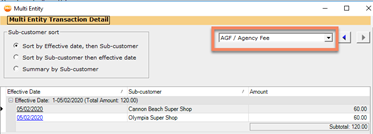
Agency Fee
Notify if the Agency Commission is Blank when Invoicing
Before
You may be unaware that there is no agency commission on a policy.
Now
A pop-up message will alert you when no agency commission has been added when you try and post an invoice. This is a quality check to ensure against missing agency revenue on policies.
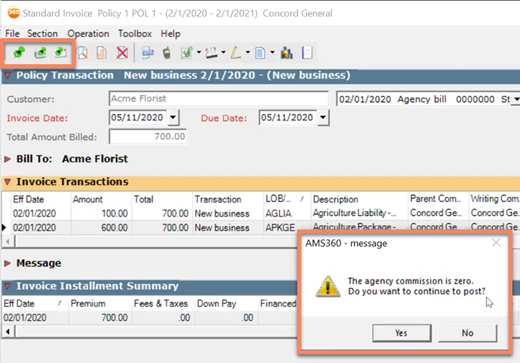
Commission is Blank
Updated Reports
Trust Account Transfers
Before
This is a new tool, this functionality did not exist prior to the 20R1 release.
Now
You will be able to see agency commissions on invoices and choose what amounts to transfer from a Trust bank. You will also have a view page to see the saved and posted Trust Transfers.
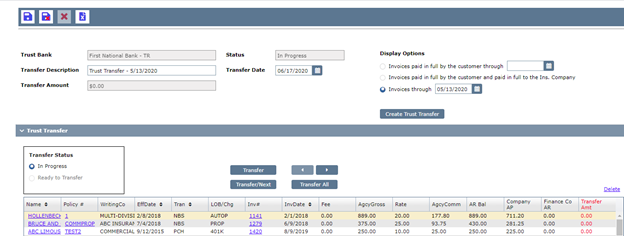
Trust Transfer
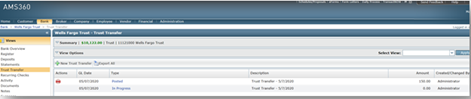
Trust Transfer View page
Security Groups
-
The Owner permanent security group will automatically be set up with Full Access to the secured items related to the Trust Transfer.
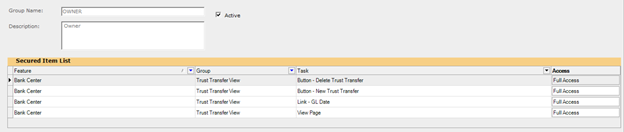
Security Group
Trust Transfer Admin Setup
-
To start using the Trust Transfer in a trust bank, the user must first set the date that they want the Trust Transfer to being pulling in invoices based on the general ledger date of the invoices.
-
In the Bank Center, select a trust bank, then click on Bank Overview and then Edit Bank.

Bank Overview
-
You will then set up the Trust Transfer Start Date. Now, the Trust Transfer will pull in invoices from the start date forward. You can either enter the date you want or use the drop-down date picker next to the date field.
-
Once the Trust Transfer Start Date has been set, you can then proceed to the trust bank and begin using the Trust Transfer.
-
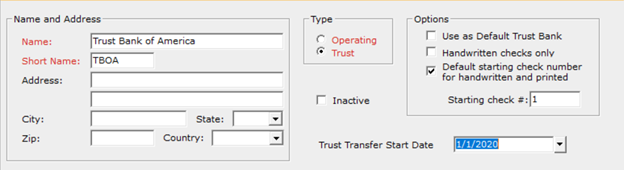
Trust Transfer Start Date
|
Note: If the date is not selected then the view page for the Trust Transfer and the create new option for a Trust Transfer will be greyed out. If you click on the view page or the create new for the Trust Transfer, you will receive a message to setup the date. |
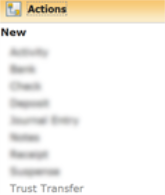
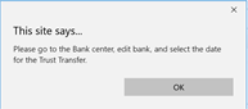
Select the date Warning
Trust Transfer
-
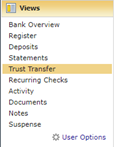
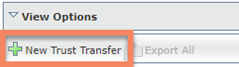
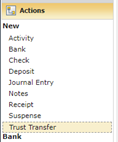
To begin a Trust Transfer, you can either go to the Views tab and click on Trust Transfer and then New Trust Transfer or you can click on the Actions tab and then click on Trust Transfer.
Trust Transfer: Route 1
Trust Transfer: Route 2
-
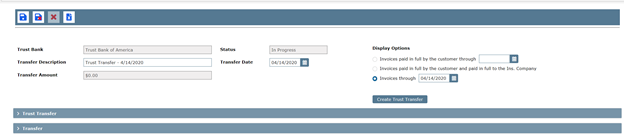
You will be taken to the new Trust Transfer Webform.
Trust Transfer
The Trust Transfer Webform
The Header
- When your pointer goes over the top of the icons, an information box will show you what each icon is. The icons, in order from left to right, are save, save and close, delete (works once the Trust Transfer is saved), and export. If a Trust Transfer is closed prior to saving, it will be removed. Once the Trust Transfer is saved in any status or posted it will show on the Trust Transfer view page.

Header
The Display Section
- Trust Bank will default to the name of the trust bank that the Trust Transfer was created in.
- Transfer Description will default to the name of the Trust Transfer and the current date but can be edited.
- Transfer Amount pulls from the Trust Transfer section and will display your selections of what amounts that are to be transferred.
- Status is the current state of the Trust Transfer.
- Transfer Date will default to the current date. The Display Options section is where users will be able to select what they want to pull into the Trust Transfer section. There are three options in the display Options section.

Display Section
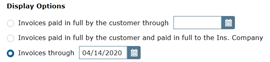
Display Options
-
You can either manually enter a date or user the drop-down date selector. Click on Create Trust Transfer for the Trust Transfer table to open and fill.
The Trust Transfer Drop-Down
-
Once you click on Create Trust Transfer, the Trust Transfer drop-down will open. Within the Trust Transfer drop-down is the Transfer Status, the buttons to choose how to deal with the lines within the table, the delete option, and the table containing the invoices.
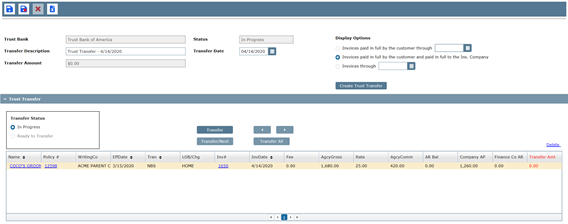
Trust Transfer
Transfer Status
- The Transfer Status tells you the current status of the form. Once you have selected all the invoices where you want to transfer the amount of the agency commissions over, select the option for Ready to Transfer and the Transfer section below the table will expand. When the Trust Transfer is in the Ready to Transfer status, you will not be able to edit the form. If you decided that more work needs to be done, you can just click in the option circle for In Progress and the form will be back in a state where it can be edited. You can also click in the cell for the Transfer Amount and enter the amount that you want to transfer and then tab or click on enter on your keyboard to accept that amount.
Transfer Buttons and Arrows
- The area for selecting the transfer amount has five different choices if there are more than one invoice in the table. The options for transferring the amount are:
- Transfer: Transfer the agency commission for the line that is currently selected into the Transfer Amt column.
- Transfer/Next: Transfer the agency commission for the line that is currently selected into the Transfer Amt column and then move to the next line.
- Transfer All: Transfer all agency commissions showing in the table to the Transfer Amt column.
- Arrows: The arrows are to move the selected line up or down the sheet. The arrow pointing to the left moves the selected row up one on the table. The arrow pointing to the right moves the selected row down one in the table.
- The Trust Transfer Table will show the user information about the invoice(s)

Trust Transfer Table
-
The table contains:
-
Name (Customer)
-
Policy Number
-
Writing Company
-
Policy Effective Date
-
Transaction Type
-
Line of Business/Change
-
Invoice Number
-
Invoice Date
-
Fee
-
Agency Gross
-
Rate (Agency Commission Percentage Rate)
-
Agency Commission
-
Accounts Receivable Balance
-
Company Accounts Payable
-
Finance Company Accounts Receivable
-
Transfer Amount
-
-
There is also a Delete option so that is if you decide to remove a line from the table, you can easily do so.
Transfer Section
-
Once you change the Trust Transfer to Ready to Transfer, the bottom section of the Trust Transfer will open, and you will have two options to work with the Transfer Amt. The options are Interbank Transfer or a Journal Entry.
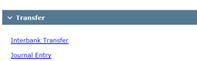
Transfer Amt
-
When you click on Interbank Transfer, the winform for the Interbank Transfer will open, and give you a list in the drop-down box of the operating banks within the same division as the trust bank. Select the bank, make any changes to the memo section that you want to, and click Post.
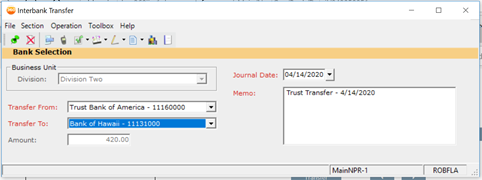
Interbank Transfer
-
To do the journal entry, click on the line for Journal Entry. The journal entry winform will open and you can then select the offsetting debit for the journal entry by selecting New on the Other GL Accounts header.
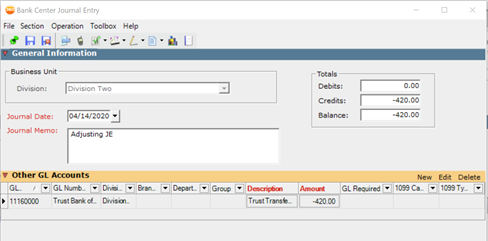
Bank Center Journal Entry
-
Once either the Interbank Transfer or the Journal Entry is completed that winform will close and the Trust Transfer will be posted. You can see Trust Transfers that have been posted or saved on the view page for the Trust Transfer.
Trust Transfer View Page
-
To see the Trust Transfer view page, go to the Views section, click on Trust Transfer.
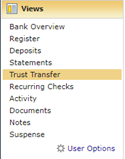
Views: Trust Transfer
-
The view page will show the Trust Transfers that have been saved and posted. Once a Trust Transfer is posted you will have an option to void that Trust Transfer, reversing the posting that occurred. If you decide that you no longer want a saved Trust Transfer, you can open that statement by clicking on the Type link that is highlighted. Once the Trust Transfer is opened, you can use the red X in the header to delete the Trust Transfer.

Trust Transfer
New Classic Report: Company Where Used Report
Before
This report did not exist before 20R1.
Now
You can now update policies from a pre-existing company and add them to a new company. This feature helps simplify the task of replacing a company on policies by identifying which policies need to be changed.
Report Setup
-
Open Classic Reports in the Toolbox. In the Classic Reports winform scroll down and click on Company Where Used on Policies report.
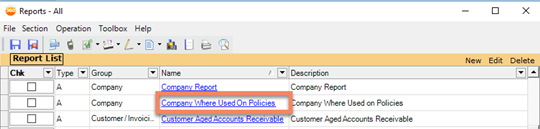
Company Where Used Report
-
In the new winform, choose a company type, parent and writing company. Then click on Generate.
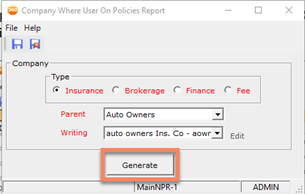
Company Where Used Report Winform
-
You’ll notice that your new report opens as an excel file.

New Report
Save Revenue Recognition Report templates
Before
You could not save a specific version of the Revenue Recognition report with a description in Classic Reports.
Now
You can now save versions of the Revenue Recognition P&C and Employee Benefits reports with a custom description for that version.
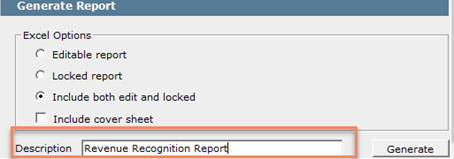
Revenue Recognition: New Description
Feature Overview
-
Open the Classic Reports winform and click on either Revenue Recognition Employee Benefits or P&C. Enter your required fields and then scroll to the bottom and add a new Description. When finished click Save and Close.
Revenue Recognition: New Description
-
Refresh the Classic Reports winform and you’ll now see the new Revenue Recognition report that you created.

Classic Reports: Revenue Recognition
Other
MAR Performance Update
Before
Some MAR reports were not generated in real-time (e.g. Book of Business, Retention, etc.) but were generated using a database extraction process that could cause inconsistent report results and slow performance in some limited cases.
Now
We removed the database extraction process for all MAR reports. With this feature update, you will notice an improvement to report accuracy, timeliness of the data, and an increase in reliability of report generation. This feature has improved generation performance for most reports, however in some limited cases, individual reports may take longer to generate. We are continuing to implement enhancements to increase performance for all MAR reports.
AMS360 Outlook Add-In Update
Now
A new update has been created for Outlook Add-In for users on 19R2 and 20R1. It will require you to take action and install the new download version.
- In the Administration center, on the left-hand side of the page, click on Utilities.
- Click on AMS360 Downloads and then click on the AMS360OutlookAddin.msi.
- Run the AMS360 Outlook Add-In Setup Wizard to install the new version.
|
Note: If you downloaded the Outlook Add-In for the first time in 20R1, you will have the current version and will not have to do an additional install. |
Merge Field Editor has New Fields for Subscription Company, Carrier Status and Writing Company Address Updates
Now
Fields that were from the subscription policy winform are now included in the Merge Field editor.
-
New fields:
Subscription Company Information
Carrier Status
Writing Company address
Subscription Policy Fields
-
In the Customer Center, select a customer that has a subscription policy attached and click on the Policy. Then in the Policy winform scroll down to the Transaction Premiums section and click on Subscription.

Transaction Premiums: Subscriptions
-
You will now see the four fields that have been added to the Merge Editor from the Subscription Winform.

Subscription Company: New Fields
Merge Field Editor
-
In the Toolbox, hover over User Settings & Tools and click on Merge Field Editor.
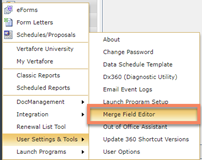
Merge Field Editor
-
Click on New to create a template. Enter a Template Name and Template Type, you will then be taken to the Merge Field Editor.
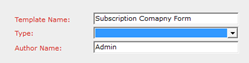
Template
-
Under Available Fields, click on the Policy Information drop-down. Next open either, Transaction Premium Information or Transaction Fees, Taxes, Finance & Down. Then, open Subscription Company Information and you will see the new fields added. From here you can select your fields as you normally would.
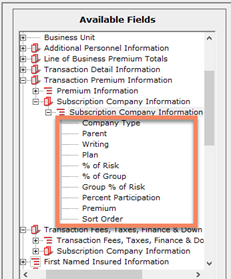
New Fields
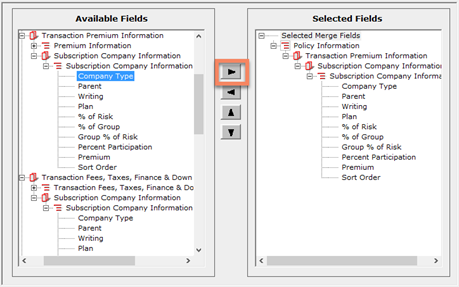
Merge Field Editor
Beginning Journal entries - producer commission to producer GL for Broker business when agency flag is set
Before
In 18R1 we added a flag to allow producer commission to get applied to producer GL for broker business when the agency flag was set. This release did not include changing how beginning balances for brokered business gets journaled.
Now
Whether you choose to post to the Agency or Broker GL systems, beginning balance journal entries will respect this choice. This update fulfills the expectation for applying Broker payables and expenses to agency/broker GL systems. This will ensure more accurate reporting between what is counted as Agency and Broker business.

Producer Expense Tracking Options
ACORD Updates
ACORD 1 (2019/07) Property Loss Notice
Now
- The form is fully integrated
- New ACORD logo on form
- Reduced the font size of CARRIER on the first page
- For the Fraud Warning for Colorado, changed for insurance proceeds to from insurance proceeds
- Deleted Hawaii Fraud warning on Page 2
- On page 4, for Puerto Rico, they deleted the brackets around be
- The Edition Date and Copyright has been updated

ACORD 1 pt.1

ACORD 1 pt. 2
ACORD 2 (2019/07) Automobile Loss Notice
Now
-
The form is fully integrated
-
New ACORD logo on form
-
Reduced the font size of CARRIER on the first page
-
For the Fraud Warning for Colorado, changed for insurance proceeds to from insurance proceeds
-
Deleted Hawaii Fraud warning on Page 2
-
On page 4, for Puerto Rico, they deleted the brackets around be
-
The Edition Date and Copyright has been updated

ACORD 2 pt.1

ACORD 2 pt. 2
ACORD 3 (2019/09) Liability Notice of Occurrence / Claim
Now
-
The form is fully integrated
-
New ACORD logo on form
-
Change Agency to Producer (field change)
-
Page 3 changed for to from in insurance proceeds for Colorado
-
Page 3 deleted Applicable in Hawaii
-
Page 4 deleted (be) replace with “be” for Applicable in Puerto Rico
-
Revise Copyright dates to 2019 and date of Form

ACORD 3 pt. 1
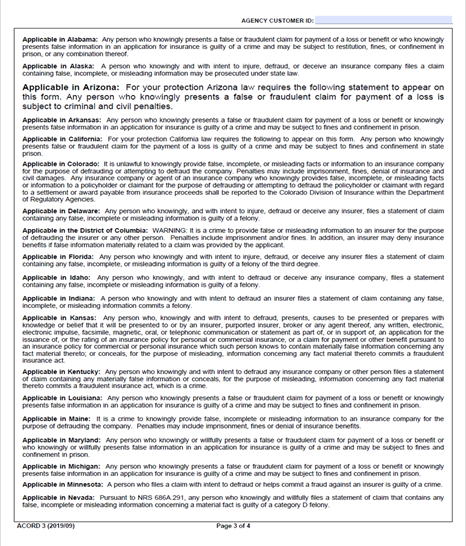
ACORD 3 pt. 2
ACORD 4 (2019/09) Workers Compensation - First Report of Injury or Illness
Now
-
The form is fully integrated
-
New ACORD logo on form
-
Page 3 changed for to from in insurance proceeds for Colorado
-
Page 3 deleted Applicable in Hawaii
-
Page 4 deleted be replaced with be for Applicable in Puerto Rico
-
Moved the Applicable in New York to above the employee signature line on page 3
-
Revised Copyright dates to 2019 and date of Form

ACORD 4 pt. 1
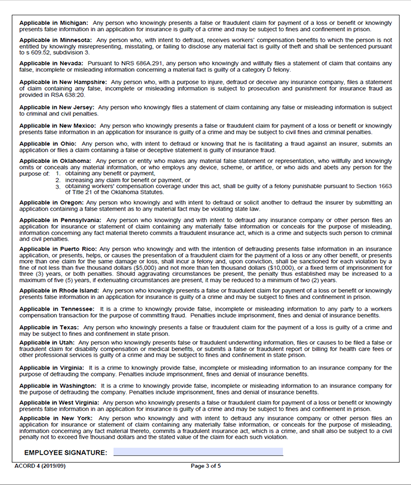
ACORD 4 pt. 2
ACORD 50 TX (2020/01)
Now
-
ACORD 50 NJ (2016/12) The form is fully integrated
-
Deleted the following: Warning: A NAMED DRIVER POLICY DOES NOT PROVIDE COVERAGE FOR INDIVIDUALS RESIDING IN THE INSURED’S HOUSEHOLD THAT ARE NOT NAMED ON THE POLICY
-
New Edition date added to the card
ACORD 50 TX
ACORD 50 NJ (2016/12)
Now
-
The form is fully integrated
-
Updated mapping has been added
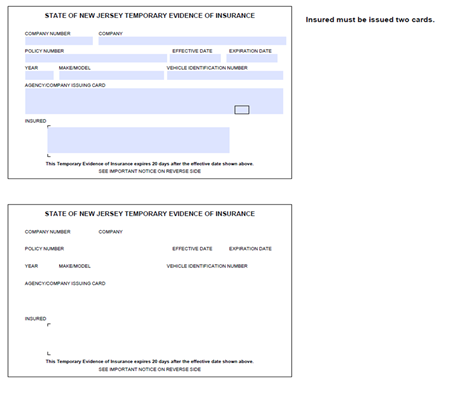
ACORD 50 NJ
ACORD 50 MD (2016/10)
Now
-
The form is fully integrated
-
Updated mapping has been added
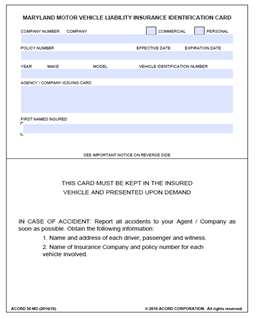
ACORD 50 MD
ACORD 50 LA (2018/10)
Now
-
The form is fully integrated
-
Updated mapping has been added
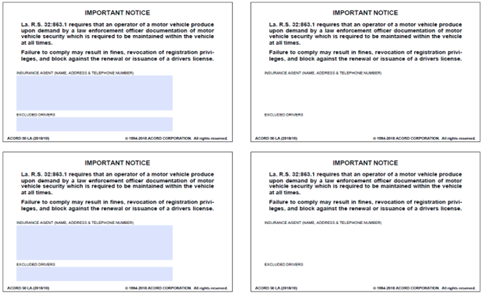
ACORD 50 LA
ACORD 50 FL (2017/12)
Now
- The form is fully integrated
- Updated mapping has been added
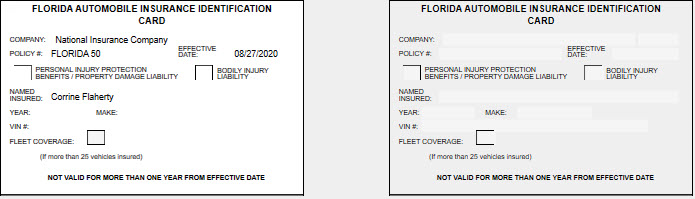
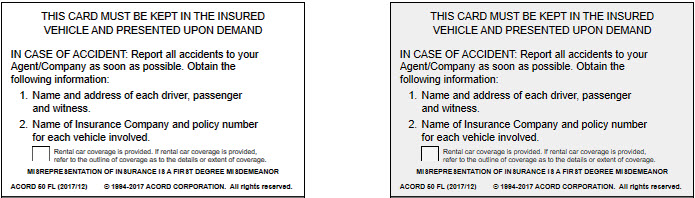
ACORD 50 FL
ACORD 50 CT (2009/01)
Now
- The form is fully integrated
- Wording change, the date has not changed
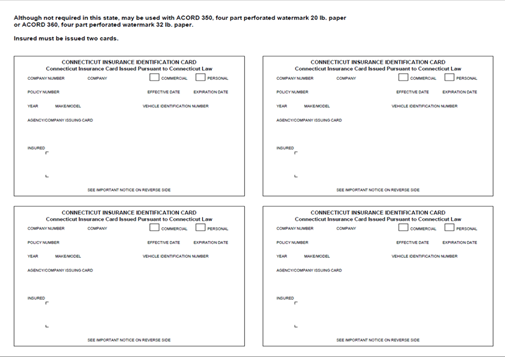
ACORD 50 CT pt.1
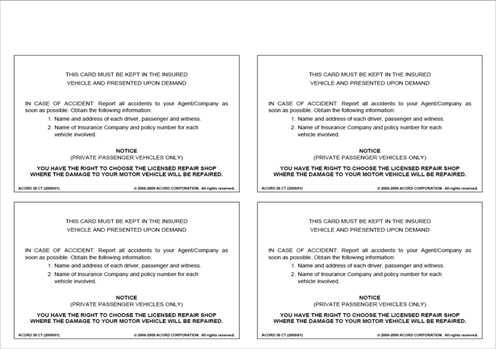
ACORD 50 CT pt.2
ACORD 51 CA (2004/07)
Now
- The form is fully integrated
- Updated mapping has been added
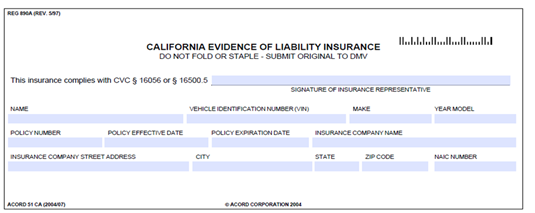
ACORD 51 CA
ACORD 51 NV (2016/07)
Now
-
The form is fully integrated
-
Updated mapping has been added
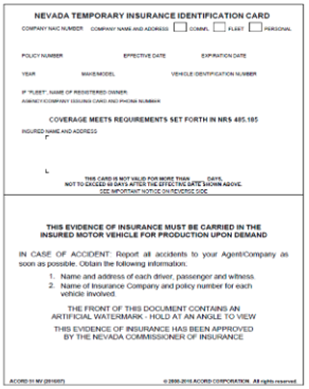
ACORD 51 NV
ACORD 52 NV (2016/07)
Now
-
The form is fully integrated
-
Updated mapping has been added
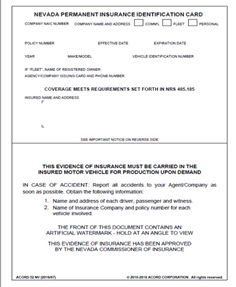
ACORD 52 NV
ACORD 54 NV (2016/07)
Now
-
The form is fully integrated
-
Updated mapping has been added
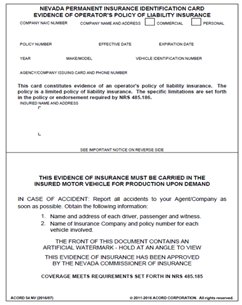
ACORD 54 NV
ACORD 90 MD (2019/08) Maryland Personal Auto Application
Now
-
The form is fully integrated
-
New ACORD logo on form
-
Instead of fields for EUIM, for each accident, each person and property damage and CSL, a single EUIM included box has been added
-
Added vertical lines in the EUIM row on the first page
-
Deleted on Page 4 of 4 “PERSONAL INFORMATION ABOUT YOU, INCLUDING INFORMAITON FROM A CREDIT OR OTHER INVESTIGATIVE REPORT…..SUBMIT A REQUEST TO US FOR A MORE DETAILED DESCRIPTION OF YOUR RIGHTS AND OUR PRACTICIES REGARDING PERSONLA INFORMAIOTN.”
-
Added on Page 4 of 4:
-
Check here if the insurer uses credit history to rate privet passenger motor vehicles, you are advised pursuant to Maryland law, that the insurer uses credit history to rate private passenger motor vehicle policies
-
You are also advised that you may request a premium quotation that separately identifies the portion of the premium attributable to your credit history
-
Revised Copyright dates to 2019 and date of Form
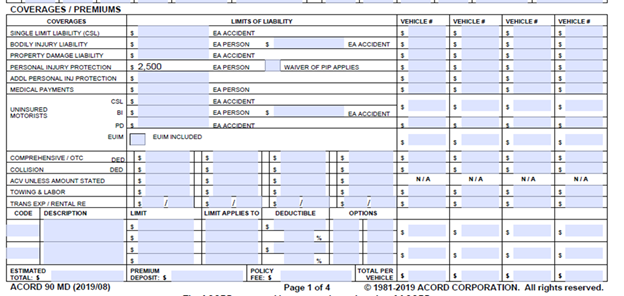
ACORD 90 MD pt. 1

ACORD 90 MD pt. 2
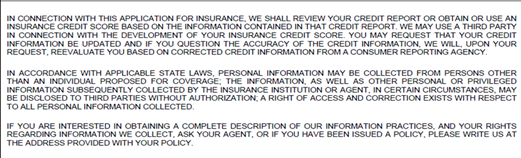
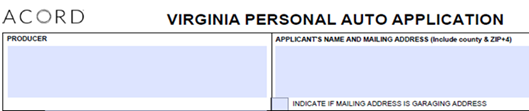
ACORD 90 VA (2018/12) Virginia Personal Auto Application
Now
-
The form is fully integrated
-
The language in this form was changed to be consistent with VA Code
-
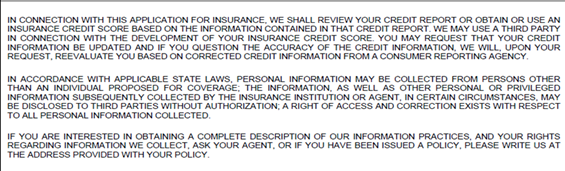
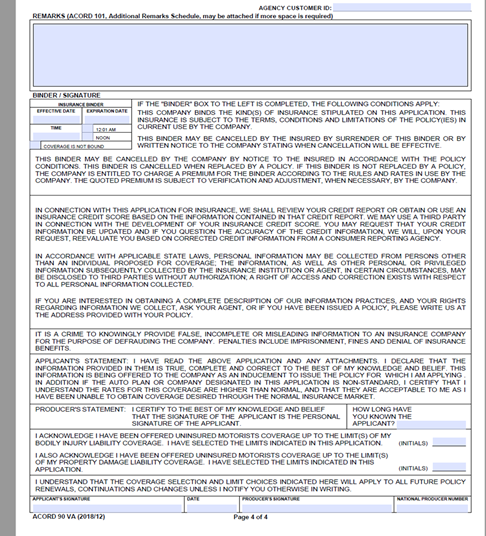
The language regarding the privacy notification was changed on Page 4 of the Form, the following has been deleted: “In accordance with applicable Federal and State law and ending with “which may be wrong”. The new language is as follows: “In connection with the application for insurance, we shall review your credit report or obtain or use an insurance credit score based on the information contained in the credit report. We may use a third part in connection with the development of your insurance credit score. You may request that your credit information be updated and if you questions the accuracy of the credit information, we will, upon your request, reevaluate you based on corrected credit information from a consumer reporting agency. In accordance with applicable state laws, personal information may be collected from person other than an individual proposed for overage: the information, as well as other personal or privileged information subsequently collected by the insurance institution or agent, in certain circumstance, may be disclosed to third parties without authorization; a right of access and correction exists with respect to all personal information collected.”
-
Prior version of the form should not be used
-
On page 1, Agency was changed to Producer
-
Further, the Edition date and Copyright changed and the ACORD logo has changed
ACORD 90 VA pt. 1
ACORD 90 VA pt. 2
ACORD 90 VA pt. 3
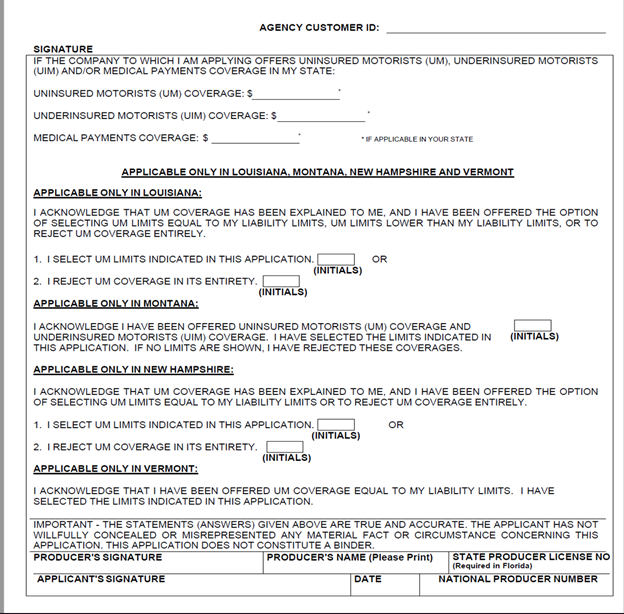
ACORD 131 (2017/11) Umbrella/Excess Section (attaches to the ACORD 125 for documentation purposes)
Now
-
The form is fully integrated
-
Updated verbiage has been added to the form
-
Added an additional page (pg. 6)
-
New ACORD logo was added
-
The Edition and Copyright dates were updated
ACORD 131
ACORD 160 (2016/09) Business Owners application
Now
-
The form is fully integrated
-
Updated mapping has been added
Defects Fixed
-
Delete Appended Descriptions/attachments when an Activity is Purged
-
AMS360 19.1 and 19.2 Database Design Guides
-
Error Loading Forms – Error Logging Improvements
-
Outlook Add-In Improvements:
-
Policies listed in most recent order
-
Submissions included in policy list
-
20R1 Service Pack 1(2020)
Defects Fixed
- The Agency Address was not saving correctly
-
The Check Voucher description was incorrect for the Fee Company account
-
Customer statements were displaying the times of the policies
-
The AMS360 and ImageRight integration was not working for certain customers
-
The Book of Business ETL report had mismatched data appearing
-
The Audit Trail data showing Emp Code was returning 0 results
-
ACORD: NV 51 Address Line 2 has been updated
-
The Trust Transfer was showing on the view page
-
An Agencies Commission was not showing in the Trust Transfer
-
You could not configure products for VSSO users in Internet Explorer
-
The Trust Transfer view page wasn't refreshing in Internet Explorer
-
Their were missing icons in Internet Explorer when configuring a user in VSSO/AMS360
-
The Invoice Printout/Preview was duplicating information when there had been a change in Invoice Messages
-
The Billing Register was not reflecting Invoice corrections
-
The message “Error Accessing Directory to create Excel spreadsheet ….” would display while generating the Revenue Recognition P&C report
-
The message “Error Accessing Directory to create Excel spreadsheet ….” would display while generating the Revenue Recognition Employee Benefits report
20R1 Service Pack 2(2020)
Defects Fixed
-
The Sales Center representative was not retained on some of the download transactions
-
Service Groups from Customer Setup were being pulled into Renewed Policies
-
You are now able to add the charge type in an Service Agreement
-
The Subscription Company winform window was too large for some resolution settings
-
The customer statement report was showing 01/01/9999 rather than continuous
-
In the Employee Benefits Revenue Recognition Report cancellations were repeating rows unnecessarily
-
In the Employee Benefits Revenue Recognition Report Unbilled Transactions were appearing in the cover letter
-
In the Employee Benefits Revenue Recognition Report Renewed/Expired/Canceled Policies the A/R was not appearing as zero
-
Submissions from the P&C and Employee Benefits reports will now be excluded in the Revenue Recognition Reports
-
Deleted policies from the P&C and Employee Benefits reports will now be excluded in the Revenue Recognition Reports
-
The Employee Benefits Revenue Recognition Report will now pull the Bill method from the invoice bill method and not the policy bill method
-
In the Employee Benefits Revenue Recognition Report, policies that have been billed will display the LOB that has been entered for the invoice/DBE rather than the LOB on the policy
-
The Employee Benefits Revenue Recognition Report will now exclude Un-billed Transactions from the report
-
The Employee Benefits Revenue Recognition Report new business was not showing in EB reports
-
In the Employee Benefits Revenue Recognition Report, the change checkbox default for Include un-billed Transactions will be checked
-
Automated Distribution was not pulling Agency Merge fields
-
My Agency Reports - The General Ledger field in the Production Analysis Report invoice was reporting an Inaccurate Month
20R1 Service Pack 3 (2020)
Defects Fixed
- Type of Business - Specific Primary Exec and Rep were not pulled from Customer Service Group setup
- The Broker did not carry over from Submission to Policy
- "Exclude from Download" did not carry over on rewrite
- There was an error when importing or exporting AL3 files and AL3 contained 5GNA
- There was an age calculation/rate issue with PS Equine
- Future installments did not print on invoices printed in batches
- There was a problem with saving Revenue Recognition Report templates
- Full-term increased premium alerts did not trigger for some downloaded policies
- DBE/statements are included in revenue (P&C)
- Un-billed Service Agreements were not displaying in P&C report
- Billed Service Agreements were not displaying in EB report
- Renewed/Expired/Canceled Policies A/R needed to be zero (P&C)
- Cancellation request followed by confirmation created extra row in EB
- Added fee commissions to Rev Rec Report (EB)
- Users can now aggregate all estimated Revenue premium transactions on the policy for DBE (P&C)
- LOB can now pull from Invoices for (P&C)
- Added Policy Estimated Revenue column to Rev Rec Report (EB)
20R1 Service Pack 4 (2020)
Defects Fixed
-
The Interdivisional Journal Entry was missing from the General Ledger Report for the Interdivisional Transfer General Ledger account
-
The Invoice number shortened unexpectedly when the number exceeded 8 digits
-
You were unable to resize the Create New Policy window
-
Fee Policies were missing from the Employee Benefit Revenue Recognition report
-
The Cancellation Transactions were repeating rows due to the Direct Bill Entry effective dates being changed in the Employee Benefit Revenue Recognition report
-
The Binding and Service % was not populating on the Employee Benefit Revenue Recognition report
-
You were unable to copy from the grid on the customer/policy assignment screen
-
The image file was broken when creating an activity from a text message with an attached .jpg
-
An Auto ID Card fix was introduced for previous mappings for fleet to 50TX (2018/09), 50TX (2020/01), and 51UT (2014/07)
-
There was some slowness when accessing the Associated Policy inside of a Service Agreement
-
Some Service Agreements were showing a double balance on the customer register view
-
The Prior Policy was not saving under the Basic Policy Information
-
You were unable to invoice Service Agreements without the Branch activated
-
Corrections on Invoices caused unnecessary extra transactions on the Commission Payable Statement
-
The Payment Import deposits were being applied to the Insured Accounts Receivable instead of the Broker Accounts Receivable
20R1 Service Pack 5 (2021)
Defects Fixed
-
The default commissions, in the billing for Executive under Billing Charges and Credits Changes, was getting lost during an upgrade
-
The Direct Bill Statement was duplicating policies in other pay plans
-
The Automated Jobs export was not being completed correctly
-
We introduced some performance improvements to the WorkSmart Online integration process with AMS360
-
The Estimated Revenue Percentage in My Agency Reports was not uploading to the Book of Business Report
-
Farm & Ranch were missing coverages after endorsement
-
The Import Deposits were not being applied to an account
-
We introduced roll back changes to the P&C Revenue Recognition report
-
You were unable to save a policy when a contact, with an international phone number, was being pulled from the Customer contacts
-
Additional event logging for Job Steps was not being displayed in the Agency Data Base
-
You were unable to edit or invoice Policies due to an Error: BRSuspendedBillingCondition(): Did not find INVBE row for the suspended billing
-
Automated Distribution Branch Merge Fields were not pulling correctly in the header & footer when Customer changes were being implemented
20R1 Service Pack 6 (2021)
Defects Fixed
- You were unable to update contacts in Internet Explorer
- All the claims downloads from United Fire Casualty were being rejected in AMS360 with the following error message:
- Error Saving Claim Data – Object Reference not sent to an instance of an object
- The My Agency Reports 19R2 release was showing the Cancellation Report Processes with 0 results
20R1 Service Pack 7 (2021)
Defects Fixed
-
Users were unable to download the AMS client through Google Chrome
-
All claims downloads from United Fire Casualty were rejecting in AMS360 due to an error: Error Saving Claim Data – Object Reference not sent to an instance of an object
-
The signature was printing below the signature line on the Agency Source check stock
-
In certain scenarios, the Sub-Customer Number (SC#) was duplicating unnecessarily on the invoice form for each line item in the invoice
-
The Automated Distribution Cust_GLBrLogo Merge Field was not populating correctly
-
Trust Transfer posted with unrelated journal entry or interbank transfer
-
In some instances, users were unable to create Trust Transfer
-
Errors while using AMS360 with the message Controller_003: An error occurred
-
Service Only Licenses could not be added if all Online Licenses were used
-
Policies with multiple Lines of Business would not export to WorkSmart
20R1 Service Pack 8 (2021)
Defects Fixed
-
Advanced invoices that were voided were not clearing out of receivable
-
Agencies were unable to complete a purge without the error message Purge was interrupted
-
The “On Account” balance appeared twice on the Customer Register
-
The ONS Queue Report displayed errors
-
Interdivision customer receipts appeared incorrectly—the interdivisional general ledger account was included in receipt vouchers and the bank deposit report doubled the receipt amount
-
In certain scenarios, the Sub-Customer Number was duplicating unnecessarily on the invoice form for each line item in the invoice
-
The Increased Full Term and Premium Alerts were not generating as expected
-
In certain scenarios, Trust Transfer was posting in error to unrelated Journal Entry
-
Trust Transfer displayed incorrect invoices based on the display option selection
-
Invoices were not pulling into Trust Transfer as expected
-
No downloads were being received for certain customer databases
-
We enhanced AMS360 Message logging for 20R1/20R2
-
The Production Analysis report experienced latency/not generating with high-record volume
-
The signature was printing below the signature line on the Agency Source check stock
20R1 Service Pack 9 (2021)
Defects Fixed
-
Invoice descriptions overlapped
20R1 Service Pack 10 (2021)
Defects Fixed
-
ePayPolicy Integration – Corrected the ability of a client user from one division to log into an ePay Account that was set up for another division
-
Automated Distribution - Line numbers were incrementing with each customer for questionnaire instead of re-starting
20R1 Service Pack 11 (2021)
Defects Fixed
-
SameSite - Added entries back into Hosts file
-
Communication service reconnecting in Chrome
-
Master description not updating holder descriptions when there are more than 25 holders
-
Rewritten Policies showing an unbilled amount on Employee Benefits Revenue Recognition Report
-
AMS360 Mobile users receive Uh Oh connection error when they attempt to select agency after logging in
-
Dev Portal - oData V22/V21/V20 – users are unable to update/change a Policy Transaction that has a Policy effective date greater than T00:00:00Z. It will continue to update the original Policy Transaction that has the effective date of T00:00:00Z.