Report: Service Agreement
You will have the ability to create a Service Agreement which may be associated with one or many policies, have service personnel commissions and multi-entity billing capability. You may then invoice customers for consulting and other service fees.
You can issue a standard or a multi-entity service agreement depending on your needs.
New Service Agreement
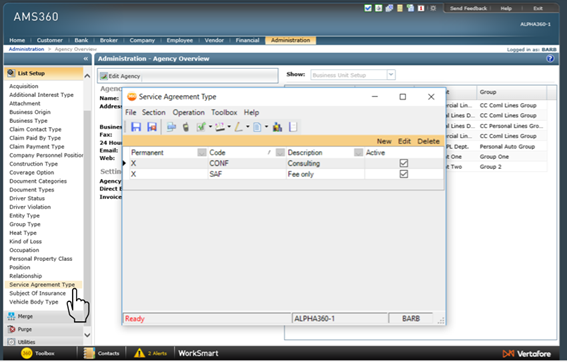
- In the Administration center, click Service Agreement Type under List Setup to either select the default types (consulting and fee only) or add a new type.
Admin Setup
- Choose a customer that you would like to set up a service agreement with in the Customer center.
- Check to see if the customer is labeled as Standard or Multiple Entities.
- Click Customer Overview in the Views section.
- Click Edit Customer and scroll down to the Multiple Entity Account Information drop-down. Here you will see if your customer is labeled as Standard or Multiple Entity.
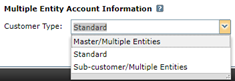
Multi Entity Account Info
Standard Service Agreement
- After selecting your customer, click Service Agreements under the Views section.
- If the service agreement does not appear in Views, click User Options and add Service Agreements to your Views section. Then click Save and Close.
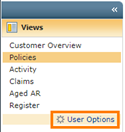
User Options
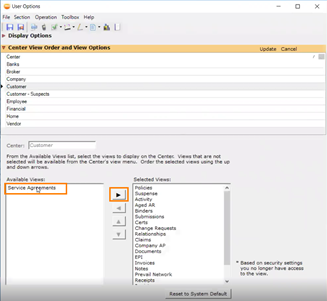
Adding Service Agreements
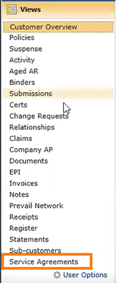
Views: Service Agreements
-
Click New Service Agreement.
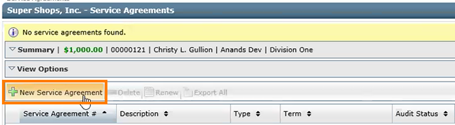
Customer: New Service Agreement
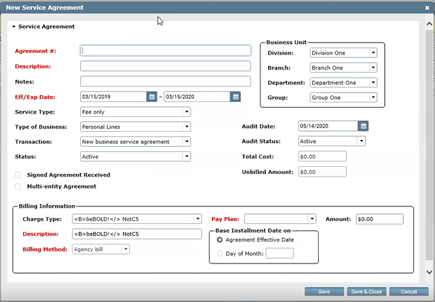
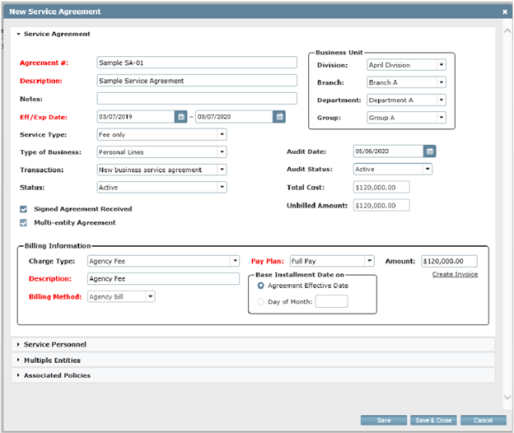
New Service Agreement form
- In order to continue you must fill in all fields highlighted in red. This information is crucial for filling out your service agreement.
- Fill in other information that you want included in your Service Agreement:
- Service Type
- Fee Only
- Consulting Only
- You can also add service types in the Administration center.
- Type of Business
- Transaction
- New Business Service Agreement
- Renew Service Agreement
- Business Unit
- This defaults from the business unit of the customer you are creating the agreement for.
- Audit Date
- Populates 60 days after the expire date
- Service Type
- If you have a contract with this customer, you can include that document by clicking the Signed Agreement Received checkbox.

Signed Agreement
-
Select a Charge Type (usually it will be Agency fee).
-
Once you have selected all your options, click Save. You may receive a warning asking if you want to create a Service Agreement that has NOT been flagged as a Multiple Entity Service Agreement. Click Yes.
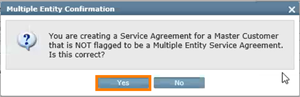
Multiple Entity Confirmation
- Two new options will appear at the bottom of the Service Agreement:
- Service Personnel
- Associated Policies
-
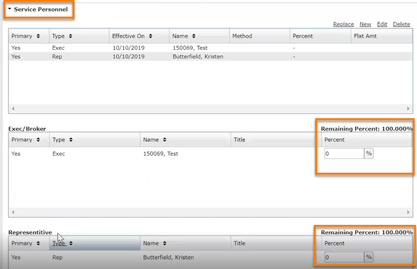
Click the Service Personnel drop-down. Here you will be able to assign employees to the Service Agreement as well as assign commissions.
-
Your options will default to the Primary Exec and Rep, but you are able to edit those options using the Replace, New, Edit and Delete buttons.
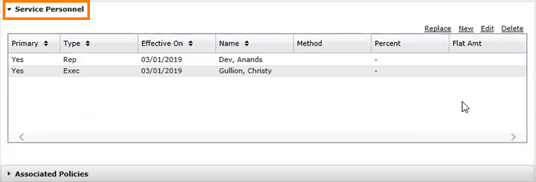
Service Personnel
-
If you click New, you can add personnel to your Service Agreement. Here you can designate your personnel and specify the commission fees. Click OK.
-
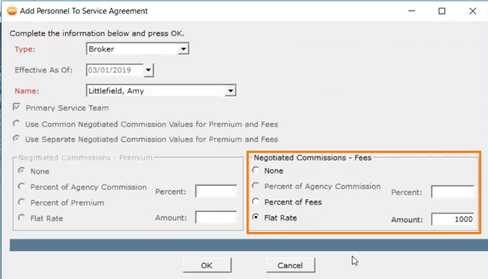
Add Personnel

New Service Personnel
|
You cannot delete a Primary Exec or Rep from the Service Personnel, but you can Replace both the Primary Rep and Exec. |
-
Click the Associated Policies drop-down. You can attach the policies that will need to be audited for the Service Agreement. Begin by clicking New.

Associated Policies
-
Select the policies you want to include and then click Add. You can add as many policies as you want. When finished, click Save.
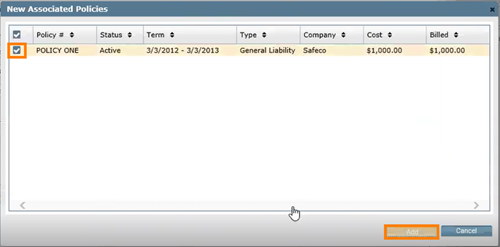
Add Policies
-
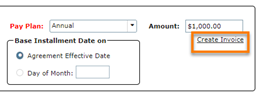
Once you have filled out your service agreement and click Save, you will notice the Create Invoice option under the Billing Information section. Click Create Invoice when you are ready to invoice your Service Agreement.

Create Invoice
-
If you’re satisfied with your Invoice, you can proceed to Post it. Finally Save and Close your New Service Agreement.
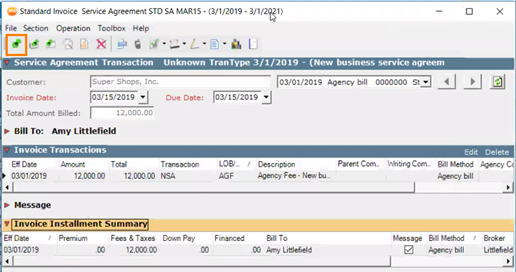
Post Invoice
-
You will now see your new Service Agreement and any associated policies you attached.

New Service Agreement
Multi Entity Service Agreement
- You have the option to make this a multi-entity agreement if you have more than one party involved in the Service Agreement.
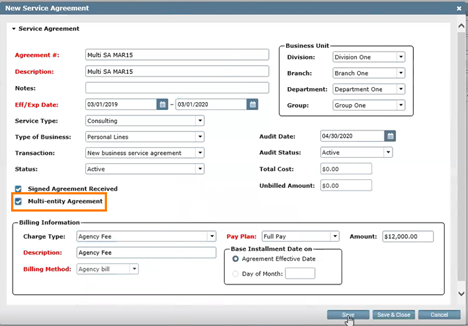
Multi-entity Agreement
-
Once you have filled in your Service Agreements information and click Save, you will notice three drop-downs at the bottom of the agreement.
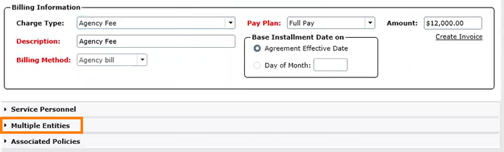
Multiple Entities Drop Down
-
After reviewing your Service Personnel and Associated Policies sections, click the Multiple Entities drop-down.
-
Here you can:
-
Track your receivable at the:
-
Sub-customer Level
-
Master Customer Level
-
-
Split the Amount
-
Add a New Multiple entity
-
Delete a Multiple Entity
-
-
-
When getting started, click New.
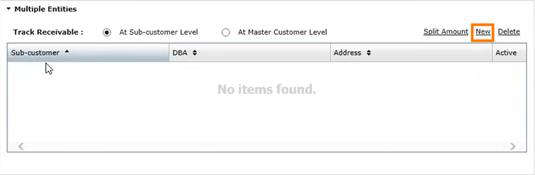
New Multiple Entity
-
Check the box next to the customers you want to include in your multi-entities agreement. Then click Add.
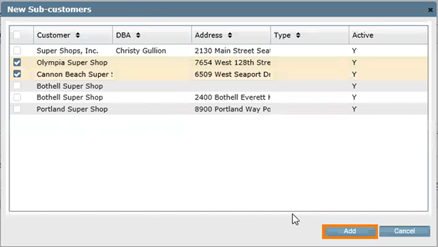
Adding New Customers
-
You will see your sub-customers in the report. You can now click Split Amount to decide how the Service Agreement will be paid.
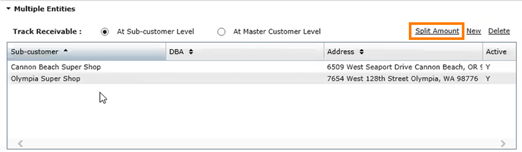
Split Amount
-
Enter the amount you want each customer to pay so that it equals out to the Total Amount. When the Remaining Amount says $0, you then click Save and Close.
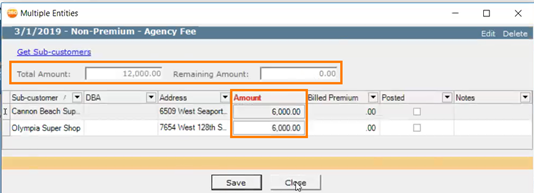
Total Amount
-
Go on to Create Invoice and finish your New Service Agreement.
-
In your Invoice, you will see the multi-entities and their fees/taxes. When finished, Post your Invoice.
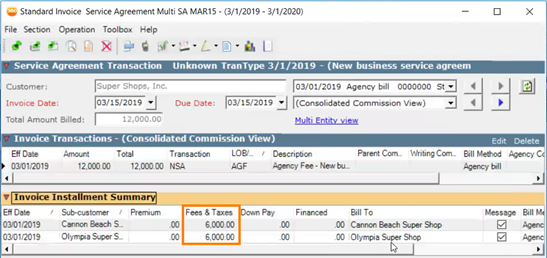
Create/Post Invoice
RUN AN INVOICE REPORT
-
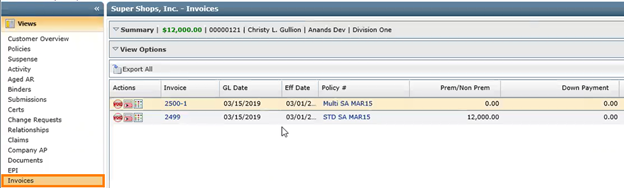
In the Views menu, click Invoices. Select the invoice you just created in order to view the invoice report.
Run and Invoice Report
-
You will notice the Service Agreement on the Invoice.
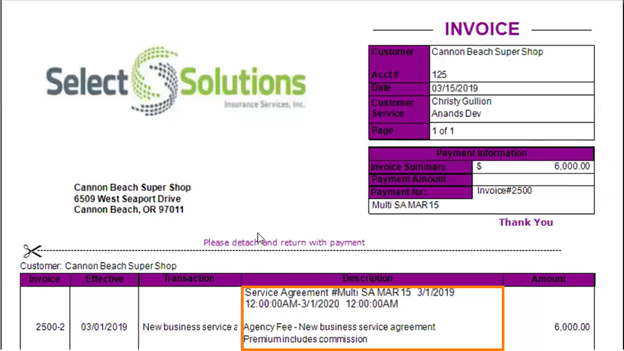
Invoice with Service Agreement
NEW STATUS TYPES
-
You will now have more options when selecting a Status type on a Service Agreement.
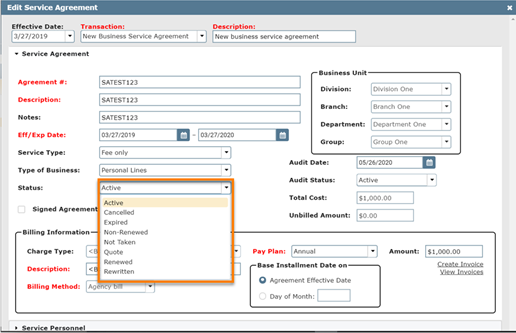
Service Agreement: Status
ENDORSE
-
You will now have the ability to endorse a Service Agreement.
-
Once in the Customer Center, navigate to the Service Agreements section, click and highlight a service agreement and then click on Endorse.
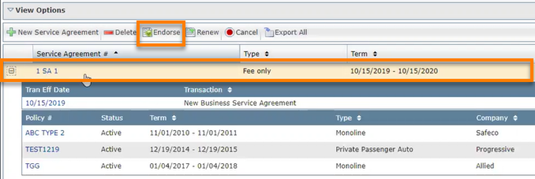
Service Agreement: Endorse
-
Enter a Transaction type, Effective Date and Description for your Endorsement. Finally click on OK.
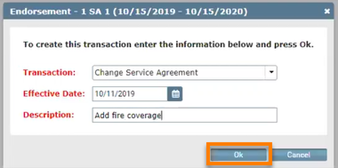
Service Agreement: Endorse
RENEW
-
You will now have the ability to renew a Service Agreement.
-
Once in the Customer Center, navigate to the Service Agreements section, click and highlight a service agreement and then click on Renew.
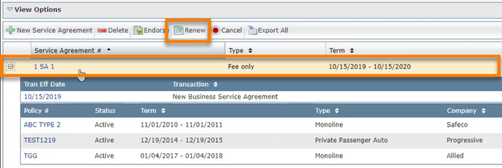
Service Agreement: Renew
-
In the Renew Service Agreement winform, you will see that the Eff/Exp Date auto populates with the next calendar years info. Fill in the rest of the relevant info and click on Save & Close.
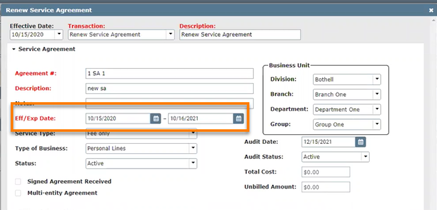
Service Agreement: Renew
CANCEL AND REINSTATE
-
You will now have the ability to cancel or reinstate a Service Agreement.
-
Once in the Customer Center, navigate to the Service Agreements section, click and highlight a service agreement and then click on Cancel.
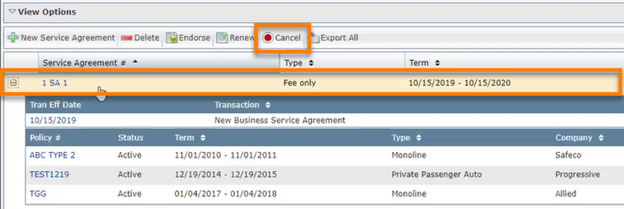
Service Agreement: Cancel
-
Enter a Transaction type, Effective Date and Description for your Cancellation. Finally click on OK.
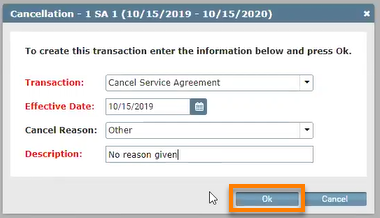
Service Agreement: Cancel
-
To Reinstate a canceled Service Agreement, click and highlight the canceled service agreement then click on Cancel.
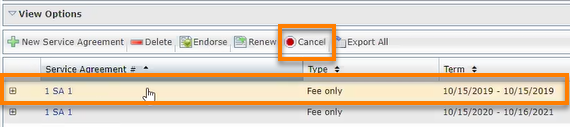
Service Agreement: Reinstate
-
In the cancellation winform you have the option to choose Reinstate Service Agreement in the Transaction drop down. Enter an Effective Date and Description for your reinstatement. Finally click on OK.
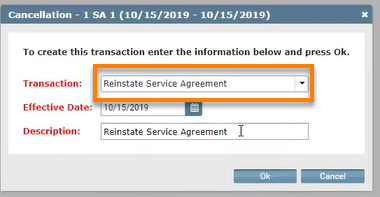
Service Agreement: Reinstate
-
In the Customer center, select a Customer. In the Service Agreements section, click New Service Agreement.
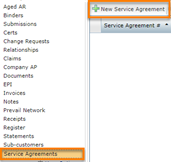
Service Agreements
-
In the New Service Agreement winform, fill in the required info and click Save.
-
Expand the Service Personnel dropdown to see the production credit section.
Service Agreement: Production Credit
-
From here you can add, edit or delete your executives, brokers and representatives on your service agreement. You can also assign production credit by clicking the Percent box.
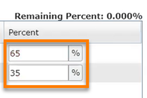
Production Credit
-
Scroll up and click Create Invoice to make any final adjustments on your invoice. Click Post to finish your Service Agreement.
Create Invoice
Production Credit Report
-
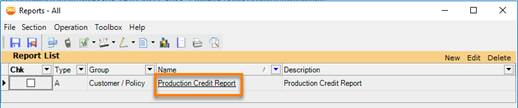
Open up Classic Reports, search for and click the Production Credit report.
Production Credit
-
Fill in the relevant information in the Production Credit winform, then click Generate. You will be taken to the Production Credit Report in Excel.
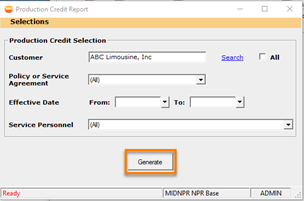
Production Credit Report
Before
The Service Agreement Detail report did not contain the Customer Number.
Now
Service Agreement Detail (Classic Report) now has a column that displays Customer Number.
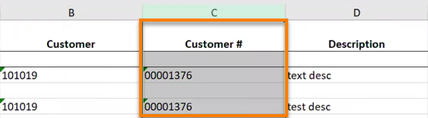
Customer # column
-
From AMS360, click the Toolbox and then click Classic Reports.
-
Click the Name drop-down and scroll down to click Service Agreement Detail.
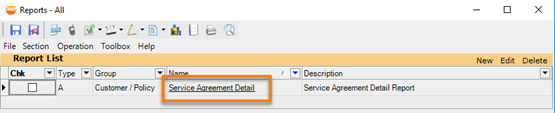
Service Agreement Detail
-
Fill in your info and click on Generate. You’ll now see a new column in your report for Customer #.
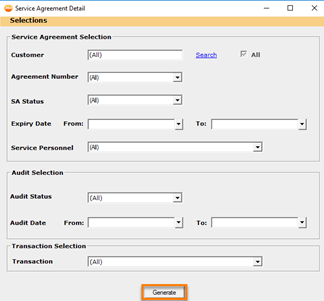
Service Agreement Detail: Generate