In this topic, we continue our discussion of theCompany table located on the Tables Menu.
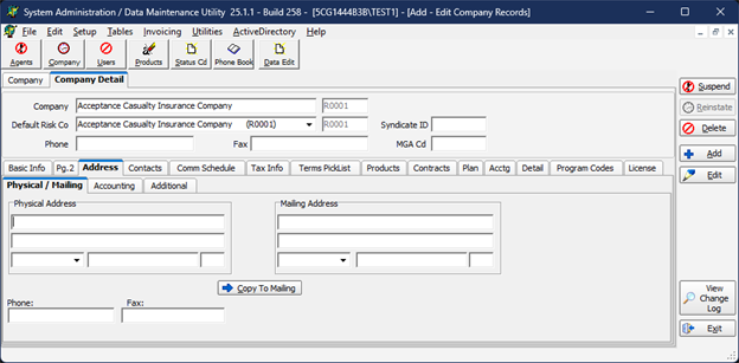
The Address tab is used to enter physical and mailing addresses for the company that you are adding or editing. You can also enter an accounting address for accounting related business. Additional addresses for the company may also be created.
- In the Physical Address box, type the physical address for the company.
Two lines are allotted for the street address. Typing the zip code causes the city and state fields to populate automatically. As an alternative, you can type the zip code, city, and state. - In the boxes listed next, enter the information related to the accounting correspondence address.
- Phone – main phone number
- Fax – main fax number
- Click Copy To Mailing to duplicate the physical address in the Mailing Address box.
Alternatively, you can type the mailing address if it is different than the physical address.
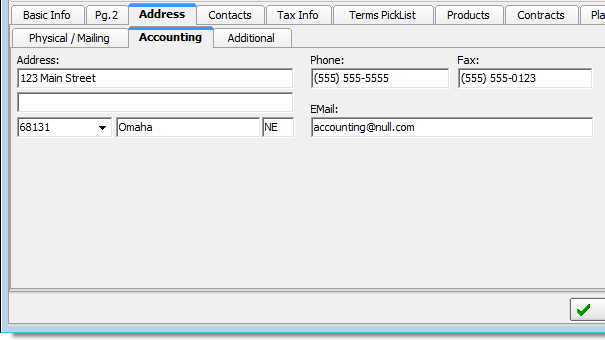
- In the Address box on the Accounting tab, type the physical address that is related to the accounting related correspondence for the company.
Two lines are allotted for the street address. Typing the zip code causes the city and state fields to populate automatically. As an alternative, you can type the zip code, city, and state. - In the boxes listed next, enter the information related to the accounting correspondence address.
- Phone – main phone number
- Fax – main fax number
- E-mail – main e-mail address
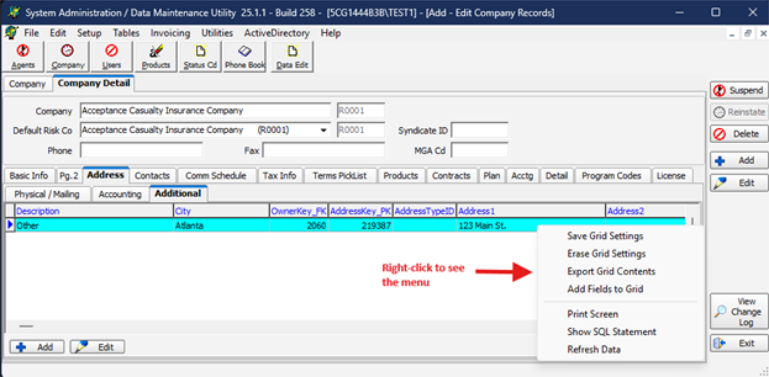
- On the Additional tab, click the Add button to add a new address or click Edit to alter an existing address entry.
Alternatively, you can right-click anywhere in the grid to see the menu. We will show you how to add a new address. This information can also be used to edit an address.
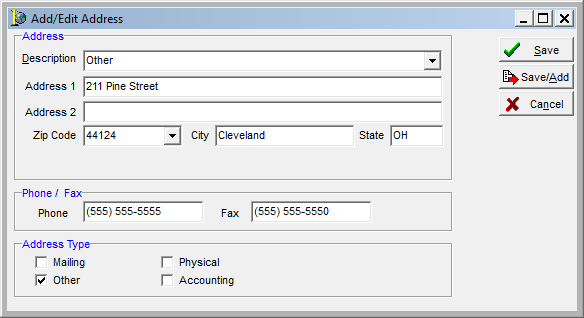
- The additional address information is entered (or changed) in the Address pane of the Add/Edit Address dialog box.Enter the necessary information in the boxes based on the descriptions that follow.
- In the Description list, select the category that most closely matches the purpose of the address.
- Enter the address in the Address 1 and Address 2 boxes.
- Enter the zip code in the Zip Code box.
The City and State boxes will be completed automatically after the zip code is entered.
- In the Phone/Fax pane, enter the numbers listed next associated with the additional address.
- In the Address Type pane, select the descriptions that apply to this address.
For example, select Other and Accounting to specify that this is a secondary accounting address. - Click Save to save your changes, or click Save/Add to save your changes and begin adding another address.
Click Cancel to close the Add/Edit Address dialog box without saving your changes.
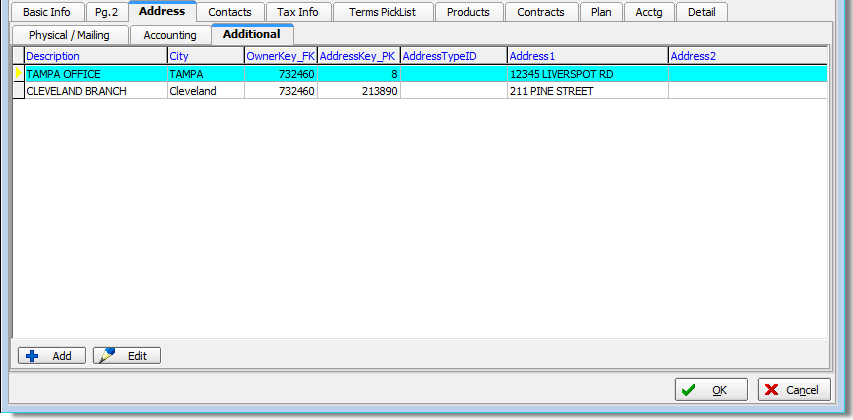
Once an address has been added, it appears on the Additional tab in the grid. The grid is divided into rows and columns. The columns on the Additional tab are as follows:
Description – Address description you selected earlier.
- City – City in which the address is located.
- OwnerKey_FK – Unique identifier used to associate the address with a company in the database.
- AddressKey_PK – Unique identifier used to identify the address in the database.
- AddressTypeID – Address ID code used in the database.
- Address1 – First line of the address.
- Address2 – Second line of the address