Setup Firewall
The AIM firewall is used to manage access to specific teams and organizations within your Agency Information Manager (AIM) environment. The firewall is configured in Data Maintenance Utility (DMU), but must first be enabled in your AIM database.
If you require assistance making the necessary changes to your database, please contact Vertafore Support for the AIM product.
In the following steps, we will discuss how to configure user access to teams and organizations using the firewall. The configuration settings impact how people using AIM are able to access information across teams and divisions.
Areas of AIM affected by firewall changes are:
- The grid located on the Main tab
- Advanced Search
- Clearance Search
- Renewal Manager
- Enable the firewall in your CIS database.
- Once the firewall is activated in your database, start the DMU application.
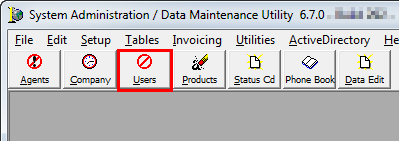
- On the speed bar click the Users button.
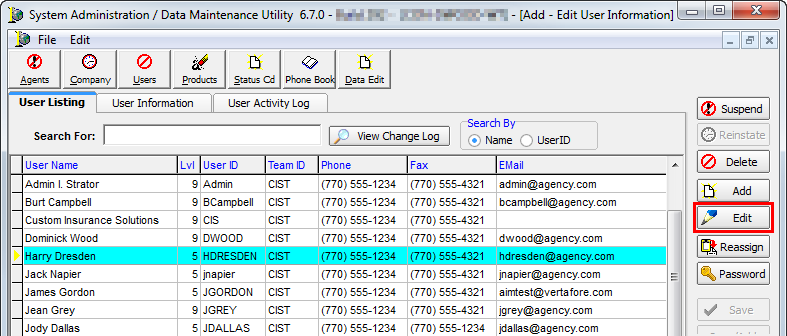
- On the User Listing tab, select the required user, and then click Edit.
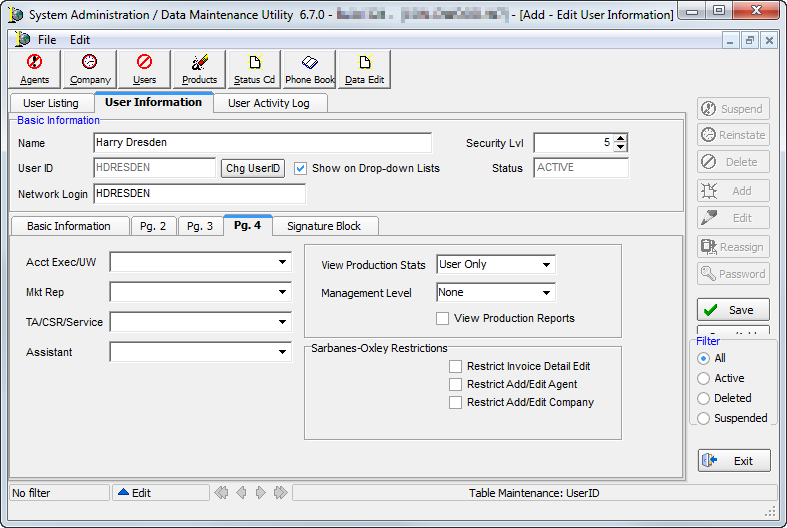
- On the User Information tab, click the Pg. 4 tab.
- In the View Production Stats box, click to select the user’s ability to view production statistics for:
- User Only – user sees only her own work
- Team – user can see her team and any team to whom access is granted via the firewall
- Division – user can see work in her division and, if granted access to another team via the firewall, all work for that team
- All – user can see all work across all teams and divisions in the organization
- In the Management Level box, select the user’s management level. Choose from:
- Agency
- Team
- Division
- None
- Click Save to save your changes.
A security token has been added to the AIM Active Directory integration that can be used to configure which teams have access to other teams in AIM. If you want to enable this token, you can use the steps below as a guide.
- On the Active Directory menu, click Role Manager.

- In Role Manager, select the required security role.
- In the Security rights for selected role pane, click
 to expand the AIM node.
 - Click
 to expand the Tools node.
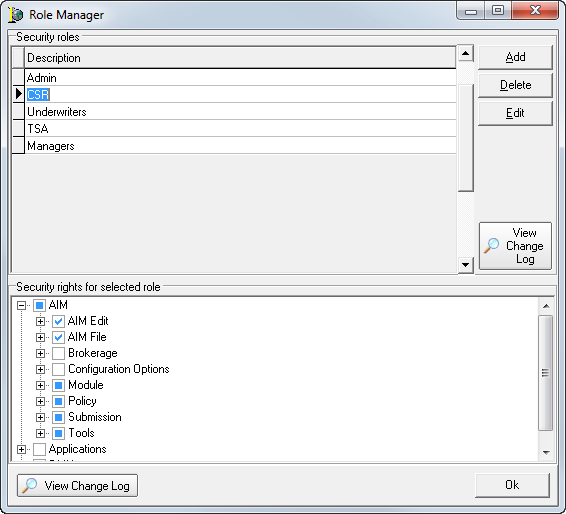
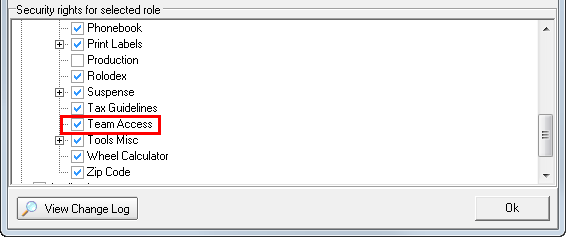
- Click in the box to select Team Access.
- Click OK to save your changes and close Role Manager.

|
Refer to Active Directory Menu for more information regarding how to configure AIM Active Directory integration. |
