In this topic, we continue to show the commands located on the Setup Menu.
Integration between AIM and ImageRight version 3.x is a process that consists of using the ImageRight Linker application to configure the appropriate file structure mapping between AIM and ImageRight. You can use our examples below to configure those mappings.
Fully configuring AIM and ImageRight integration is not within the scope of this document. We recommend that you seek assistance from AIM or ImageRight product support to fully configure integration.
This section will focus on the setup of the AIM side of the ImageRight Linker Setup and how the settings and controls in DMU are used.
Settings in the ImageRight Linker Setup dialog box are used to map values stored in the AIM database to values used by the ImageRight system. This is done to give you the ability to create and modify files in ImageRight to match files used in AIM.
- In the Configuration list, select the type of configuration used by your ImageRight system.
- Submission/Policy File – Quote centric format wherein each AIM quote number is used as the file number in the ImageRight system.
- Submission/Policy Folder – Client centric format wherein each insuredID, that is, the insured name, is used as the file number in ImageRight.
- In the Location list, select the criteria that will be used to specify the location in the ImageRight system. For example, you can select *TEAMID to use the team ID as the location (see Adding a Team).
Alternatively, you can select Hard Coded and enter the location name in the Value box to use a value of your choice. - In the Drawer list, select the criteria that will be used to specify the drawer to be used in the ImageRight system or select Hard Coded and enter a valid ImageRight drawer in the Value box.
- In the File Type list, select the criteria that will be used to specify the file type in the ImageRight system.
For example, you can select *CoverageID to use the coverage ID as the file type in ImageRight. Alternatively, you can select Hard Coded and enter a valid ImageRight file type in the Value box. - In the File Name list, select the criteria that will be used to specify the file name in the ImageRight system.
For example, you can select *NamedInsured to use the name of the insured as the file name in ImageRight. Alternatively, you can select Hard Coded and enter a file name in the Value box. - Select the Create IR File on New/Renewal option to present a message to the user with an option to create a new ImageRight file when processing a new submission or a renewal.
- In the Location ID box, type the location ID from ImageRight. If no locations are being used in ImageRight, a –1(minus1) must be entered as the location ID.
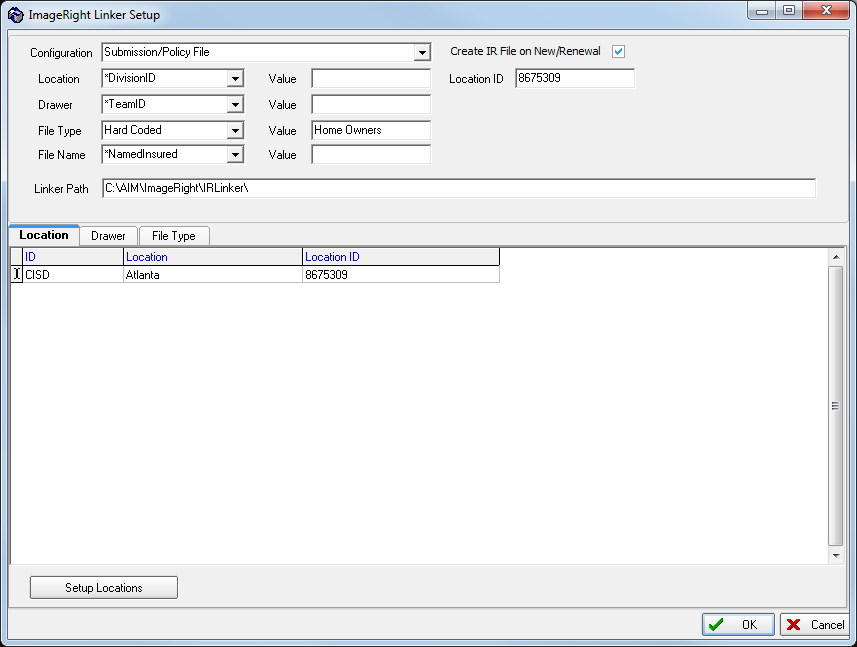
- In the Linker Path box, type the path to the IRLinker.exe file. If the IRLinker.exe file is in the default directory leave the Linker Path box blank. The default directory for the IRLinker.exe file is located here:
C:\Program Files\ImageRight\Clients\
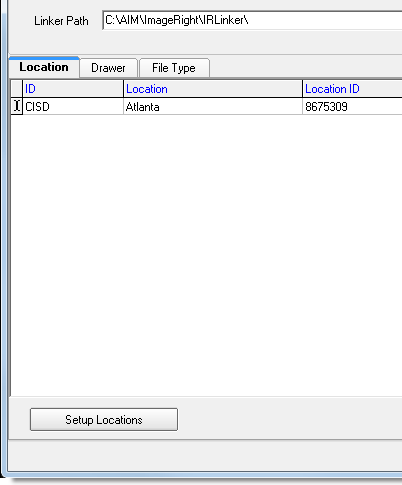
- On the Location tab, click Setup Locations to setup ImageRight locations automatically using the location settings that you entered earlier. For example, if you selected *DivisionID in the Location list, your divisions will be listed as locations on the Location tab (see Adding a Division).
- In the Location column, type the name of the location as it appears in ImageRight Enterprise Management Console (IEMC).
- In the Location ID column, type the location ID from IEMC or type –1(minus1) if no locations are configured in IEMC.

|
If locations are configured in IEMC, you must use the exact same location name and location ID in the ImageRight Linker Setup. |
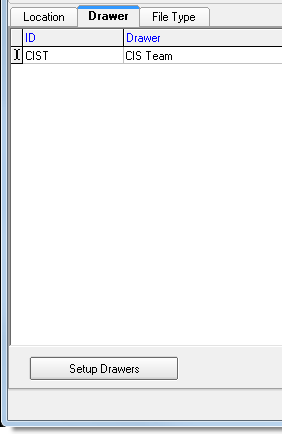
- On the Drawer tab, click Setup Drawers to automatically configure your drawers based on the selection that you made in the Drawer list earlier.
If you selected the Hard Coded option, type the drawer ID in the ID column. - Type the name of the drawer in the Drawer column.
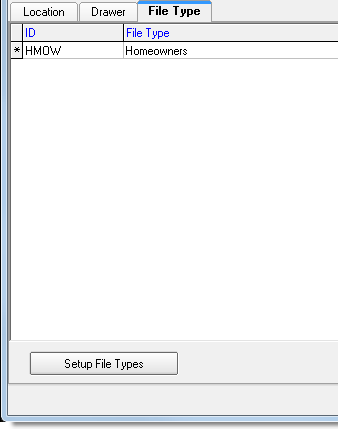
- On the File Type tab, click the Setup File Types button to automatically configure file types based on the selection that you made in the File Types list earlier.
If you selected the Hard Coded option, type the file type ID in the ID column. - Type the name of the file type in the File Type column.