Implement User Defined Tables
In the steps that follow, we show you how to implement user defined tables in AIM.
Note: It is recommended that you try this first in a test environment. You should always ensure that you have a full backup of your database before making changes to the production database.
- Open SQL Server Enterprise Manager.
- Locate your production server.
- Expand the server container.
- Expand the DB container.
- Expand the CIS container.
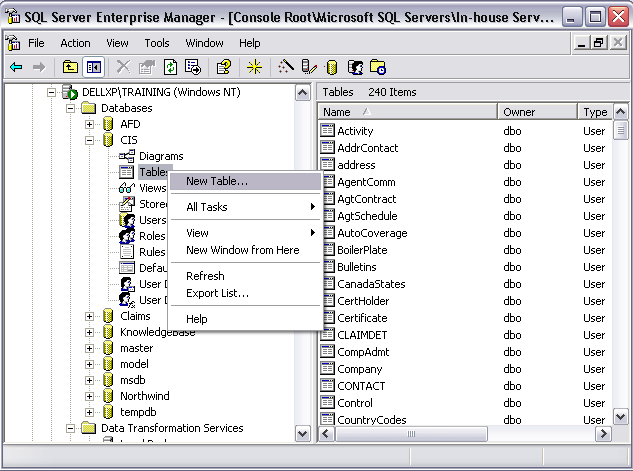
- Right click on the tables container and select New Table.
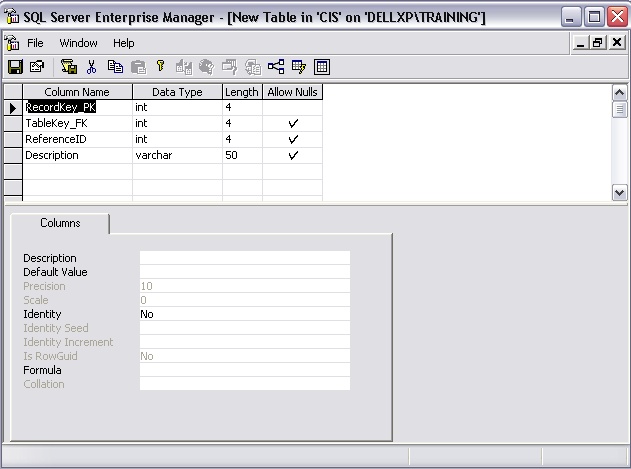
- Create a new SQL table, containing the fields that you want to define in addition to below required fields. None of the fields below should have the Identity property enabled.
| RecordKey_PK | This is the unique identifier for each record |
| TableKey_FK | This is the link to the type of table |
| ReferenceID | This is the link to the submission/quote table |
| Description | Description of the record being added |
Add other fields as needed,
Note: When defining the description of the field, do not use blank spaces between words – use an underscore.
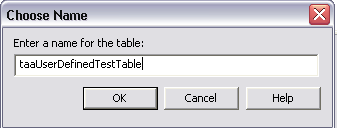
- Save the SQL table. Enter the table name when prompted to do so, making sure the name does not exceed 50 characters.
- Next, log on to AIM and open the Submission Entry dialog box.
- Press the Add button on the User-Defined tab.
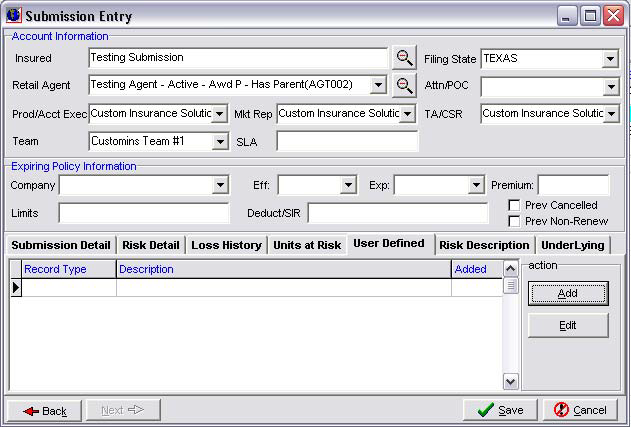
- A list of available user-defined tables will appear on this screen. If no user-defined table is available, click Add.
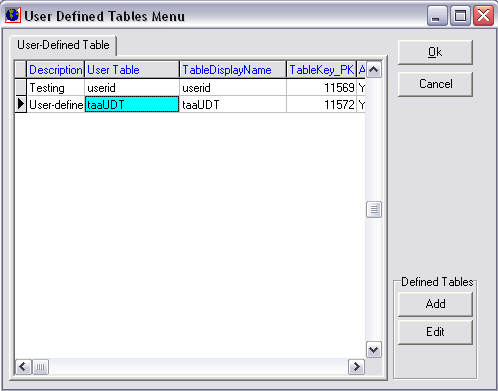
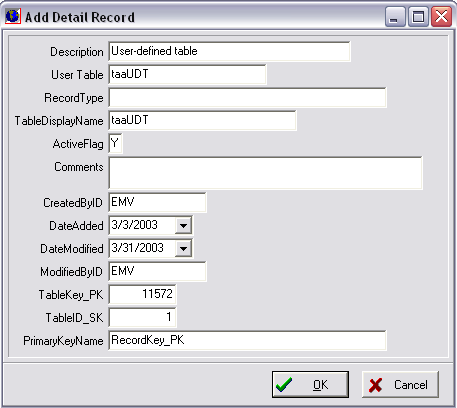
When pressing the Add button, the Add Detail Record is retrieved, allowing you to define/describe the SQL table created in step 8. Once saved, this user-defined table becomes available for selection via any submission.
- In the Description field enter a description of the table.
- In the User Table field enter the name of the SQL table defined in step 8.
- In the RecordType field enter the description of this record as you want it to display in the User Defined record grid on the Submission Entry dialog box.
- In the TableDisplayName field enter the display name of this table as you want it to appear in the User Defined record grid on the Submission Entry dialog box.
- In the PrimaryKeyName field enter the text “RecordKey_PK”.
- In the TableKey_PK field AIM will automatically assign a value. Do not enter any data here.
- In the TableID_SK field enter a random number that will differentiate one user-defined table from another. This number must not be a duplicate of other tables that you have created.
Note: If the TableID_SK field in the taaUserDefinedTables table has the Identity option enabled, do not worry about assigning a value to this field from this screen (or at all).
- Click OK to save the table definition and revert to the User Defined Tables Menu dialog box.
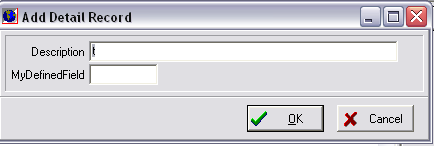
- Highlight the table you just defined and click OK. A screen displaying all your user-defined fields of the SQL table you created in step 8 of this guide will be displayed.
- Enter all necessary information.
The Description field can contain up to 50 characters describing the record.
-
Click OK to save the record.
From this point forward you can create a record on any submission for the user-defined table created above. You can repeat the steps outlined in this guide to add additional tables.