In this topic, we continue our discussion of the commands located on the Invoicing Menu.
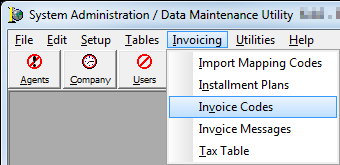
Invoice transaction codes are used throughout AIM to define the fees, premiums, and tax types to be used on invoices in AIM. The Invoice Codes menu command is used to manage the invoice transaction codes in your AIM system.
- On the Invoicing menu, click Invoice Codes.
Invoice transaction codes are displayed on the Table tab of the Add/Edit Invoice Transaction Codes dialog box, using the grid layout.
The following table explains the various buttons that appear in the Add/Edit Invoice Transaction Codes dialog box and their functions.
| Button | Function |
|---|---|
|
|
Add a new invoice transaction code |
|
|
Edit an existing invoice transaction code |
|
|
Copy the selected invoice transaction code data for insertion into a new code |
|
|
Delete the selected invoice transaction code |
|
|
Print a list of all invoice transaction codes |
|
|
View the change log |
|
|
Close the Add/Edit Invoice Transaction Codes dialog box |
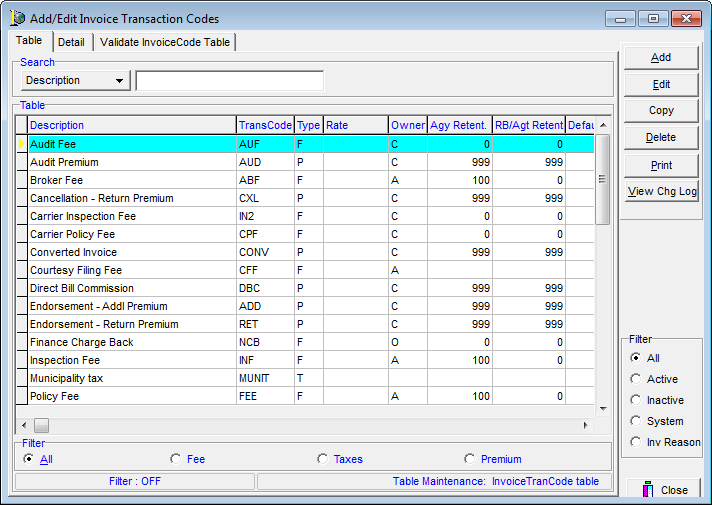
We will show you how to search for invoice codes, how to filter the search results, and how to add a new invoice transaction code. You can use the information provided to edit existing invoice codes as needed.
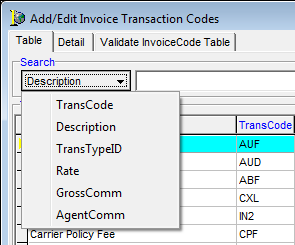
- Click
 on the Description button to change the search operator.
Click one of the following options:- TransCode – three character invoice transaction ID code
- Description – name or description of the transaction code
- TransTypeID – single character transaction type ID code
- Rate – flat amount or percentage that is used in calculating the amount
- GrossComm – gross commission percentage
- AgentComm – agent commission percentage
- In the text box, type the search parameter based on the selection that you just made.
For example, if you selected Description, type the description of the invoice transaction code in the text box.
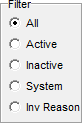
- In the Filter pane, located on the right side of the Add/Edit Invoice Transaction Codes dialog box, select one of the following filter options:
- All – All invoice codes are displayed.
- Active – Only active codes are displayed.
- Inactive – Only inactive codes are displayed.
- System – Only codes that are required by AIM are displayed.
- Inv Reason – Only codes marked with an invoice reason appear in the grid.
- In the Filter pane, located at the bottom of the Add/Edit Invoice Transaction Codes dialog box, select a filter method to view only specific types of codes. Choose from the following filters:
- All – All codes are displayed.
- Fee – Only codes for fees are displayed.
- Taxes – Only codes for taxes are displayed.
- Premium – Only codes for premiums are displayed.
![]()
- Click the Add button to add a new invoice transaction code.
- To use an existing code as a starting point, select the code on the Table tab, click Copy, and then modify the code as needed.
- To change or delete an existing code, select the code on the Table tab, then click Edit or Delete. You can modify our steps as needed to change an existing code.
- Enter the properties of the transaction code on the Detail tab.
- In the Transaction Code pane, enter:
- Name – transaction code name
- Box (unlabeled) next to the name – three letter transaction ID code
- Type – select the transaction code type
- Fee
- Premium
- Tax
- Active – makes the code active in AIM.
- Invoice Reason – information that will appear in the Reason field on the Invoice Transaction Header dialog box in AIM. If the option is selected, you must type a reason in the Invoice reason box.

|
The type of invoice that you create is reflected in the Type column on the Table tab: Fee = F, Premium = P, Tax = T. |

|
The System Required option makes the invoice transaction code a system requirement. You should only select this option under the direction of AIM product support. |
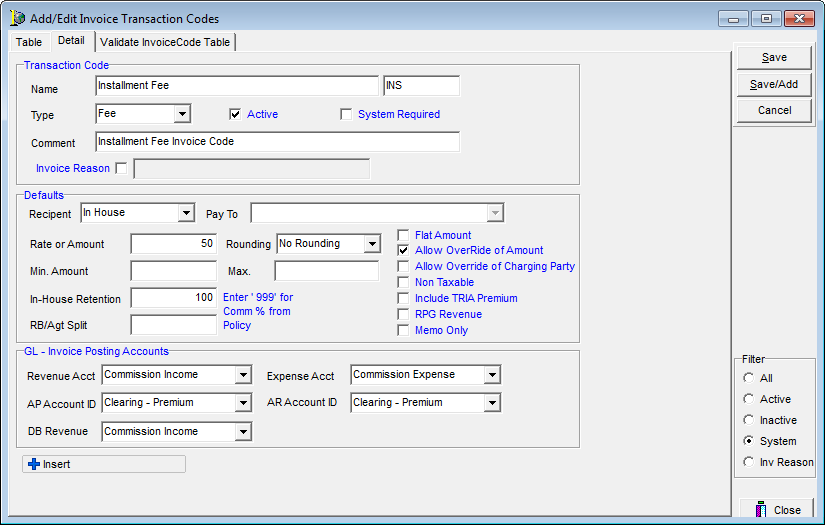
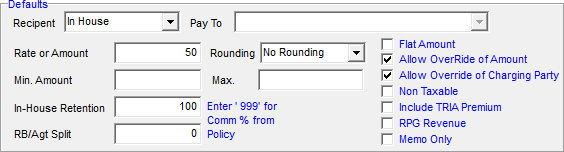
- In the Defaults pane, enter:
- Recipient – entity that will collect the invoice you are adding
- Company
- In house (your agency)
- Not applicable
- Other
- Pay To – company that will be receiving payment (available only when Other is selected in the Recipient list)
- Rate or Amount – flat rate or dollar amount to be charged for the invoice item, if applicable
- Rounding – method of rounding to be applied to the rate
- No Rounding
- Round up to Whole Dollar
- Round to Whole Dollar
- Min. Amount – minimum dollar amount to be applied if a percentage is used in the Rate or Amount box. Enter 999 to use the commission percentage from the policy.
- Max. – maximum dollar amount to be charged if a percentage is used in the Rate or Amount box. Enter 999 to use the commission percentage from the policy.
- RB/Agt Split – agent's commission percentage amount. Enter 999 to use the commission percentage from the policy.
- Flat Amount – makes the amount in the Rate or Amount box a dollar amount rather than a percentage.
- All Override of Amount – users will be able to change the default amount in the AIM Quote dialog box.
- Allow Override of Charging Party – users will be able to change the Paid To field in the AIM Fee Schedule dialog box.
- Non Taxable – transaction will not be taxed.
- Include TRIA Premium – Terrorism Risk Insurance Act premium will be included.
- RPG Revenue – Risk Purchasing Group revenue, if applicable
- Memo Only – invoice transaction code will be on the quote and binder but not on invoices.
- Recipient – entity that will collect the invoice you are adding
- In the GL - Invoice Posting Accounts pane, enter:
- Revenue Acct – revenue account that invoices will post to
- Expense Acct – expense account that invoices will post to
- AP Account ID – accounts payable account that invoices will post to
- AR Account ID – accounts receivable account that invoices will post to
- DB Revenue – direct bill revenue account that invoices will post to
|
|
Revenue, AP, DB Revenue, Expense, and AR accounts are maintained in the Admin module of AIM Accounting by editing the Chart of Accounts. To cause an account to appear in lists in the GL - Invoice Posting Accounts pane, the Insurance Specific option must be selected for the account when editing the Chart of Accounts. |

- Click:
- Save to save your changes.
- Save/Add to save your changes and retain the dialog box for adding another mapping.
- Cancel to abandon your changes without saving.
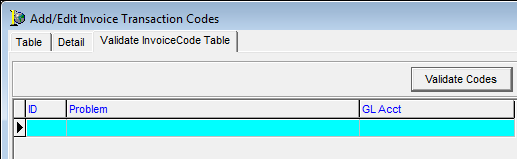
- Click the Validate Invoice Code Table tab.
- Click the Validate Codes button.
- Verify that the GL accounts and pay to companies that you specified on the Detail tab are valid. If a posting account is missing, it will be reported in the grid.