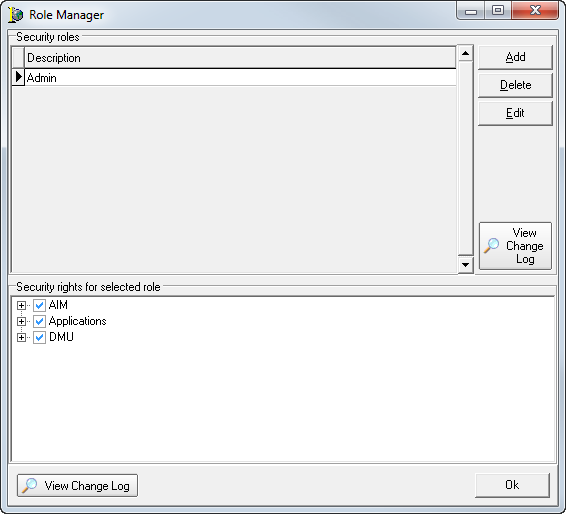
The Role Manager command, located on the Active Directory Menu menu, is used to add AIM security roles and assign rights to those roles.
- On the ActiveDirectory menu, click Role Manager.

- Use the
buttons described below to manage roles in Role Manager.
- Add – add a new role
- Delete – delete the selected role
- Edit – modify the name of the selected role
- View Change Log:
- The top button is used to view the change log for security roles.
- The bottom button is used to view the change log for changes to rights selection.

- In the
Security rights for selected role pane, select rights
for the applications and controls within the applications to which the
role that you are creating has access.
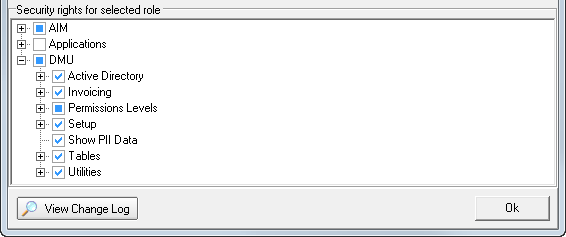
- AIM – specific AIM application rights
- Applications – Logon rights to AIM, DMU, and Process Manager applications and modules
- DMU – specific DMU application rights
- Click
 to expand a node
and explore the options within. You can also select the top level of a
node to select all options below it.
 – Indicates
that the right is selected, or if used at the top level of a node, it
indicates that all rights nested within the node are selected.
 – Inidates that only some of the nested rights are selected.
 – The right is not selected, or if used at the top level of a node, none
of the nested options are selected.

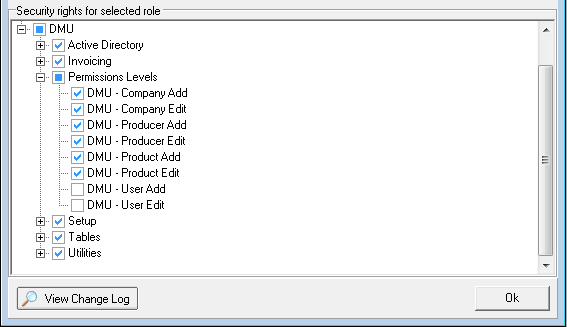
- If you need to assign rights to add or edit companies, producers, or users in DMU, expand the Permissions Levels node and select the applicable rights.

|
If the role has rights to a table in DMU, but does not have add or edit rights to that table, the table will be read-only. |
- Once you have selected the applicable rights for the role, click OK to close Role Manager and save your changes.
