Client Details
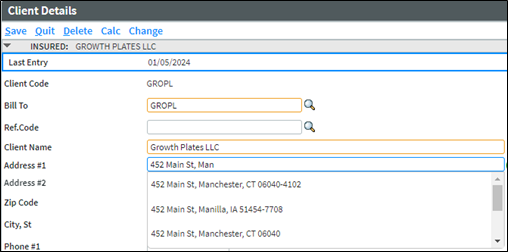
On the Client Details page, valid addresses will be displayed in a drop-down menu after typing two characters in the Address #1 field. Continue typing until the desired address is shown. Select the address to pre-fill the Address #1, City, State, and ZIP Code fields. The Address #2 field does not typically populate from Melissa Data, but that information may be added manually.
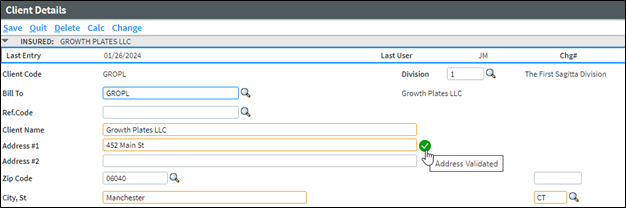
After the address field is populated, the check mark next to the address will turn Green. Hover over the check mark to display a tool-tip of Address Validated.
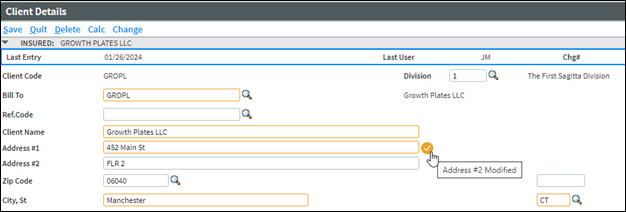
The check mark will turn Yellow when Address #2 is entered. Hover over the check mark to display a tool-tip of Address #2 Modified.
The check mark will turn Gray when the Address #1, City, State or ZIP Code fields are modified, or when a user bypasses the various drop-down options and manually enters the address. Hover over the check mark to display a tool-tip of Address Not Validated.
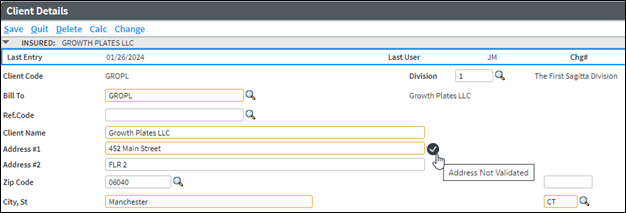
If an Address in the Client Details and Additional Interests page is not previously validated but is a valid address presented in Melissa Data, clicking on the check mark will validate the address by turning it Green.