Sagitta 2017 R2.3.0 Release Notes
Vertafore is pleased to release Sagitta 2017 R2.3.0. With each release, we are incrementally improving and updating Sagitta to provide you with the best possible experience.

|
Customers need to configure and provision the Vertafore eForms feature, even if they do not intend to have their users use the feature at this time. |
The following table summarizes the most important enhancements in this release:
|
Enhancement |
Description |
|---|---|
|
Auto ID Cards |
The replacement for Classic auto ID cards is now available. |
|
Mapping Guides for Vertafore eForms |
Guides in Help show the source and target of data from Sagitta in Vertafore eForms. |
|
Password Reset |
Users can reset their own passwords |
|
Import and Export |
The process has been modernized |
For information about recommended and supported system configurations for all Vertafore products, see the Supported Configurations Matrix (DOC822 on My Vertafore). You must be registered with My Vertafore and signed in to access this document.
For optimal performance of the application, we recommend the following as a minimal workstation configuration:
|
Hardware/Software |
Minimum Requirements/Recommendations |
|---|---|
|
Processor/CPU Speed |
Recommended: i5, i7 or Multi-core: 2.6 GHz or above Minimum: Core 2 Duo: 2.3 GHz or above Not Supported: Single Core, Reduced feature CPUs such as Celeron or AMD Sempron |
|
Memory |
Recommended: 16 GB Minimum: 4 GB |
|
Hard Drive Space |
Minimum: 150 MB of local disk space per user |
|
Video |
Minimum: Resolution 1024x768 with 16-bit high color or better |
|
Operating System |
Recommended: Microsoft Windows 7 (64 bit) Minimum: Microsoft Windows 7 (32 bit) |
|
Microsoft Office (Word, Excel) |
Recommended: Microsoft Office 2016 Professional Minimum: Microsoft Office 2010 Professional |
|
Microsoft Internet Explorer |
Recommended: Microsoft Internet Explorer 11 Minimum: Microsoft Internet Explorer 11 |
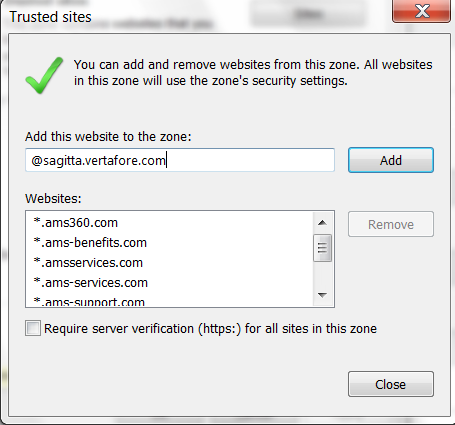
Sagitta 2017 R2 requires a new entry to your Microsoft Internet Explorer trusted site list. (Internet Explorer Settings > Security > Trusted Sites > Sites)
@sagitta.vertafore.com
Feedback
https://support.vertafore.com/
We value your feedback to ensure we are working on what is most important to you. Please use My Vertafore to provide feedback. We appreciate your input, whether positive or negative, on any visible change.
What's New
Part of the post upgrade process will create a new index on the POLICIES file. See the SAG17R2.0.0DeploymentDatabaseApplicationServerInstall document for more details and a calculation you can run to find out how long this will take on your system.
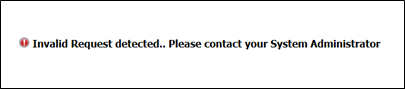
Security enhancements have been made to the Sagitta application. As part of that effort, several common query string parameters utilized in the Sagitta application are now being scanned for invalid values. If an invalid value is encountered, you may see an error like the one below. Please contact Sagitta Support should you receive this error.
Use the -noframemerging option on user workstations for their Internet Explorer link.
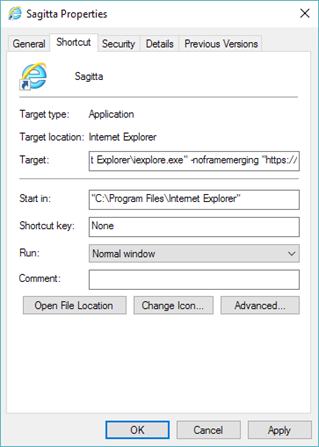
Type in the Target textbox:
- For Windows 64-bit:
"C:\Program Files (x86)\Internet Explorer\iexplore.exe" –noframemerging “<Sagitta URL>”
- For Windows 32-bit:
"C:\Program Files\Internet Explorer\iexplore.exe" –noframemerging “<Sagitta URL>”
If a user has created a Sagitta favorite or link to the Sagitta login screen ending in “/sagitta/account/login,” and if the “/sagitta” portion contained any capital letters, these links will no longer work. These should be updated such that the URL to the home page is similar to the following:
“http://<servername>/sagitta”
Additionally, the user should right click the created shortcut and “pin to Taskbar” or desktop to get a shortcut that uses the specific path and URL. An Internet Explorer Favorites or Link will only be useful if the Internet Explorer session was started with a shortcut using one of above targets.
It is now possible to enter a separate agency percentage for additional transactions when using the invoiceInsert method in Web Services. Previously, all transactions used the agency percent entered for the main transaction.
Agency% field added for additional transactions in invoiceInsert method for Web Services
It is now possible to enter a separate agency percentage for additional transactions when using the invoiceInsert method in Web Services. Previously, all transactions used the agency percent entered for the main transaction.
The following columns have been added to the Proposals grid:
- Servicer - Primary Servicer from the Policy
- Policy Description
- Division - from the Policy
- Department - from the Policy
These columns have been added to the Policies selection grid. They are hidden by default:
- Curr Term - Current Term Policy Sequence Number - internal sequence number
- Fin - Finance Indicator
- Status - New or Ren from Policy Status field
For information on working with grids, see the About Grids topic.
Prior Term and Next Term are now Links
Prior and Next Term fields on the Policy Selection Grid will be displayed as hyperlinks. When clicked, a new page will open with the previous or next policy in view mode.
Prior and Next Term fields on the Policy Selection Grid will be displayed as hyperlinks. When clicked, a new page will open with the previous or next policy in view mode.
Password Reset
To use this feature, the Sagitta Instance needs to be Registered on the Vertafore Services Personalization page.
New fields have been added to the Passwords Restrictions Page
Three new fields have been added to the Passwords Restrictions page (Other > Maintenance > Accounting).
- Allow User Password Reset, allows the System Coordinator to enable users to reset their own passwords through a link during the login process. The dropdown for this field includes the values null, Yes, and No. It is defaulted to null (User Password Reset functionality not enabled). When this field is set to Yes, the next field is required.
- Maximum Password Reset Attempts within a Day, controls the number of times (1-5) that a user can request a password reset in a day (that day starts when the overnight process completes, and ends when the next overnight process starts).
- Require Sagitta-Specific Security Question, requires users to answer a Sagitta-specific question during the reset process. When Allow User Password Reset is set to Yes, this field is automatically set to Yes.
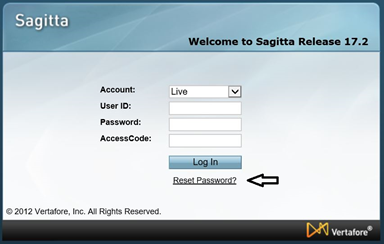
When the System Coordinator enables User Password Reset, a link will display on the Sagitta login page. When the link is clicked, the password reset process is initiated.
After the System Coordinator enables the User Password Reset feature, each user will be required to set up security questions. Upon logging in, the user will be redirected to the Security Questions Setup page. Select and answer three Security Questions from the drop down lists, and then click Continue. To defer this process, click Later in the prompt. The Security Questions Setup page will display upon each login until security questions with valid answers have been saved on the account. After completing the setup, subsequent logins will go directly to the Sagitta Home page, as normal.
Click the question mark button in the Security Questions Setup prompt to see a list of Tips for Security Questions.
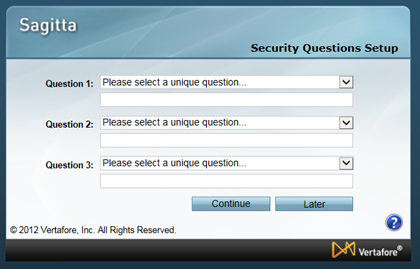
Security question entry requirements:
- A different question must be selected for Question 1, 2 and 3
- Each question must have an answer between 3 and 255 characters (any character is valid)
Click Reset Password? on the Sagitta login page to get to the Reset Password page.
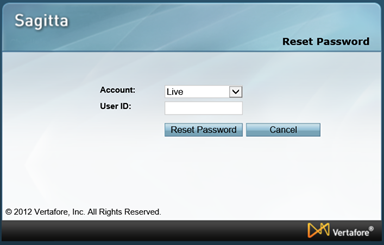
Enter your User ID and click Reset Password to request a password reset email.
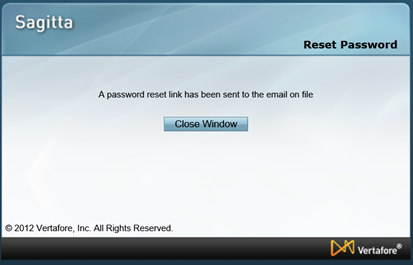
- If the User ID entered belongs to a valid Sagitta user, and the maximum attempts for the User ID has not been reached for that day, and there is an email address associated with the account
- An email will be sent to the email address on the Staff record for that user containing a password reset link. An email sent message will display.
- If the Security Questions are not set up
- No email will be sent, but an email sent message will be displayed for security purposes.
- If the User ID entered belongs to a valid Sagitta user, and the maximum attempts for the User ID has not been reached for that day, but there is no email address on the user’s Staff record
- No email will be sent, but an email sent message will be displayed for security purposes.
- If the User ID entered does not belong to a valid Sagitta user, and the maximum attempts against that User ID has not been reached for that day
- The reset attempt count for the invalid User ID will be incremented. An email will not be sent, but an email sent message will be displayed for security purposes.
- If the Cancel button is clicked on the Reset Password page
- The Sagitta login page displays.
The reset password email contains a link to answer security questions. This link can only be used once; if the link is clicked more than once, an error page will display.
If another password reset email is requested, the new email will contain a different link.
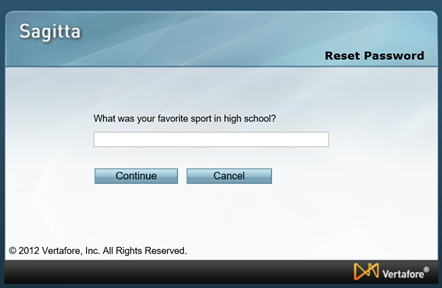
After the link in the User Reset Password email is clicked, the user is redirected to Sagitta and prompted to answer a security question. The question is randomly selected from the questions that have been set up on the account.
If the Cancel button is clicked on the Reset Password page, the Sagitta login page displays.
When the security question has been answered, the user clicks Continue. The answer is submitted for validation.
If the security question has been answered incorrectly, a different question will display. If all three of the user’s security questions are answered incorrectly, a page is presented with a message that password reset has failed.
Any attempt to use the back button to re-answer a question will cause an error to display.
If the user correctly answers one of their security questions and Require Sagitta-Specific Security Question has been set to No or null on the Password Restrictions page, they will proceed directly to the Reset Password page. If they correctly answer one of the security questions and Require Sagitta-Specific Security Question has been set to Yes on the Password Restrictions page, the user will be prompted to enter the Default Division associated to their staff code.
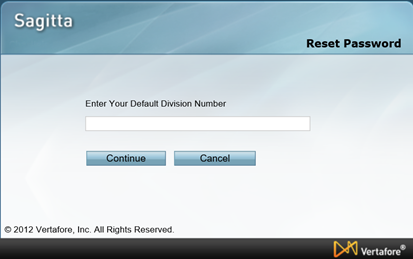
Clicking Cancel will cause the Sagitta login page to display. If the wrong division is entered, the error, reset password has failed, will display. If the correct division is entered, the user will continue to the next page to set up a new password.
To set up a new password on the account, the user must enter the new password in the New Password and Confirm New Password fields.
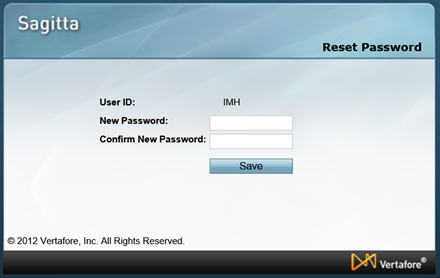
When the new password has been entered, click Save.
- The new password is checked for errors according to the password restrictions set on the account
- The values in New Password and Confirm New Password are compared to verify that they match
- The new password is checked for spaces, which are not allowed in Sagitta passwords
If the new password meets all of the validation criteria, the new password is set on the account and the message Password has successfully been reset is displayed.
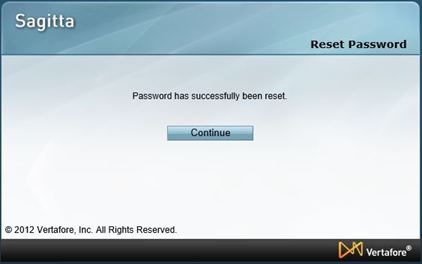
When the successful reset message displays, click Continue to be directed to the Sagitta login page. Use the new password to log in to the account.
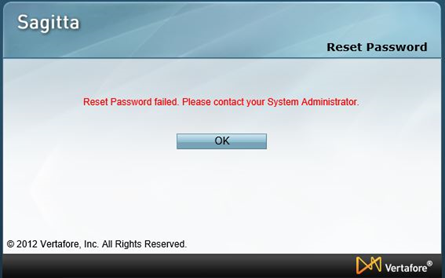
The message, Reset Password failed. Please contact your System Administrator., displays when:
- Maximum password reset attempts allowed per account has been exceeded
- Three security questions have been answered incorrectly
- Default Division (if the Sagitta-Specific question is required) is answered incorrectly
- User attempts to skip answering the security questions
Clicking OK in the message displays the Sagitta login page, but your credentials will remain unchanged.
Users who have already set up their security questions are able to edit their questions and answers on the Options page, which can be accessed via Options on the Global navigation bar. Note that the User Password Reset Security Questions edit area will not display if the Allow User Password Reset flag is set to No or null, or if the user has not completed the security questions setup.
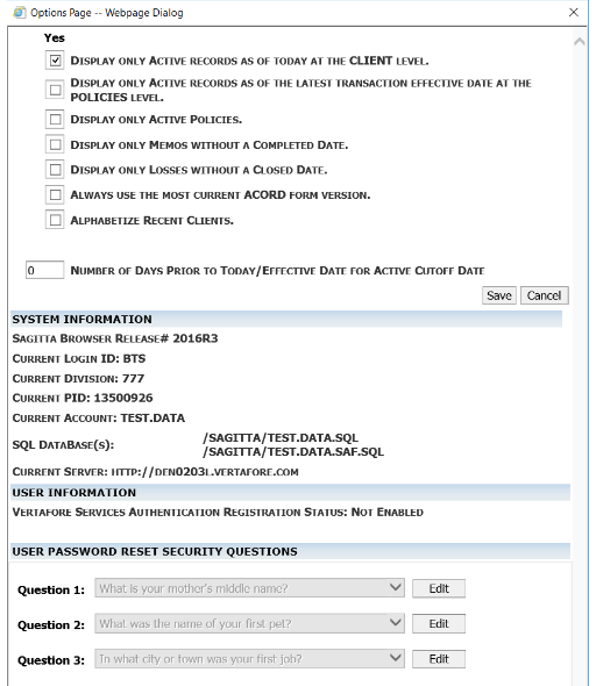
To update security questions, click the Edit button next to the question. Select a new question, or change the answer for an existing question.
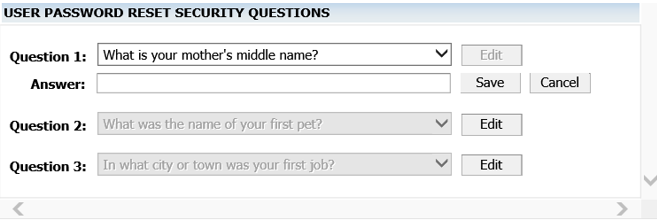
The same validations from the security questions setup process apply; you cannot select the same question more than once, and answers must be a minimum of 3 characters and a maximum of 255 characters.
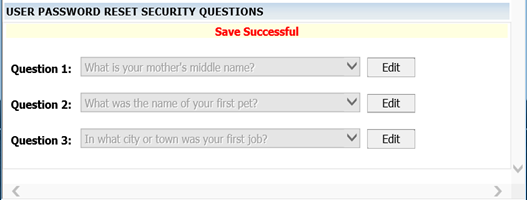
Click Save after editing the security question to save the updates and close the edit section for that question. The Save Successful message will display. Edit additional security questions and answers, or close the Options page.
These password reset events are logged to the Login Information Report:
- When a password reset email is requested after entering a valid User ID and clicking Reset Password
- User ID, Staff Code, Division Code, Department Number, and status User Password Reset
- When a password reset email is requested after entering an invalid User ID and clicking Reset Password
- User Password Reset – Invalid User
- When a user attempts to access the reset password workflow using an invalid email link
- User Password Reset – Invalid Token

Password Reset changes in the Overnight Process:
- The number of password reset attempts is cleared for all users
- Password reset links are expired and cleared from the database
- Requests for Invalid User ID password reset are cleared from the database
Auto ID Cards
A new Vertafore eForms page and process has been created to replace the Classic eForms auto ID card wizard for all states excluding NY. Support for the NY auto ID card will be delivered in a subsequent release.
The new page; Auto ID Cards, is added to the Client Forms menu at the client level, and the Forms menu at the policy level. At the client level, existing cards can be viewed, revised, or the descriptions modified. At the policy level, new cards can be created, as well as revising previous cards, and modifying the description of previous card sets.
Note that it is not possible to add user defined fields to this page.
Auto ID Cards are created on the Auto ID Card Creation page. To access the page, go to a policy, click Forms, and click Auto ID Cards. The Auto ID Cards page displays with a list of previously created Auto ID Cards. Click Add to get to the Auto ID Cards Creation page. The page has tabs for Vehicles and Fleet. Use Fleet to create a specified number of Auto ID Cards. The Vehicles tab allows you to select one, some, or all vehicles on the policy from the Vehicles grid.
Auto ID Card section
- Use Endorsement Date over Effective Date checkbox - Check the box to have the current endorsement date prefill to Effective Date on the Auto ID card. Note that it is necessary to be in the endorsement for this feature to work. If this box is checked while the user is in display mode on the policy, the most recent endorsement date will be used.
- Use Duplex Print box– When the box is checked, forms with an uneven number of pages will have a blank page inserted, so that the forms do not print with the beginning of the new form on the back of the previous form. When the box is not checked, the cards will be formatted for simplex (single-sided.) The default setting for this field is on (checked). The setting persists by user; i.e., if it is unchecked when a card is created, it will be unchecked when the next card is created by that user.
- Some of the ACORD auto ID cards are oriented as Landscape orientation, and some are oriented as Portrait orientation. With Format for Duplex Printing selected, cards that are generated in Portrait will print correctly when the Flip on long edge option is selected in the PDF viewer. Cards that are generated in Landscape mode will print correctly when the Flip on short edge option is selected.
- In mixed batches (batches that contain cards oriented in Portrait and Landscape), the PDF will display both in Portrait, so the Landscape forms will be displayed rotated 90 degrees, but the entire batch will print correctly with the Flip on long edge option selected.
- The ACORD 50 generic card has two layouts contained within the card; one for simplex (one-sided print), one for duplex (two-sided print). If Format for Duplex Print is checked, the data for the card will prefill only to the duplex layout portion of the card, and changes made in the Vertafore eForms Viewer to the simplex part of the card will not be retained when the formset is saved to PDF. If Format for Duplex Print is not checked, the data will prefill to the simplex part of the card, and changes to the duplex part of the card would not be retained.
- Auto ID Template Description – This is a free-form field to enter a description of this auto ID card form set. The description entered here will display in the Auto ID Card (retrieve) page grid.

Vehicle Selection grid
This grid includes columns for Vehicle number, Client Vehicle Number, Registered Owner, Secondary Name, Year, Make, Model, Body Type, Vehicle Identification Number, Veh Eff Date, State Registered, Date Off, and Veh Eff Date. Veh Eff Date shows the effective date of the policy change that added that vehicle to the policy. You can filter the results on the grid to identify more easily the vehicles to be selected. Select vehicles by clicking on them. Use the Control key (Ctrl) to select vehicles from different places on the grid, use Shift to select vehicles on contiguous lines. Use the button at the top of the grid to Select All.

Auto ID Vehicle Overrides section
Use this section to select one value for every Auto ID Card in the form-set, regardless of the values stored on each vehicle.
- Registered Owner fields; Registered Owner, Registrants Address, Registrants Zip Code, Registrants City, Registrants St, Registrants FEIN. A registered owner selected here will be the name used on each of the auto ID cards, regardless of what is entered on the Vehicles page for each vehicle.
- Secondary Name - A secondary name selected here will be the name used on each of the auto ID cards, regardless of what is entered on the Vehicles page for each vehicle.
- Auto ID card search – A form selected here will be used on each of the auto ID cards, regardless of the card selected on the Vehicles page. For more information, see the Auto ID Creation Hierarchy section below.

|
Buttons on the Auto ID Cards page |
Description |
|---|---|
|
Add |
Add a new Auto ID Card formset. This function is not available at the client level. |
|
View |
View a previously created Auto ID Card formset in PDF. |
|
Revise |
Edit a previously created Auto ID Card formset in the Vertafore Forms Viewer. All fields are editable. |
|
Modify Description |
Modify the Description of an existing Auto ID Card formset. |
|
Buttons on the Auto ID Card Creation page |
Description |
|---|---|
|
Create Forms |
Creates the Auto ID Cards and opens them in the Vertafore eForms Viewer. Cards can be edited, saved or opened in PDF from the viewer. |
|
Adobe |
Creates the Auto ID Cards and opens them in a PDF document. |
|
Quit |
Prompts with a message “Okay to lose changes? (click Cancel to return to editing)” If OK is clicked, the Auto ID Cards page displays. |
|
Buttons on the Vertafore eForms Editor page |
Description |
|---|---|
|
Save Form |
Saves the formset, leaves it open |
|
Save Form & Close |
Saves the formset, and closes it |
|
Print Form & Close |
Closes the formset, and opens it in a PDF document |
|
Close |
Closes the formset |
The Fleet tab is used to print a specified number of identical Auto ID cards. It is possible to set up batches of fleet cards for different states and then create them all at the same time.
Create a Fleet Auto ID Card
- Access the Fleet tab on the Auto ID Card Creation page
- Enter text in the Auto ID Template Description
- Click Add in the Fleet Selection grid. That grid has fields for Auto ID Card, Fleet Description, State, Number of Cards, and Registered Owner. The Registered Owner field has the same Registered Owner lookup available in the Vehicles page, and on the Vehicles tab of the Auto ID Card Creation page.
- Save when done
- Click Add in the grid to add another line, or
- Click Create Forms, to display the first page of each line item set in the Vertafore Forms Viewer, or
- Click Adobe, to create the formset PDF immediately
- Note that Fleet Description prefills to the VIN field (or, if longer, may start in the Model or Make field)
It is possible to enter data on the Vehicle tab and on the Fleet tab, but not possible to create a Vehicle and a Fleet Auto ID Card at the same time. If both tabs have data entered, when Create Forms is clicked, only the cards from the tab open at the time will be created.
The Auto ID Card feature follows a process to determine the type of card to create. When users click the Create button on the Auto ID Cards Creation page, a sequential process ensues.
The process looks for particular data and continues through the steps below until the data indicates an appropriate card type to create.
The first check is the Auto ID Card overrides page to see if a specific auto ID card is personalized there. If not, then it checks the Vehicles page for a specific Auto ID card. If not, it checks the State Registered field on the Vehicles page first then the State field on the Policy Details page.
On the Auto ID Cards Creation page, the Format for Duplex Print option is checked by default. When this box is checked, auto ID cards will print on both sides of the page if your printer supports duplex printing. A blank page will be inserted as needed to make the first page of a new form print on the front of the page. To print on only one side of the page, unclick the Duplex option to print simplex.
The ACORD 50, 52NV and 53 NV auto ID card forms have two print options:
- A one up card that prints both sides of the card on one page to be folded (simplex)
- A card that prints one side of the card on one page and the other side of the card on the reverse side of that page (duplex)
All of the cards in the set will be displayed in the Vertafore eForms Viewer, but only the card you have chosen (simplex or duplex) will be prefilled, and only the prefilled cards will be sent to the PDF document when the forms are printed.
Auto ID Cards can be revised after they have been saved. To make changes on an existing Auto ID Card formset, go to Auto ID Cards, click on the desired formset to highlight it, and click the Revise button. The formset will open in the Vertafore eForms Viewer. Make changes as needed and close or print the formset.
A new file, Fleet, has been added to Generic Code Maintenance. Use this file to add Fleet Descriptions by state. Select a Fleet Description when creating Fleet Auto ID Cards, and the Fleet Descriptions will flow to Auto ID cards. The file has fields for Code (State), State Name, Country and Fleet Description. When 17R2 is loaded on your Sagitta system, it will copy the STATES file (which is also in Generic Code Maintenance), to the Fleet file. After this initial load of states, the two files will be independent of each other, so changes to one will not change the other.
The field, Auto ID Claim Reporting Phone#, has been added to the Insurers maintenance page. When a telephone number is added to the field, the number will prefill to Auto ID cards in states that have a field on the card for claim phone number.
|
File |
Field |
Sagitta |
SQL |
Object.Properties (SagittaWord) |
Web Services tags |
|---|---|---|---|---|---|
|
INSURORS |
Auto ID Claim Reporting Phone# Auto ID Claim Reporting Phone# |
RPT.# 80 |
CLAIM_RPT_NUMBER |
ClaimReportNumber |
AutoIDClaimReportingPhoneNumber |
|
INSURORS |
extension |
CLAIM.RPT.EXT.# 81 |
CLAIM_RPT_EXT |
ClaimReportPhoneEx |
AutoIDClaimReportingPhoneExtension |
|
CLI.VEHICLES |
NJ Medical Name |
NJMEDNAME 120 |
NJMEDNAME |
NJMedName |
NJMedicalName |
|
CLI.VEHICLES |
NJ Medical Address |
NJMEDADDR 121 |
NJMEDADDR |
NJMedAddr |
NJMedicalAddress |
|
CLI.VEHICLES |
NJ Medical Fax |
NJMEDFAX 122 |
NJMEDFAX |
NJMedFax |
NJMedicalFax |
|
CLI.VEHICLES |
NJ Medical Email |
NJMEDEMAIL 123 |
NJMEDEMAIL |
NJMedEmail |
NJMedicalEmail |
|
CLI.VEHICLES |
NJ Medical City |
NJMEDCITY 124 |
NJMEDCITY |
NJMedCity |
NJMedicalCity |
|
CLI.VEHICLES |
NJ Medical State |
NJMEDSTATE 125 |
NJMEDSTATE |
NJMedState |
NJMedicalState |
|
CLI.VEHICLES |
NJ Medical Zip |
NJMEDZIP 126 |
NJMEDZIP |
NJMedZip |
NJMedicalZip |
|
CLI.VEHICLES |
NJ Medical Zip Ext |
NJMEDZIPEXT 127 |
NJMEDZIPEXT |
NJMedZipExt |
NJMedicalZipExt |
|
VEHICLES |
NJ Medical Name |
NJMEDNAME 120 |
NJMEDNAME |
NJMedName |
NJMedicalName |
|
VEHICLES |
NJ Medical Address |
NJMEDADDR 121 |
NJMEDADDR |
NJMedAddr |
NJMedicalAddress |
|
VEHICLES |
NJ Medical Fax |
NJMEDFAX 122 |
NJMEDFAX |
NJMedFax |
NJMedicalFax |
|
VEHICLES |
NJ Medical Email |
NJMEDEMAIL 123 |
NJMEDEMAIL |
NJMedEmail |
NJMedicalEmail |
|
VEHICLES |
NJ Medical City |
NJMEDCITY 124 |
NJMEDCITY |
NJMedCity |
NJMedicalCity |
|
VEHICLES |
NJ Medical State |
NJMEDSTATE 125 |
NJMEDSTATE |
NJMedState |
NJMedicalState |
|
VEHICLES |
NJ Medical Zip |
NJMEDZIP 126 |
NJMEDZIP |
NJMedZip |
NJMedicalZip |
|
VEHICLES |
NJ Medical Zip Ext |
NJMEDZIPEXT 127 |
NJMEDZIPEXT |
NJMedZipExt |
NJMedicalZipExt |
If your agency is already using Vertafore eForms, Auto ID Cards is enabled when 17R2 is loaded on your Sagitta system.
In support of the Auto ID Card forms, JSON export for Auto ID Card forms has been added to aid in troubleshooting in case of errors. The JSON Export will be available upon right click on an Auto ID form on the Auto ID Cards Retrieve page.
To personalize the product JSONIDEXPORT in Import/Export Personalization:
- Go to Import/Export Personalization (Other > Personalization > Integration).
- In the Program ID field enter VF.AUTOIDS
- Click Load
- In the Export section, click Add
- In the Product field enter JSONIDEXPORT
- Click Save when done.
A new section, Auto ID Cards, has been added on the Vehicles page at the client and policy level. The new section contains Registrant fields that have been moved from the Basic Vehicle section on the Vehicles page, as well as some new fields needed for Auto ID Cards.
These fields have been moved to the Auto ID Cards section
- Registered Owner
- Registrants Address
- Registrants Zip Code
- Registrants City
- Registrants St
- Registrants FEIN
These fields are new in the Auto ID Cards section
- Secondary Name
- Auto ID Card
- Names of Excluded Drivers (Applicable in AZ, IL, LA, MI, OK) with three lines of text fields available.
- Address For Commencement Of Medical Treatment (Applicable in NJ) Name, Address, Zip Code, City, State, Fax# and Email.
The order of the Search Results in Registered Owner on the Vehicles page (Client and Policy levels) has changed. Now the results display in this order:
- Named Insured
- Supplemental Name(s)
- Driver(s)
- Additional Interest(s).
Search results display in the same order for the Registered Owner field on the Auto ID Card Creation page as well.
The Mapping Guide describes the location of Sagitta policy pages that populates Vertafore eForms. See the Vertafore eForms Mapping Guide for more information.
The table lists new forms now available through the Create Forms page.
|
ACORD Form |
State |
Version |
Form Name |
|---|---|---|---|
|
50 |
|
2007/02 |
ACORD Insurance ID Card |
|
50 |
AL |
2007/10 |
Alabama Insurance Identification Card |
|
50 |
AR |
2007/10 |
Arkansas Proof of Insurance Card |
|
50 |
AZ |
2012/08 |
Arizona Insurance Identification Card |
|
50 |
CA |
2004/07 |
California Insurance Identification Card |
|
50 |
CO |
2007/03 |
Colorado Insurance Identification Card |
|
50 |
CT |
2009/01 |
Connecticut Insurance Identification Card |
|
50 |
FL |
2017/05 |
Florida Personal Auto Insurance Identification Card |
|
50 |
GA |
2008/11 |
Georgia Insurance Policy Information Card |
|
50 |
HI |
2008/01 |
Hawaii Auto ID Card |
|
50 |
IA |
2007/08 |
Iowa Financial Responsibility Card |
|
50 |
ID |
2007/10 |
State of Idaho Liability Insurance Identification Card |
|
50 |
IL |
2007/03 |
Illinois Insurance Identification Card |
|
50 |
IN |
2007/11 |
Indiana Insurance Identification Card |
|
50 |
KY |
2006/01 |
Commonwealth of Kentucky Proof of Insurance (2 part) |
|
50 |
MD |
2016/10 |
Maryland Motor Vehicle Liability Insurance Identification Card |
|
50 |
ME |
2007/08 |
Maine Motor Vehicle Insurance Identification Card |
|
50 |
MO |
2007/05 |
Missouri Auto Insurance ID Card |
|
50 |
MS |
2008/01 |
Mississippi Auto Insurance ID Card |
|
50 |
ND |
2007/08 |
North Dakota Insurance Identification Card |
|
50 |
NE |
2007/01 |
Nebraska Auto Liability Insurance Identification Card |
|
50 |
NJ |
2016/12 |
Temporary State of New Jersey Insurance Identification Card |
|
50 |
OK |
2009/08 |
Oklahoma Owners Security Verification Form |
|
50 |
PA |
2007/09 |
Pennsylvania Financial Responsibility Identification Card |
|
50 |
RI |
2008/01 |
Rhode Island Insurance Identification Card |
|
50 |
SC |
2007/01 |
South Carolina Insurance Identification Card |
|
50 |
SD |
2007/02 |
South Dakota Insurance Identification Card |
|
50 |
TN |
2007/02 |
Tennessee Insurance Identification Card |
|
50 |
VT |
2007/02 |
Vermont Automobile Insurance Identification Card |
|
51 |
CA |
2004/07 |
California Evidence of Liability Insurance |
|
51 |
FL |
2009/07 |
Florida Commercial Auto Insurance Identification Card |
|
51 |
GA |
2005/01 |
Georgia Fleet Policy Information Card |
|
51 |
NJ |
2016/12 |
Permanent State of New Jersey Insurance Identification Card |
|
51 |
NV |
2016/07 |
Nevada Temporary Insurance Identification Card |
|
51 |
OK |
2009/08 |
Oklahoma Operators Security Verification Form |
|
51 |
UT |
2014/07 |
Utah Insurance Identification Card |
|
52 |
CA |
2007/07 |
California Fleet Auto Insurance Identification Card |
|
52 |
NV |
2016/07 |
Nevada Permanent Insurance Identification Card |
|
128 |
|
2015/12 |
Garage and Dealers Section |
SagittaTransfer – Import and Export Changes
Some of the Sagitta Transfer Import and Export controls have been modernized. There are some new prompts, the validation messages have been refined, and the overall look and feel has been improved.
|
Enhancement/New Feature |
Description |
|---|---|
|
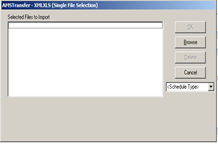
Import “XMLXLS” on Content Toolbar for Client Level and Policy Level Units |
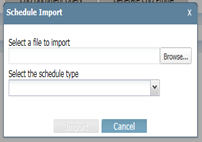
The prompt for SagittaTransfer XMLXLS Import has been replaced with Schedule Import Window. |
|
Import “Expedite” on Content Toolbar for Company Mailbox Page (Interface) |
The previous screen for SagittaTransfer Expedite Import has been replaced with “Expedite Import” Window. |
Old Import Screen:
New Import Screen:
Changes for Import
- The “Import” button on Schedule Import prompt is enabled only after a file is selected to Import
- It is only possible to Import one file at a time
- If the wrong file is selected, it is necessary to browse again to find the correct file
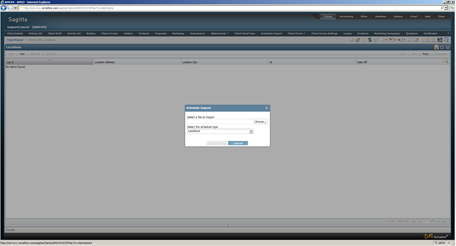
- The page behind the prompt is masked when Schedule Import is open
- The field, Select a file to import, is not editable and the user cannot search the file by typing in this field
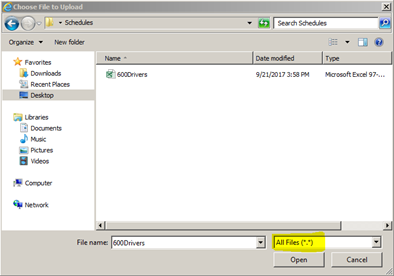
- The All Files option displays in the Choose File to Upload prompt. Previously, this defaulted to XML/XLS.
- If the Schedule Import window is open, it is not possible to Import on any other page
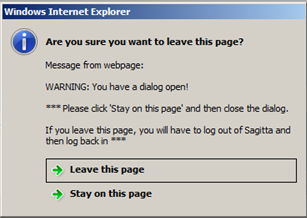
- If the user tries to X out of the page while the import is in progress, the warning below will display. If the page is closed, it will be necessary for the user to log out and log in again.
- The message below displays when users attempt to access the Home Page when the Schedule Import is in progress.
Please complete the Sagitta system Message on window Sagitta#
New Prompts
Import Successful displays upon successful import
Error message when an invalid file type is selected for import
Error message when the schedule type is not selected, but Import is clicked
Error message when the selected schedule type and the file type do not match
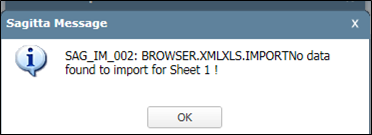
Error message when a file has valid column headers but no data
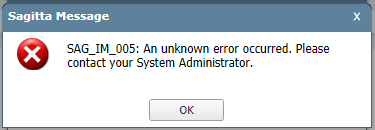
Error message For Errors which are not anticipated such as (Criteria object is null)
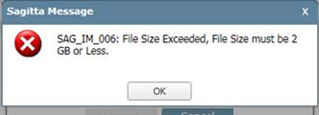
Error message when the file size of 2 GB is exceeded
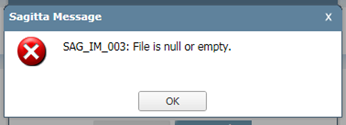
Error message when the file has no column headings or data
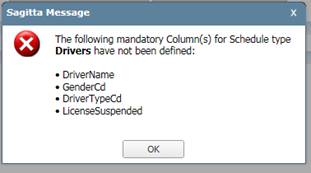
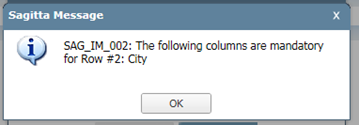
Error message when mandatory column
.
|
Enhancement/New Feature |
Description |
|---|---|
|
Engage Export (Policy Selection Grid and Policies grid in Client relationships)
|
New security features and validation error messages. Also, in Import/Export Personalization for product Engage, no input is needed in the Program field |
|
Export “XMLXLS” on Content Toolbar for Client Level and Policy Level Units |
The page for SagittaTransfer XMLXLS Export has been replaced with windows Export prompt |
|
Schedule Export - Export/Export All |
The page for SagittaTransfer XMLXLS Export has been replaced with windows Export prompt |
|
Export on ‘Print’ window |
The page for SagittaTransfer XMLXLS Export has been replaced with windows Export prompt |
|
JSON Export |
The page for SagittaTransfer XMLXLS Export has been replaced with windows Export prompt |
Engage
When navigating to the Engage login page, an alert message will display
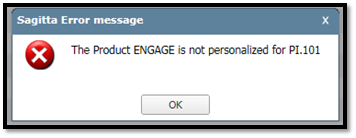
New Error Prompts
If Engage is not personalized for program PI.101
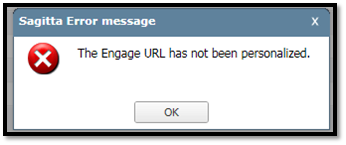
If No URL defined and No Key defined (Or) No URL defined and Key is personalized for Engage
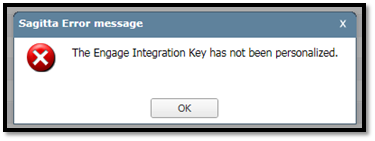
The Engage integration key has not been personalized
Excel Export
- In Import/Export Personalization, if File Mask is configured with XML and XLS for XMLXLS and EXCEL, it will export the file as personalized (xls/xml), if not personalized (xml/xls), default export will be XLS format
- When an export is in process, the message, Exporting…please wait, will display, and the page will be masked until the export has completed
- When the export completes, this prompt will display


|
Use Other Transactions maintenance (Other > Maintenance > Policy) to set up automatic diary creation for actions on the system such as adding policy binders or losses. Set the number of days to follow up, whether or not the number can be overridden, and the document type. Diaries created for losses will contain the loss information link to allow the user to click directly to the associated loss. |
Known Issues and Fixes
|
Area |
ID |
Release Notes |
|---|---|---|
|
Auto ID Cards |
|
The New York Auto ID card is not included in the release. It will be added in a future release. |
| Policies | 167462 |
Workers Compensation Classification Codes (ACORD.WC.CLASSIFICATIONS) do not prefill with the correct description when a code that more than one description is selected. This issue was fixed in a previous release, but the fix caused another bug (190398.) The fix for 167462 was removed as a result. Workaround: If the description is typed manually, it will remain in place. |
|
Area |
ID |
Release Notes |
|---|---|---|
|
Accounting |
184397 |
When a user navigates to another page while at the Continue, Adjust, or Split prompt in Cash Receipts, the system will no longer display the prompt message (below) for both pages, leaving the user no option except to close Internet Explorer. Please complete the Sagitta System Message on window xxx , The error will now display on the newly accessed page only, and allow the user to select an option in the prompt on the Cash Receipts page. |
|
Clients |
179884 |
When quitting out of a previously saved Client Level invoice on the Client Invoice page, the error message "There is no Period Control record for Division 0!" no longer displays. |
|
Clients |
184803 |
The Cancel, Back, Next, and Preview buttons correctly display, and the correct form version is selected, when Updating or Reissuing an ACORD 25 Certificate. This change is for versions 03/16, 01/14 and 05/10. |
|
Clients |
186228 |
The error, “Object Required”, does not display and certificates are created successfully when clicking the Attach button to attach holders during creation of an ACORD 25 form. This change is for versions 03/16, 01/14 and 05/10. |
|
Clients |
187454 |
The Policy multi indicator on the policies grid will now be displayed based on the presence of the client code on the POLICIES.ACCT.PREFILL. Previously it was based on the presence of the external policy number which resulted in issues for converted policy data. |
|
Grids |
179785 |
The filter bar will not be removed and the page will revert from Show All mode to Paginated mode when a newly added record is one record greater than the grid size limitation. |
|
Integration |
178842 |
When a split is set up for the house producer commission of 100% in BenefitPoint, an agency bill invoice from BenefitPoint will now be created in Sagitta with the house producer code, and house producer commission of 0%. Previously it created the invoice with primary producer and commission from the policy. The Sagitta BenefitPoint Integration Flags page would be set as below in this scenario:
|
|
Integration |
180154 |
The Invalid command entered. Please try again error message will no longer display when attempting to import a Direct Bill Commission statement after exiting a suspended window where a new policy was created. |
|
Integration |
184545 |
An agency bill invoice from BenefitPoint with a split that contains commission for house as well as other producers, will create invoice lines for the other producers, but will not create a line for the house producer in Sagitta. Previously it created the invoice including the house producer. The Sagitta BenefitPoint Integration Flags page would be set as below in this scenario:
|
|
Invoicing |
43307 |
When the Policy Flags setting, Allow Invoicing for APP Policies is set to No, invoicing will no longer be allowed in One Step Direct Bill if the policy is Remarketed (the policy number has APP as prefix.) |
|
Policies |
37151 |
The error that sometimes displays upon save of the Policy Details page, You are about to create multiple copies of this policy term ... will no longer occur for certain workflows. |
|
Policies |
153780 |
Microsoft update package KB3065822 for Internet Explorer version 11 will no longer cause lockups when Client or Policy Notes include special characters, such as " ' ( ). |
|
Policies |
175304 |
When exiting a classic form, the Sagitta error message below will no longer display: You are about to create multiple copies of this policy term. Please contact agency services immediately and provide your exact workflow! |
|
Policies |
182431 |
After closing a suspended page, if the Client Details page is clicked in order to exit a policy that is in edit mode, the correct Sagitta message, You are closing an edited transaction, (with options to Save, Quit or Cancel) displays. Previously, the message and options did not display, and policy remained in edit mode. |
|
Policies |
182432 |
Users are now able to suspend to another page while adding a new policy without getting a session ended error message. Prior to this change, when a user suspended to a new page after clicking Add to add the policy, but before entering the effective date, and clicking Next, the error would display. |
| Policies | 190398 | There will now be a prompt to save changes when a user navigates away after making a change to a line item in Workers Compensation Underwriting. |
|
Vertafore eForms |
158049 |
On the ACORD 140 form, building numbers in the Premises Information section are displayed in sequential order. Previously, all locations that started with 1 were listed first, then all locations with 2 were listed next, such as 1, 10, 100, 2, 21. |
|
Vertafore eForms |
169962 |
On the ACORD 140, the Roofing and Wiring boxes in the 'Building Improvements' section will be X’d appropriately when information has been entered for these fields. |
| Vertafore eForms | 175002 | Unscheduled Equipment is now included on an overflow form (OFSCHEQP) attached to ACORD 152 Commercial Inland Marine Section. ACORD 152 replaced ACORD 146 Equipment Floater Section. |
|
Vertafore eForms |
179456 |
The Bound field in the Status section of the ACORD 125, 125FL, and 401 will now contain an X for policies in bound status. In addition, the binder effective date will display in the Status section. |
|
Vertafore eForms |
181039 |
In the Prior History section of ACORD 88, 125, 125 FL and 130, the history now displays from most recent to least recent. Previously, the order was reversed. |
|
Vertafore eForms |
181050 |
When a vehicle is garaged at a location not associated with the policy, the garaging City, State and Zip now display on the ACORD 127 when that information is entered in the Basic Vehicle section of the Vehicles page in Sagitta. |
|
Vertafore eForms |
182013 |
Policies with more than 24 drivers did not overflow correctly on the ACORD 163 in Vertafore eForms. Now, the first 24 drivers will go to the form, and the next 24 drivers will go to an additional 163, and so forth. On the ACORD 127, the first 13 drivers will go to the 127, and the remaining will overflow to the 163 in groups of 24. |
|
Performance |
126213 |
Performance is enhanced for the Insurer Payables Reconciliation Report based on removal of General Ledger account number lists that were not needed and were impacting performance. |
|
System |
161950 |
A File Resize will no longer fail with the error message "SAGITTA" is not a valid account name. - Resize of GEM.DATA.SAF failed." With the UniVerse 11.2.5 upgrade, the account GEM.DATA.SAF was identified as a file instead of an account and generating the failure message. |
|
Web Services |
43486 |
The policy number will be correctly updated on all memos when the policy number is updated on the prior term and the changes are copied to the new term. |
|
Web Services |
130061 |
When importing a Memo through Web Services that includes a tag indicator (< >) as part of the Memo Description field, the text will now wrap correctly. |
Questions
If you encounter problems or have questions concerning this release, Vertafore offers the following helpful resources:
- Search Help by clicking Help from the top navigation menu.

- Search the Knowledge Base on My Vertafore.
- Open a case at My Vertafore.