In this topic, we continue our discussion of electronically filing New York taxes that we began in Excess Lines Association of New York (ELANY) Tax Manager.
Starting the NY Tax Manager process starts the Tax Manager – ELANY module. This module is used to create the XML file to be sent to ELANY. We will show you how to use Tax Manager – ELANY to create the XML to be filed and mark invoices for manual filing.
The Tax Manager – ELANY module must be configured prior to attempting to create a SLX file. We explain the use of the commands on the Settings menu that you will be using in the sections that follow.
You must configure the authentication information to the ELANY web service and the default location where the XML file will be stored.
- Click the Settings menu, and then click Preferences.
- In the Server Location field, enter the name of the ELANY server to connect to when processing invoices.
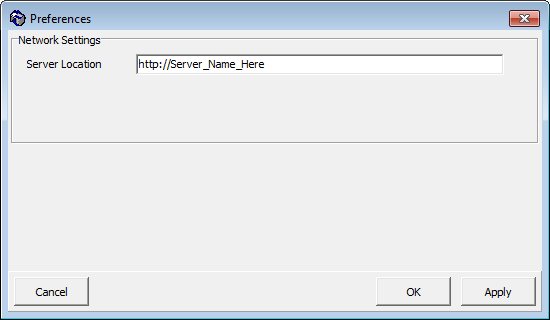
If you would like to enter a test server to verify your connectivity and settings, the test server URL for ELANY filings is:
http://eefs-test2.elany.org/ProgrammaticFilingWS/services/ProgrammaticFiling
Using the SLIP username and password, discussed later in this topic, you can validate whether information was uploaded by logging on to the following ELANY URL:
You can configure ELANY risk companies using the Company Mapping command on the Settings menu.
- Click the Settings menu, and then click Company Mapping.
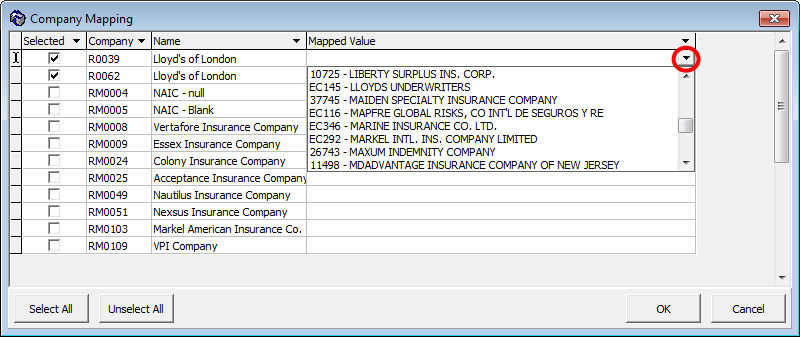
A list of ELANY risk companies is displayed in a grid layout for mapping to corresponding ELANY companies.
In the table below, we define the grid layout.
|
Column |
Definition |
|---|---|
|
Selected |
Indicates whether the row is selected |
|
Company |
The AIM company code |
|
Name |
Company name |
|
Mapped Value |
ELANY company code and ID; cannot be edited by the user; displays both the numeric and descriptive values as defined by ELANY; values are displayed in alphabetical order |
- Click in the Mapped Value field to select an AIM risk company that will be mapped to the ELANY company.
- You can select multiple products to map to a single coverage code by selecting them in the Selected column or by clicking Select All. That value will populate for all of the selected records.
- You can sort the contents of the grid and apply filters by clicking
 in the column header.
- Click OK to save your changes.
The Product Mapping feature is used to map AIM product IDs to New York coverage code definitions. This is necessary in order to ensure that the products associated with the invoices being filed are converted to a standard coverage code format that the Excess Line Association of New York recognizes.
- Click the Settings menu, and then click Product Mapping.
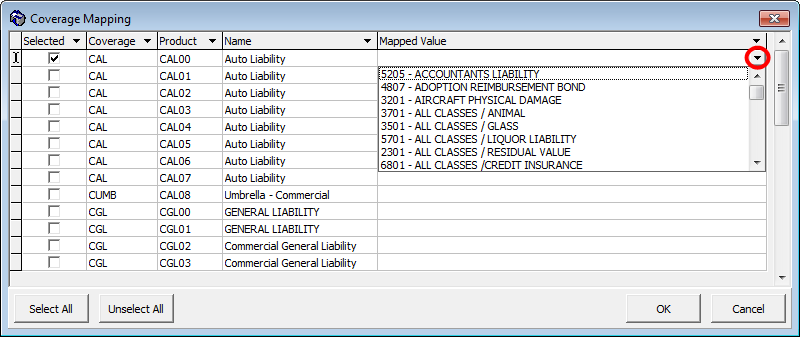
The Coverage Mapping dialog box displays the product IDs and descriptions from your AIM system as well as the ELANY mandated coverage codes. The dialog box is laid out in a grid format using columns and rows, similar to a spreadsheet. The grid contains useful information that is used by New Jersey Tax Manager or is forwarded to ELANY.
We have defined each of the grid columns in the table below.
|
Column |
Definition |
|---|---|
|
Selected |
Indicates whether the row is selected |
|
Coverage |
The AIM coverage code |
|
Product |
Product ID codes in your AIM system; cannot be edited by the user |
|
Description |
Product description in your AIM system; cannot be edited by the user |
|
Mapped Value |
ELANY coverage code and ID; cannot be edited by the user; displays both the numeric and descriptive values as defined by ELANY; values are displayed in alphabetical order |
- Click in the Mapped Value field to select an AIM coverage that will be mapped to the ELANY coverage value.
- You can select multiple products to map to a single coverage code by selecting them in the Selected column or by clicking Select All. That value will populate for all of the selected records.
- You can sort the contents of the grid and apply filters by clicking
 in the column header.
-
Click OK to save your changes.
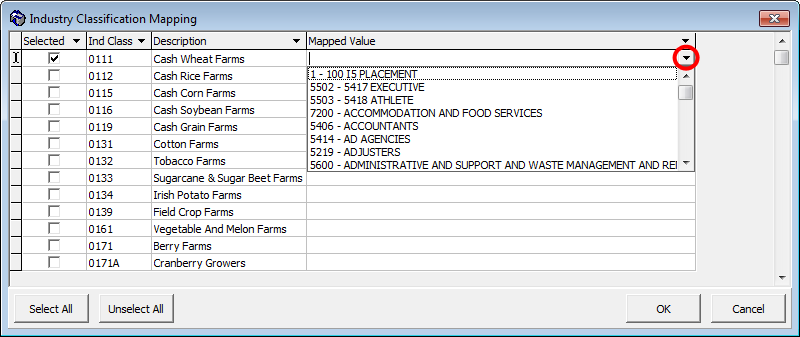
Industry Classification Mapping is a tool for mapping ELANY industry classification codes with AIM classification codes. Currently only SIC codes are used.
- Click the Settings menu, and then click Industry Classification Mapping.
We have defined each of the grid columns in the table below.
| Column | Definition |
|---|---|
| Selected | Indicates whether the row is selected |
|
Coverage |
The AIM coverage code |
| Ind Class | Industry classification code in your AIM system; cannot be edited by the user |
| Description | Product description in your AIM system; cannot be edited by the user |
| Mapped Value |
ELANY industry classification code and ID; cannot be edited by the user; displays both the numeric and descriptive values as defined by ELANY; values are displayed in alphabetical order |
- Click in the Mapped Value field to select an AIM industry code that will be mapped to the ELANY value.
- You can select multiple coverage codes to map to a single coverage code by selecting them in the Selected column or by clicking Select All. That value will populate for all of the selected records.
- You can sort the contents of the grid and apply filters by clicking
 in the column header.
- Click OK to save your changes.
ELANY requires a signatory to be applied to a policy, and a PIN assigned to that signatory when processing the invoices to ELANY.
You can view the signatories on the ELANY website and/or reset their PIN numbers by logging on the ELANY test web page:
http://eefs-test2.elany.org/eefs/Login.xhtml
Signatories are added to your AIM system in DMU, on the Tax Info tab located in the States table. Refer to the New York Tax Manager Setup topic in Data Maintenance Utility Help for more information.
You must add the PIN number for each signatory in ELANY Tax Manager.
- On the Settings menu, click Signatory Mapping.
- In the PIN field, enter the PIN for each signatory.
- Click OK to save your changes.
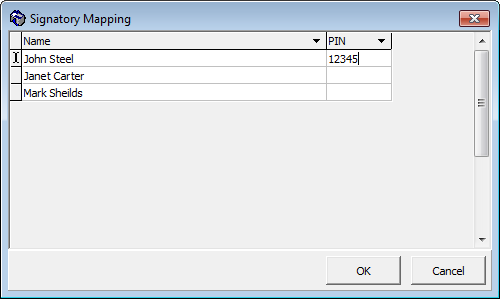
The signatories will appear in the State Specific Information dialog box in AIM below the Declining Carriers grid. The signatories displayed in the drop-down are only those saved to the States table for the filing state of the submission (in ELANY's case, New York).
- To view the state specific information in AIM, click the Policy menu, point to Misc, and then click State Specific Information.
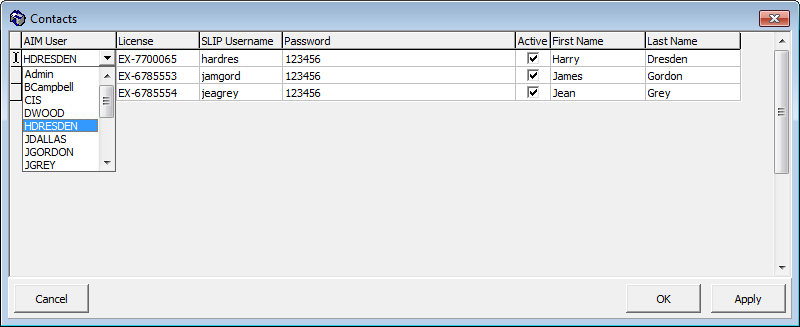
The Contacts command, located on the Settings menu, is used to add or edit contact information for users at your agency that have been designated as a user in the ELANY filing system. The contact information will be included in the XML file transmitted to ELANY.
- Click the Settings menu, and then click Contacts.
The Contacts dialog box is laid out in a grid format using columns and rows similar to a spreadsheet.
|
Column |
Definition |
|---|---|
|
AIM User |
Select the AIM user who will be filing from the drop down field |
|
License |
The user's NY license number |
|
SLIP Username |
Username assigned by New York's SLIP system |
|
Password |
Security token assigned by New York's SLIP system |
|
Active |
Indicates whether the user is active |
| First Name | First name of the AIM user |
| Last Name | Last name of the AIM user |
- In the Contacts dialog box, click the AIM User field.
- Click
 in the User ID column to see a list of AIM users.
 - Click a user ID to select it from the list.
- In the License field, enter the user’s license number.
- In the SLIP Username field, enter the user’s SLIP username.
- In the Password field, enter the user’s AMS token or password.
- To add a new row for a new contact, select the previous contact and press the Down Arrow key. Alternatively, you can press Tab to move to the next row or add a new row.
|
A contact row can be removed before the data has been entered by pressing the Up Arrow key. |
- Click Apply to save your changes or click Cancel to close without saving your changes.
- Click OK to close the Contacts dialog box and save the changes.
