In this topic, we continue our discussion of the Invoice Register Module.
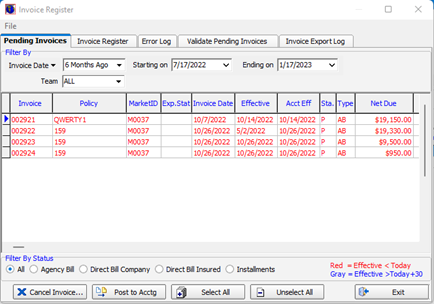
You can view invoices waiting to be exported to AIM Accounting on the Pending Invoices tab. The pending invoices are shown in the grid based on filter settings that you select.
A brief description of the buttons on the tab and their functions is provided in the table that follows.
| Button | Function |
|---|---|
|
|
Cancel the selected invoices |
|
|
Post the selected invoices to AIM Accounting |
|
|
Select all invoices shown in the grid |
|
|
Clear the selection of all invoices |
|
|
Close Invoice Register |
In the steps that follow, we show you to how post invoices to Accounting.
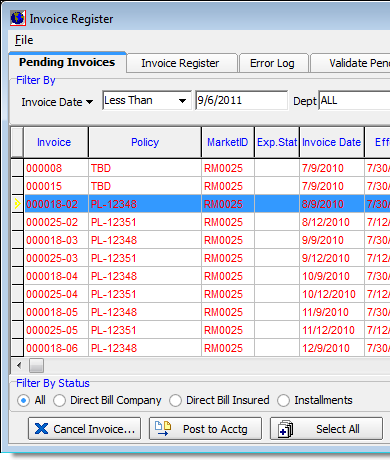
- Select an invoice to post. To post multiple invoices, select an invoice, then press Ctrl and click additional invoices. To select a block of invoices, select an invoice, then press Shift and select another invoice. All invoices between the first invoice and the second invoice will be selected.
- Click Post to Acctg.
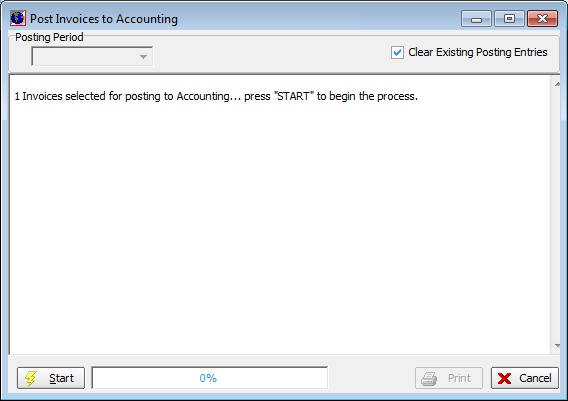
- In Post Invoices to Accounting, select Clear Existing Posting Entries to ensure that any previous attempts to post this invoice have been cleared.
- Click Start.
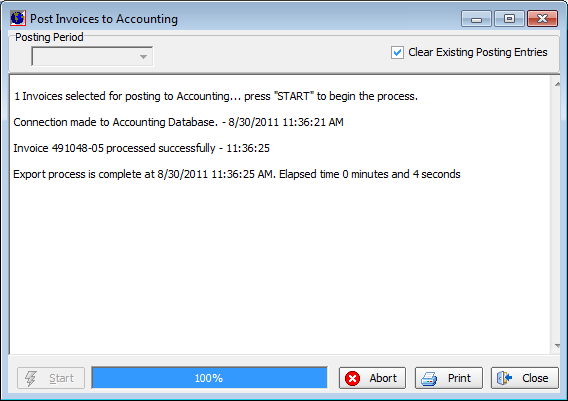
- Click Abort during the export process to stop the export.
- Click Print to print the export results.
- Click Close to close Post Invoices to Accounting.
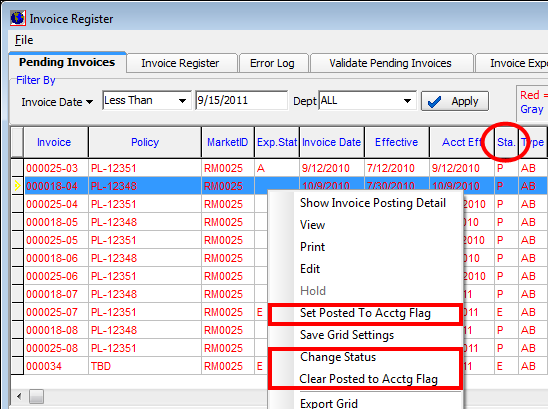
- Right-click
the grid to change the status (Sta.) of selected invoices.
- Set Posted To Acctg Flag – changes the status of the selected invoice to reflect that it has been exported to accounting. Available only when using the system administrator (SA) account.
- Change Status – opens the Change Invoice Status Code dialog box which is used to
change invoice status codes to indicate that the invoice has been:
- C – cancelled.
- E – exported to AIM Accounting.
- H – held
- P – posted
- Clear Posted to Acctg Flag – removes the exported to AIM Accounting flag. Available only when using the SA account.
Features:
-
The Invoice Date drop-down menu now defaults to "6 Months Ago," so as to avoid retrieving large amounts of data when opening the Invoice Register. The Starting Date and Ending Date are automatically set according to the Invoice Date option chosen, or they can be manually changed by using the Custom option.
-
The Team drop-down menu was recently renamed from Division. This option can narrow down the results to only the team being selected.


