You can use the Dunning Notices report to view or print accounts that have past due balances and are pending cancellation.
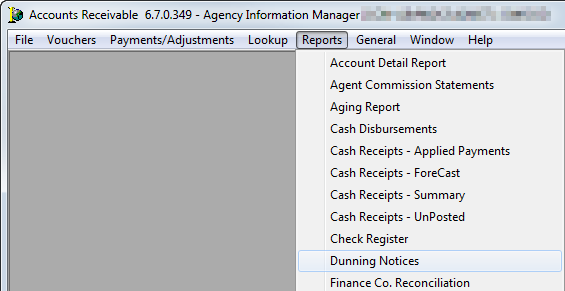
- On the Reports menu, click Dunning Notices.

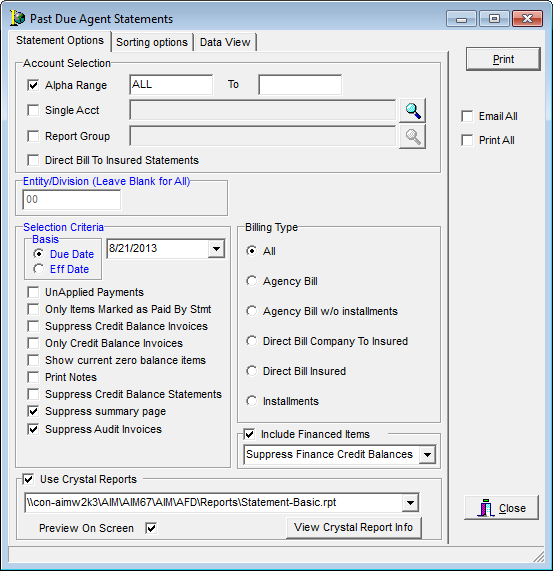
- In the Account Selection group box, located in the Past Due Statements dialog box, enter the following information:
- Alpha Range – Select to prepare a report for all accounts by typing ALL in the unlabeled text box or enter an alpha range in the text boxes using any range from A to Z.
- Single Acct – Select to prepare a report for a single account, and then click
 , and then select the required account from the list.
Alternatively, you can click to open the Select Account search window to select a company from the list of companies.
 - Report Group – Select to send to a selected group of agents or insureds.
You can click to add, edit, or delete report groups.
 - Direct Bill to Insured Statements – Select to print only direct bill to insured past due statements.
- In the Entity/Division group box, click
 , and then select the entity or division ID. Leave this box blank to prepare the report for all entities/divisions.
 - In the Selection Criteria group box, enter the following information, if applicable:
- Basis – Select either Due Date or Accounting Effective Date, and then click to select the appropriate date.
- UnApplied Payments – Select to view unapplied payments for each account selected.
- Only Items Marked as Paid By Stmt – Select to view only the agents marked as paid by statement for the account selected.
- Suppress Credit Balance Invoices – Select to not show invoices with a credit balance.
- Show Current Zero Balance Items – Select to include invoices that have a zero balance for the period specified.
- Print Notes – Select to cause notes created against an invoice to display on the agent’s statement.
- Suppress Credit Balance Statements – Select to omit any net credit balance statements from the print job.
- Suppress summary page – Select to omit the summary page from printing with the print job.
- Suppress Audit Invoice – Select to omit audit invoices from printing with the print job.
- In the Billing Type group box, select the appropriate billing type.
- Select Include Financed Items to include financed items, and then click
 and select one of the appropriate option.
 - Select Use Crystal Reports if a Crystal Report has been prepared for this report.
The box populates the path to the stored Crystal Report making the View Crystal Report Info button active. - Select Preview on Screen to preview the report on your computer prior to printing.
- Click Print to print or view the report or you can choose to send the report in an e-mail message.

The Sorting Options tab is used for the selection of additional sorting options:
- Statement Order – sort by ID code, zip code, or name.
- Sorting Options – sort by policy number, insured, effective date, or due date.
- Direction – select either Ascending or Descending

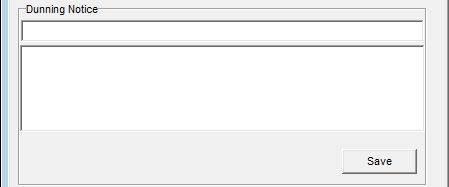
In the large and small Dunning Notice text boxes you can customize the message wording to meet the needs of your organization.