In this workflow we show you how to set up AIM Accounting so that you can record money sent or received via Automated Clearing House (ACH).
You must have security permissions in AIM Accounting to add/edit bank accounts in the Admin module.
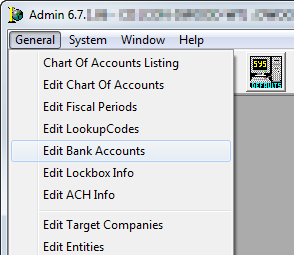
- In the Admin module, click the General menu, and then click Edit Bank Accounts.
- In Add/Edit Bank Accounts you can click Add to create a new bank account or select an existing bank account and click Edit.
For the purposes of this workflow we are editing an existing account.

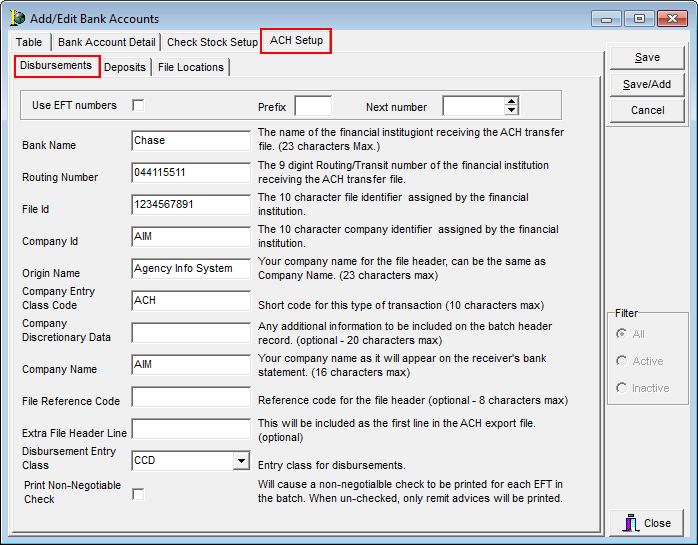
- Click the ACH Setup tab, and then click the Disbursements tab.
- Enter the appropriate information for the account in the boxes. The boxes are defined in the table below.
|
Name |
Description |
|---|---|
|
Use EFT Numbers |
If selected, the Next number box becomes active. |
|
Prefix |
Prefix of the check number. |
|
Bank Name |
The name of the financial institution |
|
Routing Number |
The 9 digit routing number from financial institution |
|
File ID |
The 10 character file identifier assigned by the financial institution. |
|
Company ID |
The 10 character file identifier assigned by the financial institution. |
|
Origin Name |
Your company name (23 characters max). |
|
Company Entry Class Code |
Class code that appears on the output file (10 characters max). |
|
Company Discretionary Data |
Optional |
|
Company Name |
Your company name as it will appear on the receivers bank statement |
|
File Reference Code |
Optional file reference code that appears on the output file. |
|
Extra File Header Line |
Optional |
|
Disbursement Entry Class |
CCD is used for businesses PPD is used for individuals |
|
Print Non-Negotiable Check |
When selected, a non-negotiable check is printed for each EFT in the batch. When not selected, remit advices are printed. |
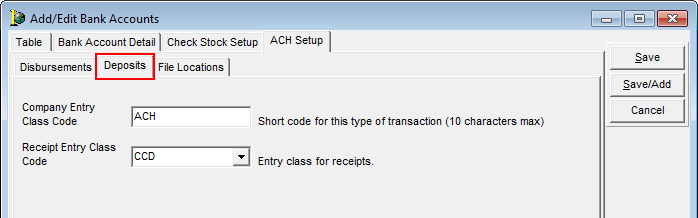
- Click the Deposits tab.
- In the Company Entry Class Code box, enter the short code for this type of transaction.
- In the Receipt Entry Class Code box, enter the entry class for receipts.
The available options are the same as the Disbursement Entry Class options (CCD and PPD).
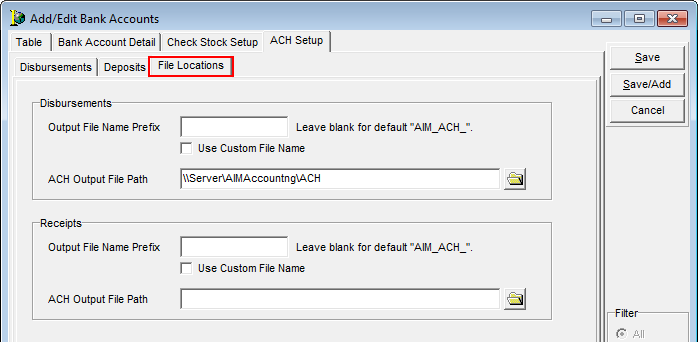
- Click the File Locations tab.
- Enter the location on your network where disbursement and receipt
- Disbursements
- Output File Name Prefix – The file name prefix for disbursement files. If left blank AIM_ACH is used automatically.
- ACH Output File Path – The network location where the file being exported to the bank is stored. Click
 to browse to the desired network location.
- Receipts
- Output File Name Prefix – The file name prefix for receipt files. If left blank AIM_ACH is used automatically.
- ACH Output File Path – The network location where the receipt file is stored. Click to browse to the desired network location.
- Disbursements
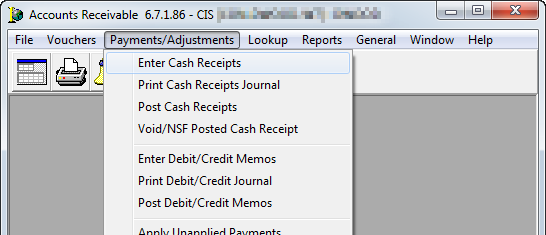
- In Accounts Receivable, click the Payments/Adjustments menu, and then click Enter Cash Receipts.
- In the Select Batch dialog box, click New or select a batch and click OK.
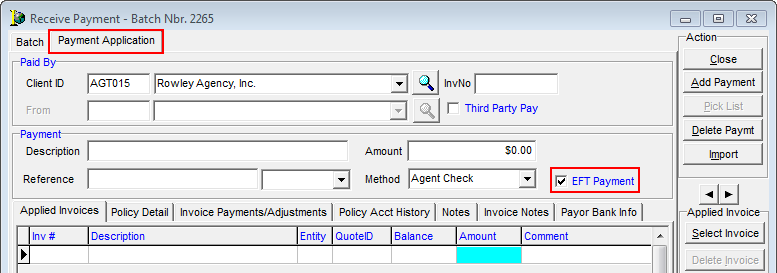
- On the Payment Application tab, enter the agent or insured in the Client ID box.
You can click to locate the account.
 - Select EFT Payment.
- Click the Payor Bank Info tab.
- If this is the first time entering information click next to the Routing Number box to enter the ACH settings.
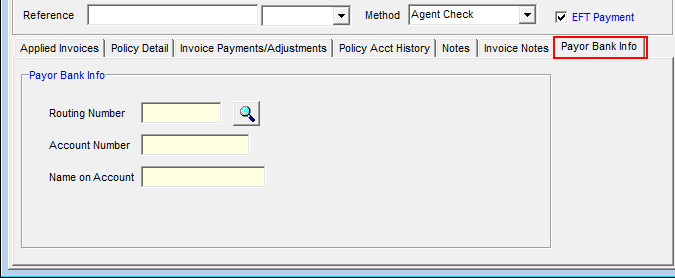
- Click Add to add new settings.
- Enter the following information:
- ID – ID code of the agent/insured (populated automatically).
- Description – Agent/insured’s bank name.
- Routing Number – Agent/insured’s bank routing number.
- Name on Account – Name on the agent/insured’s bank account.
- Account Type – Checking or savings account.
- Include ID number – indicates whether the ID code is included.
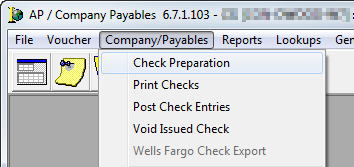
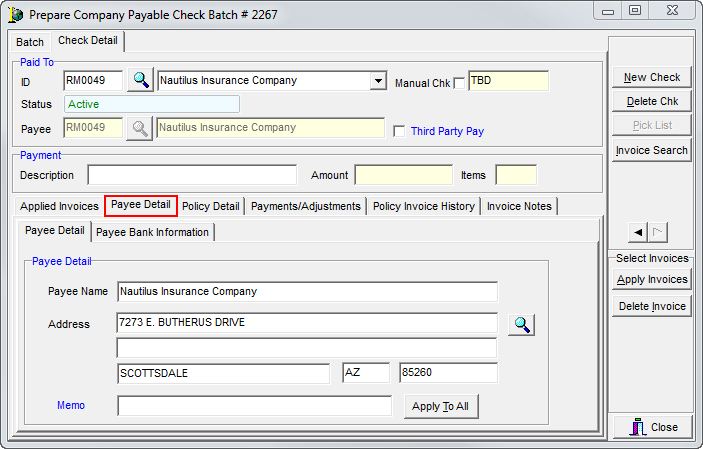
- In the Company Payables module, click the Company/Payables menu, and then click Check Preparation.
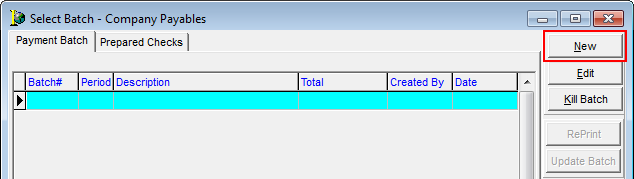
- In the Select Batch – Company Payables dialog box, click New.
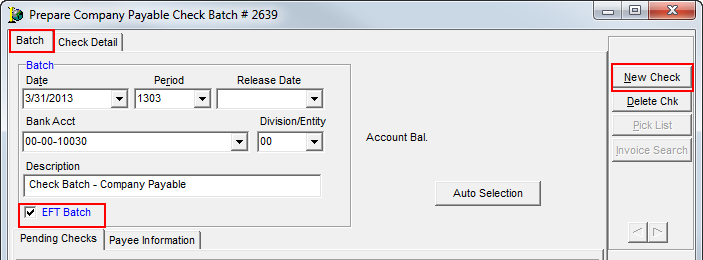
- On the Batch tab, select EFT Batch.
- Click New Check.
- On the Check Detail tab, enter the appropriate company information.
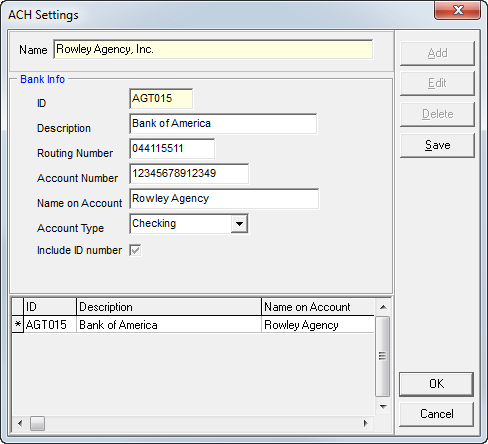
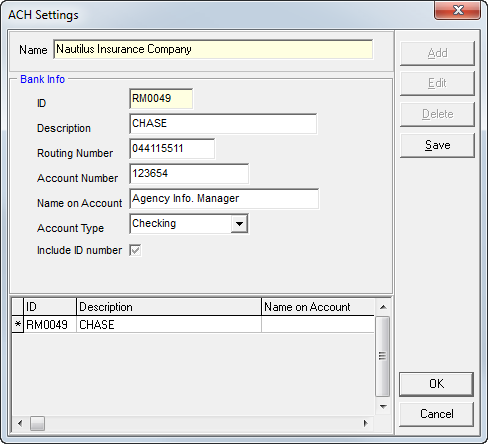
- If this is the first time you are paying this company with an ACH the ACH Settings dialog box appears for you to complete. Enter the following information in the Bank Info group box:
- ID – ID code of the agent/insured (populated automatically).
- Description – Agent/insured’s bank name.
- Routing Number – Agent/insured’s bank routing number.
- Name on Account – Name on the agent/insured’s bank account.
- Account Type – Checking or savings account.
- Include ID number – indicates whether the ID code is included.
- Click OK.
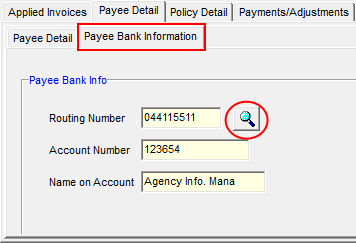
- Click the Payee Detail tab and verify that the payee information is correct.
- Click the Payee Bank Information tab, and verify that the bank information is correct.
- If you need to add or edit bank information, click .