Year End Procedures
This guide is intended for people that may not have performed a year-end close using the Agency Information Manager (AIM) Accounting application or people that would like to refresh their memory on the year-end close process.
To ensure a successful year-end close, you must follow the processes described in this guide. This document describes each process and breaks it down into the following steps:
- Verify that all invoices have been exported from AIM
- Run the financial report preparation command
- Run the year-end financial reports
- Enter your adjusting entries
- Close regular periods
- Create/post the year-end close and make necessary corrections
- Verify next year’s 1st period balances
- Run 1099 report
|
Year-end close can be run before year-end adjusting entries are entered. Since your accountants may not have the adjusting entries before March or April of the following year, year-end close can be used to zero out your income and expense accounts so that current year financials reflect only that year’s activity. The year-end close can then be reversed, adjusting entries posted, and the year-end close can be rerun to reflect those adjustments. |
If you are using 13 periods, year-end adjustments received from your accountant/CPA must be entered in the 12th period to accurately reflect in reports and so you can create a set of financials without showing the system generated year-end closing entries. System generated closing entries are created in the 13th period. The system year-end closing entry procedure zeros out your income and expense accounts and posts adjustments to the appropriate equities accounts.
If you are using 12 periods, all entries will be posted to the 12th period with a December 31st date.
Before you can perform year-end procedures in the Accounting application, you must first ensure that all invoices have been posted to Accounting from the AIM Invoice Register module.
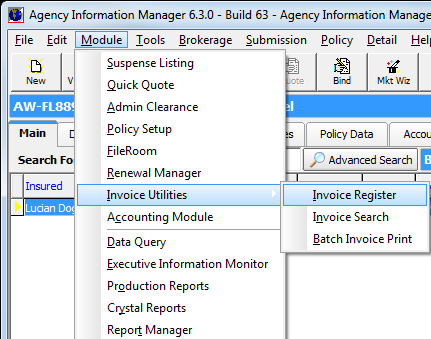
- Start AIM.
- On the Module menu, point to Invoice Utilities, and then click Invoice Register.
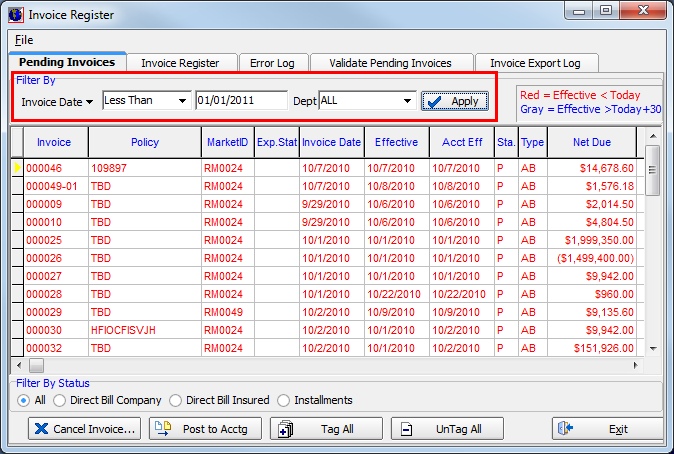
- In the Filter By pane, configure the Invoice date by selecting Less Than from the list.
- Type the date 01/01/20xx where xx is in the following calendar year. For example, if you are preparing the year-end for the 2010 calendar year, you will type 01/01/2011 in the box, as we have shown in our example.
- In the Dept list, select ALL.
- Click Apply to show all invoices that meet the filter criteria.
- Click Tag All.
- Click Post to Acctg to post the invoices to Accounting.
In order to ensure that all data from the year is properly reported, the financial reports must be prepared. AIM Accounting will prepare the financial reports for you based on parameters that you provide.
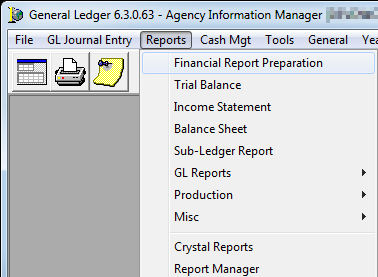
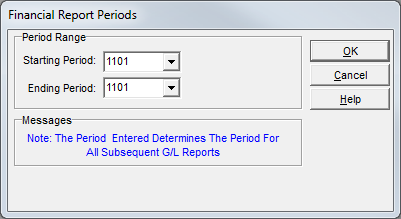
- In the General Ledger module, click the Reports menu, and then click Financial Report Preparation.
- In the Starting Period field, select the 12th period of the current year. In our example we have selected 1012.
- In the Ending Period field, select the 12th period again.
- Click OK to prepare the financial reports. Financial reports preparation is complete when the Financial Report Periods dialog box closes.

You should run normal financial reports that you would typically run each month such as a Balance Sheet report or Income Statement report. Reporting requirements vary from customer to customer; however, we will show you how to run the Income Statement report as an example since you will need to run that as a part of your normal year-end process. You will have to determine which reports you need to run.
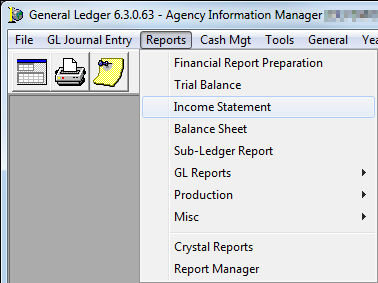
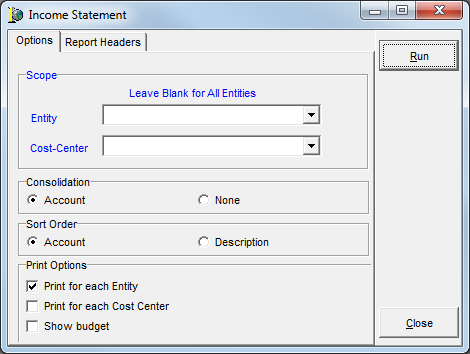
- On the Reports menu, click Income Statement.
- In the Scope pane, select the entity from the Entity list or leave blank to include all entities.
- In the Cost-Center list, select the cost center or leave blank to include all cost centers.
- In the Consolidation pane, select Account to consolidate the report by account.
- In the Sort Order pane, select whether to sort the report contents by Account or Description.
- In the Print Options pane, select from the following options:
- Print for each Entity – Separates the report by entity.
- Print for each Cost Center – Separates the report by cost center.
- Show budget – Displays the budget variance on the report.
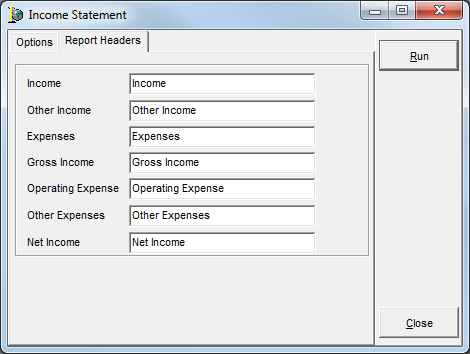
- Click the Report Headers tab to edit the text that appears in the headers of the report (optional).
- Click Run to run the report.
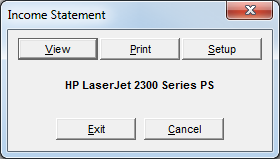
- In the Income Statement dialog box, click a button described below:
- View – View the report on your computer.
- Print – Send the report to the default printer, shown in the center of the Income Statement dialog box.
- Setup – Select the printer and configure printer settings.
- Exit – Close the Income Statement dialog box.
- Cancel – Close the Income Statement dialog box.
You must enter year-end adjustments from you accountant/CPA in period 0x12. If the adjustments are entered in period 0x12, you will be able to go back and create a set of financials without showing the system generated year-end closing entries.
System-generated closing entries are created in period 0x13. If your year-end adjustments are performed in period 0x13, both entries will be reflected. The system year-end closing entry procedure will not include your adjustments. Changes to the system-generated closing entries must be made before you post the created Journal Entry Closing batch.
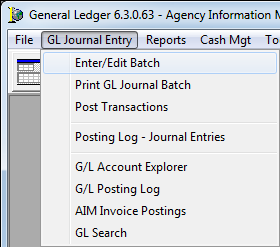
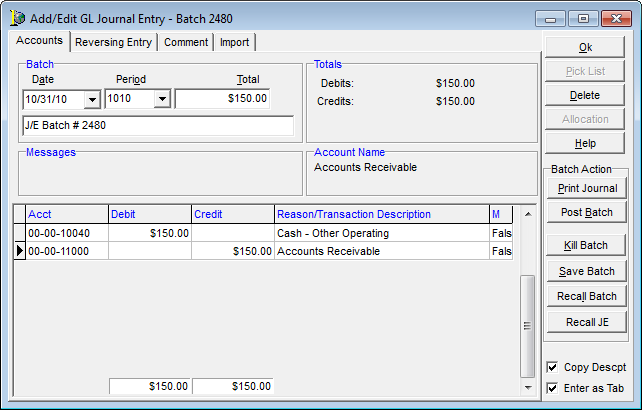
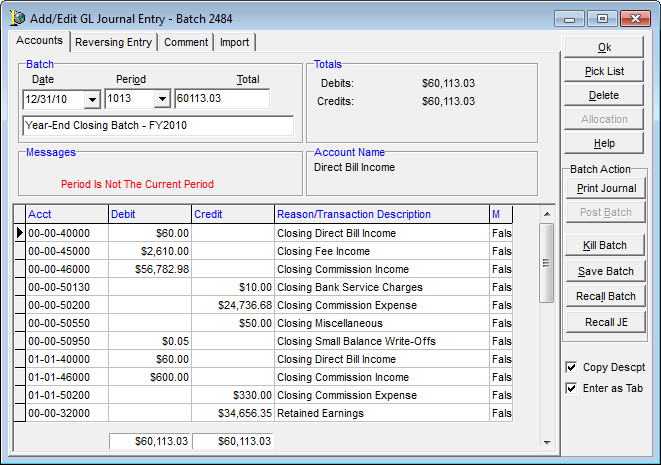
- In the General Ledger module, click the GL Journal Entry menu, and then click Enter/Edit Batch.
- In the Select Batch dialog box, click New.

- In the Batch pane, enter the following information:
- Date – Month that the journal entry is being applied to.
- Period – Period that the journal entry is being applied to.
- Total – Amount of the journal entry.
|
For more information on creating journal entries, review the GL Journal Entry Menu Help topic. |
- Click Print Journal to print the journal entry.
- Click Post Batch.
- Run the financial report preparation and financial statements again after the adjusting journal entries have been made.
It is a good practice to close out any open accounting periods from prior months to prevent new postings to old periods which can alter your balance.
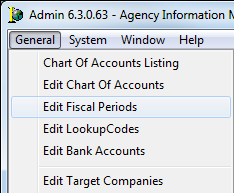
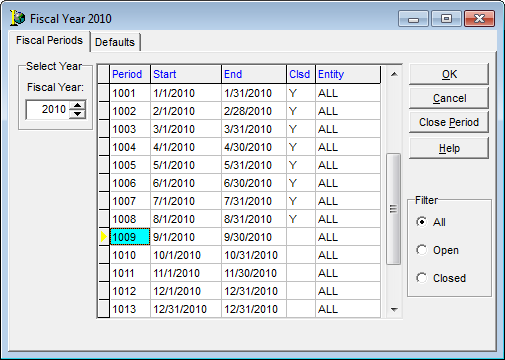
- In the Administrator module, click the General menu, and then click Edit Fiscal Periods.
- In the Fiscal Year dialog box, select a period in the grid.
- Click Close Period to close the period.
Alternatively, you can double-click the Clsd field and press the space bar to toggle the status.
|
Do not close period 13. If you are only using 12 periods, do not close period 12. |
-
Click OK.
This process closes out the income and expense accounts to retained earnings by automatically creating journal entries to zero the account balances. The following steps will create a journal entry batch containing year-end closing entries.
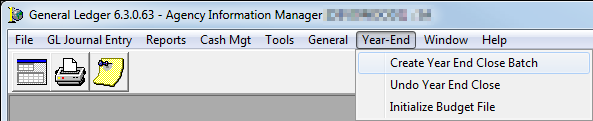
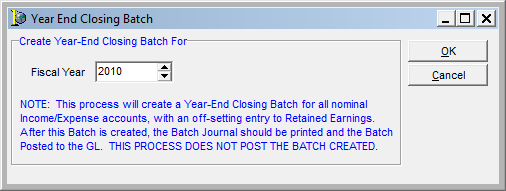
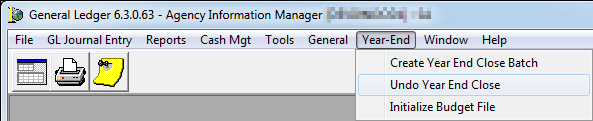
- In the General Ledger module, click the Year-End menu, and then click Create Year-End Close Batch.
- In the Fiscal Year box, type the fiscal year that you are closing.
|
A year-end closing batch will be created for all entities. Entities cannot be closed separately. |
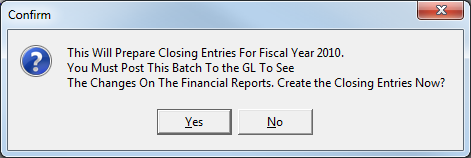
- Click Yes in the Confirm dialog box to create closing entries.
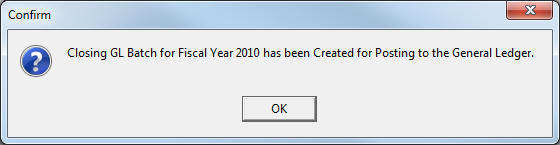
- Click OK.
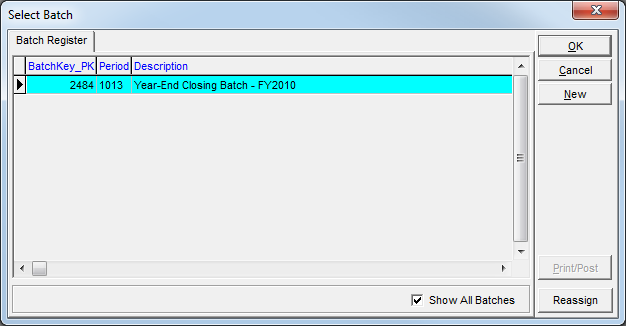
- On the GL Journal Entry menu, click Enter/Edit Batch.
- On the Batch Register tab, select the batch that contains Year-End Closing Batch in the Description column of the grid.
- Click OK.
- Review the batch and make any corrections before posting.
- Click Print Journal to print the journal.
- Click Post Batch to post the batch.
To make certain that accounting is prepared for the next fiscal year, you should verify that next year’s 1st period opening balance is consistent with the closing of the current fiscal year.
- Run the financial report preparation using the first period of the next fiscal year as the starting and ending period.
- Run any financial reports that you require.
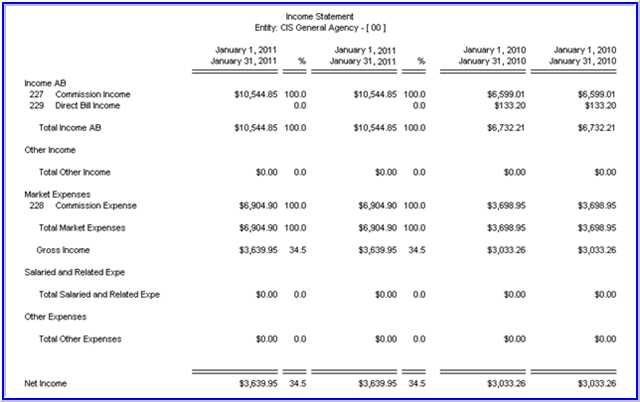
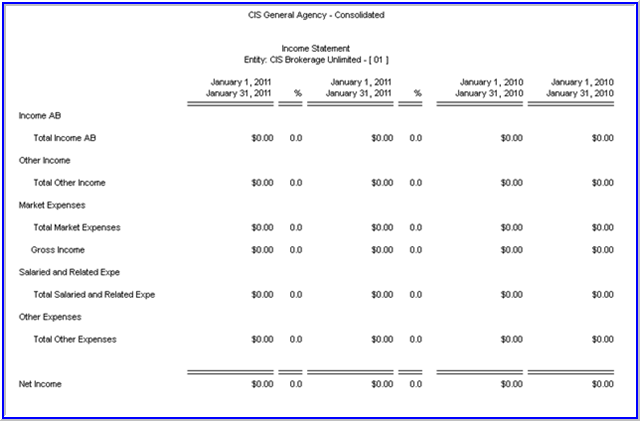
- Run the Income Statement report.
On the Income Statement report, each fiscal year is represented by two columns. The first column for each fiscal year shows totals for the period that you selected when preparing the financial reports. The second column shows year to date. If invoices have been exported for the next year, both pairs of columns should have the same amounts respectively.
If no invoices have been exported and posted to the next fiscal year, the Income Statement report shows zeros in all columns.
If you find that you have forgotten something or if you need to create new adjusting entries, there are steps that you can take to reverse the year-end process.
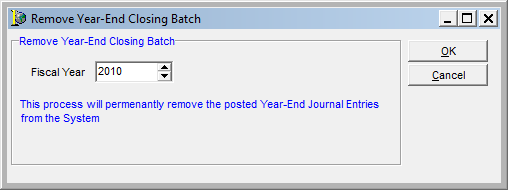
- In the General Ledger module, click the Year-End menu, and then click Undo Year End Close.
- In the Fiscal Year box, type the fiscal year associated with the fiscal year-end batch that you want to remove.
- Click OK.
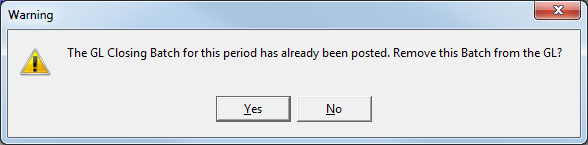
- In the Warning message box, click Yes.
Make corrections and repeat the year-end closing procedures. If the year-end procedure is being performed in the next fiscal year, you must go back to the first period of the current fiscal year, run Financial Report Preparation for that period, and then run financial reports. Repeat this process for each period until you reach the current period. For example, if you are performing year-end procedures for 2010 in the year 2011, you will need to return to the first period of 2011 and run Financial Report Preparation and the fiscal reports as we just described.
In order for the 1099 reports to show the correct data, General Ledger accounts used in 1099 reporting must have the 1099 Account check box selected in the Accounting Admin module. Such accounts would include but are not limited to Commission Expense, Producer Payables, and any vendor expense accounts.
Each retail agent or vendor who will receive a 1099 must also have the 1099 option selected. The 1099 reporting is enabled in the Vendor Payable module for vendors and in the Database Maintenance Utility (DMU) for agents.
|
Vouchers created in the Accounts Receivable or Producer Payable modules will not be reflected in the 1099 reports. |
You can print 1099 reports using the following steps.
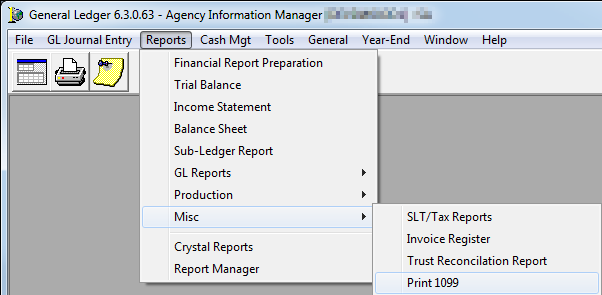
- In the General Ledger module, click the Reports menu, and then click Print 1099.
- Configure the 1099 Reporting dialog box using the following parameters:
|
Parameter |
Action |
|---|---|
|
Client/Co. ID |
Click the magnifying glass button to select a vendor or agent. Leave blank for all. |
|
Division/Entity |
Select the division or entity from the list or leave blank for all. |
|
Tax Year |
Enter the tax year in YYYY format. |
|
Export File Format |
Select the desired export format from the list. |
|
1099 GL Accounts |
Include agency billed generated commissions for GL Accounts configured for 1099 reports. |
|
DB Comm Payments |
Include DB Commissions created and paid in the Producer Payables module. Total DB Commission amount included on the 1099 is calculated on the checks created/posted during the year. |
|
Vendor Payments |
Include Vendors who have been paid that were invoiced to the GL Account with 1099 checked. |
|
Suppress < 600.00 |
Don't display amounts less than $600.00. |
|
Print Detail Report |
Print 1099 report using 1099Detail.rpt if no export format was selected. |
- Once you have configured the 1099 Reporting dialog box, click OK to generate the report.

This process creates a file in the format that you just selected that can be viewed or imported into 3rd party software.