Getting Started with Vertafore API Developer Portal
Vertafore API Developer Portal provides a standard source of documentation for creating applications that rely on Vertafore data and services. The application allows you to test your interactions with Vertafore product data as you develop your application. With Developer Portal, you can create applications more quickly and with confidence with the information and connection tools provided.
To begin, review the information in this topic to set up your application through the tool. You will need files that conform to the requirements as described in this topic.
The information in the Developer Portal Help system is intended to guide all developers using Vertafore APIs, regardless of your API registration. Please note that there are two types of credentials accepted for use and these differ according to the API you use:
- AMS360 Application Developers: Be sure to use OAuth Credentials when developing your applications.
- The API credential keys are provided in anticipation of a forthcoming Vertafore Rating API release.
Getting started involves:
- Signing in to Vertafore Developer Portal. You need a VSSO account and be registered as a licensed Vertafore Developer Portal customer.
- Creating an application. Once you have an application set up, you will have OAuth Credentials (AMS360).
- Enabling an API and scopes (web service methods) that you intend to use.
Sign In
- To sign in to Vertafore Developer Portal, open your browser and navigate to:
https://developer.vertafore.com/portal/ - Select the Sign In button in the top right corner of the Developer Portal.
Click the image to change its size.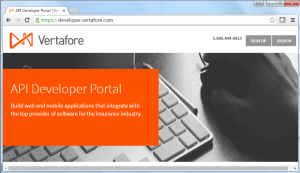
- Sign in to Vertafore Single Sign-On. Enter your email address and password and click Sign In.
Click the image to change its size.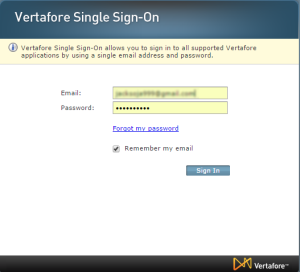
You will then be directed to the Vertafore Developer Portal landing page and ready to move forward toward application development.
Create an Application
Integration credential keys are required to identify your application and build a container for your Vertafore integrated application.
- Once signed in to the Vertafore Developer Portal, click the My Applications tab.
- Click New Application to display the New Application dialog. This information will be used by Vertafore when you submit your application for approval before you can promote it to the .
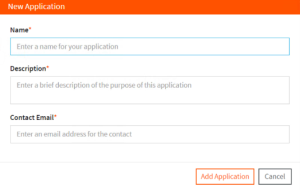
- Enter a name for the application you intend to build.
- Enter a description that helps you define your application for reference.
- Enter an email for a contact person. Vertafore uses this particular email to send an approval or, if necessary, rejection notification once your application has been submitted for promotion approval.
- Click Add Application to create the container for your application.
- Once the application has been created, you will see four boxes (Application Information, API Keys, OAuth Credentials, Required APIs)
Click each of the four boxes for details about each section.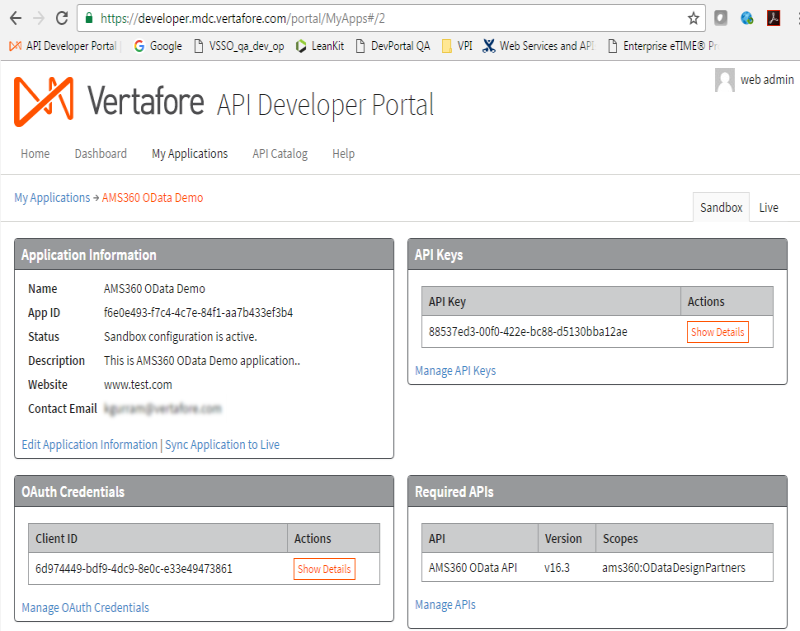
Enable API and Scopes
To select an API, you must have the scope assigned by Vertafore. Scopes are the instances of APIs that your agency has contracted with Vertafore to use when you purchased Developer Portal capabilities.
In Developer Portal, you enable the scopes you intend to use in the Sandbox environment. When you promote your application to the Live environment, Vertafore activates the scopes used.
When working in an API, look for the Read! icon  .
.
When you place your cursor over the icon, the names of the scopes associated with the method you are using display.
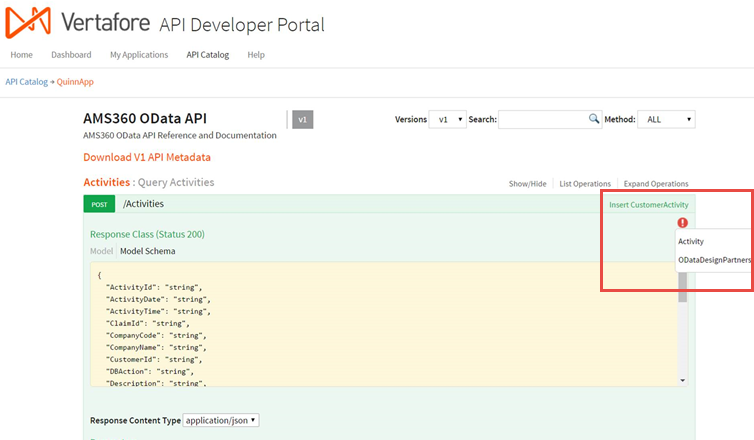
In our illustration below, two scopes display in the Post Activities web service method in the AMS360 OData API: (Activity and (ODataDesignPartners). You can enable either scope; it is not necessary to enable both of them.
To use the method noted in the illustration above, one of the two highlighted choices in the illustration below must be enabled.
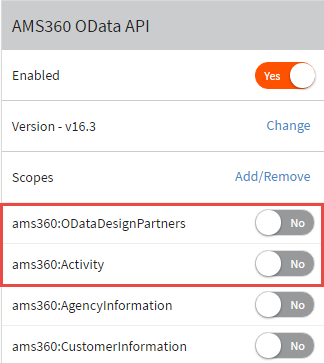
To enable an API and activate scopes
- Open your application in Vertafore Developer Portal.
- In the Required APIs box, click Manage APIs.
- In the API box you intend enable, click the Enabled slider button from No to Yes.
- Click the Scopes Add/Remove link to display the scopes.
- Click the slider button from No to Yes next to the scopes you plan to use in your application.
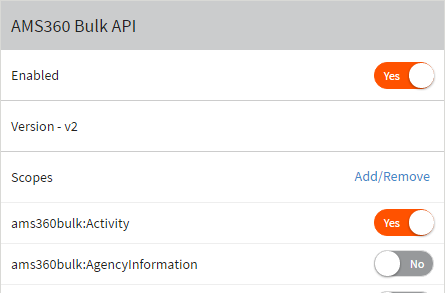
If you choose a scope that you are not authorized to use, the following message will display:
- Continue enabling the scopes you require for your application.
With the above steps completed, you are ready to begin working with your selected API.
© 2024 Vertafore