In other topics, we have explained how to customize windows, use the Desktop tabs, customize toolbars, and more. In this topic, we are going to explain how you can customize the various lists that are displayed in ImageRight, that is, the columns, that are presented in the lists. While our explanations here are related to a limited number of lists, you should remember that you can apply our steps to virtually any list, for example, the lists on these tabs: To Do List, Completed Items, and Task History.
We are going to begin our discussion by explaining how to customize the columns on the To Do List tab. While the scope of our discussion relates only to the To Do List tab, you can modify our examples and apply the features to the other tabs and dialog boxes easily. Later we will explain how to customize and filter columns in the File Open dialog box.
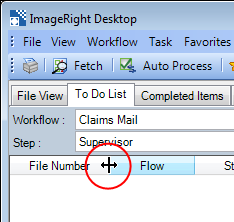
To change the width of the columns, do one of the following:
- Point
at the border between the columns. When the pointer changes to
 ,
drag the column to the desired size.
,
drag the column to the desired size. - Point
a the border between the columns. Double-click when the pointer changes
to . The column will be sized automatically
to the width of the longest item in the column.
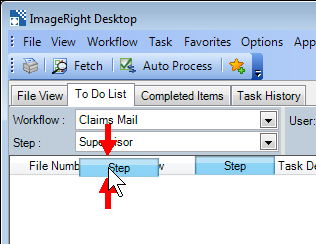
You can change the order of columns by dragging the column headings to new locations. Red arrows appear to indicate where the column will be placed when you release the mouse button.
You can sort the items in the list by any of the column headings by simply clicking the column title. Clicking the heading again will sort the list in the opposite order. A small arrow will be added next to the column heading to indicate the direction of the sort order.

There are other alternatives to changing the display of the columns. You can add or remove columns in the display and change the sort order, and you can save the modified column layout so that it will be used each time you start ImageRight Desktop.
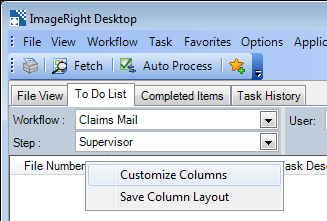
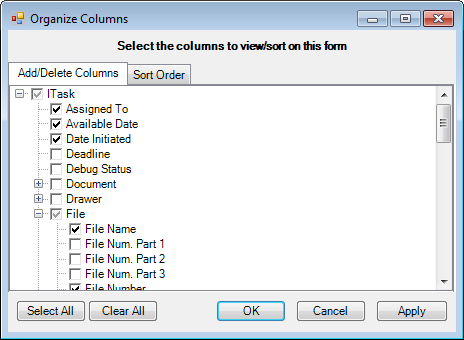
- Right-click a column header and click Customize Columns to open the Organize Columns dialog box.
- On the
Add/Delete Columns tab, select the columns, indicated by
 ,
that you want to display in the list. To remove a column from the list, clear the selection next to the column name. You can click
,
that you want to display in the list. To remove a column from the list, clear the selection next to the column name. You can click  or
or  to expand and collapse the list.
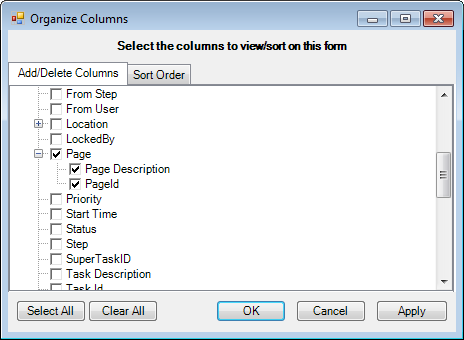
- If you select the highest level in a branch of the hierarchy, Page in our example, all items in the hierarchy will be selected even if the list is not expanded.
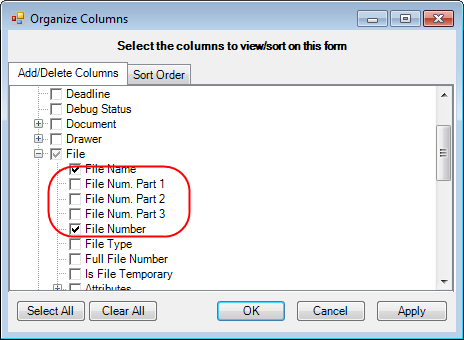
- In the
File branch of the hierarchy, you should select the file number parts
only if your organization uses or has used (one to three part) multi-part
file numbers.
- File Num. Part 1 displays the first part of a multi-part file number.
- File Num. Part 2 displays the second part of a multi-part file number.
- File Num. Part 3 displays the third part of a multi-part file number.
- Full File Number displays the three parts of a multi-part file number as one number.
- To select all items in the list or unselect all items in the list, click Select All or Clear All respectively.
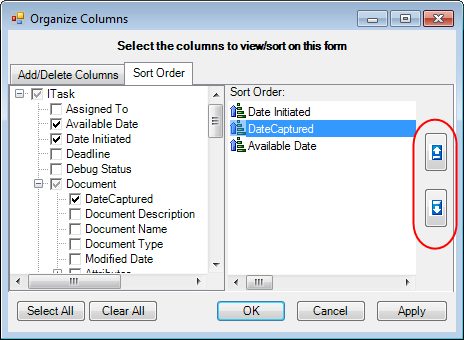
- Click the Sort Order tab. Here, you can manage the manner in which the list is sorted.
- In the left column, select the column headings you would like to use as the basis for sorting the list items. The headings will be added to the Sort Order column.
- To add all the column headings selected on the Add/Delete Columns tab to the sort order or remove all headings, click Select All or Clear All respectively.
- To change
the ascending or descending sort direction of a column (heading), select
an item in the Sort Order list, and then double click the icon to change
the direction.
 –
ascending
–
ascending –
descending
–
descending
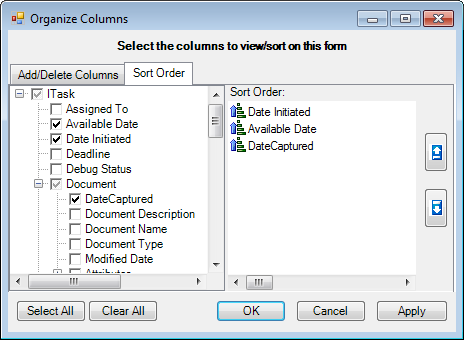
- To manage the order in which the heading sort order is applied you can change the order of the headings in the sort Order column. Select the heading that you would like to move, and then click the up and down arrows to move the heading to the correct order. In our example, the list will be sorted first by Date Initiated then by Date Captured and finally by Available Date.
- Click OK or Apply to save your changes. Click Cancel first to return without saving changes.
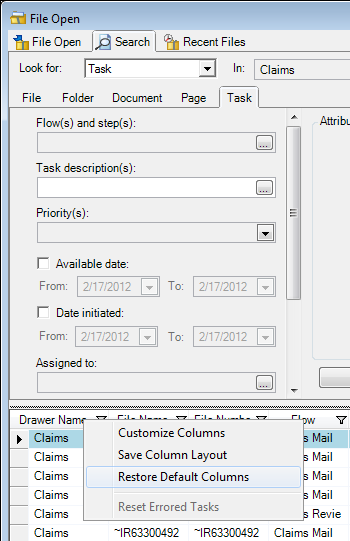
Once you have completed all your changes to the column layout, you can save the layout so that it is restored each time you start ImageRight Desktop. Simply right-click a column heading and click Save Column Layout.

In certain lists, you can also use the Restore Default Columns command to restore the column layout to be what it was the first time you started ImageRight Desktop.
Filtering is a quick and easy way to find and work with a subset of items in a list. A filtered list or range displays only the rows that meet the criteria you specify for a column or columns. Unlike sorting, filtering does not rearrange a list. Filtering temporarily hides rows you do not want displayed.
There are various lists presented in ImageRight that you can filter. For example, when you search for tasks or documents, the results list displayed in the File Open dialog box can be filtered. When you see a list that has a Filter icon next to the column headings, you can filter the list as we explain next.
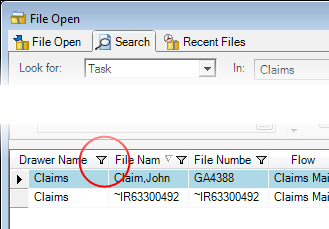
- Click
the Filter icon (
 or
or  )
on the heading of the column that you want to filter. The appearance of
the Filter icon indicates the filter status of the column.
)
on the heading of the column that you want to filter. The appearance of
the Filter icon indicates the filter status of the column.- –
no filter applied
- –
filter applied
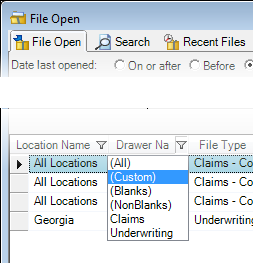
- Select
the item in the list that you want to use to filter the list. The list
will be filtered after each selection.
- All – all items in the list
- Custom – enter specific filter criteria as explained later
- Blanks – all rows with no value in the selected column
- NonBlanks–all rows with a value in the selected column
- Text or identifier that you want, Claims in our example

You can follow these steps to apply custom filter criteria to a list.
- Click
the Filter icon on the heading
of the column that contains the value by which you want to filter, and
then click Custom.
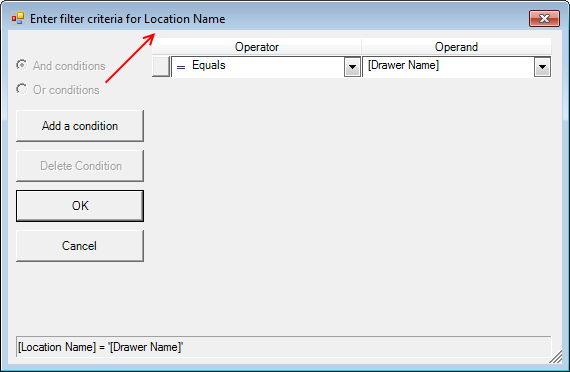
- Enter
your criteria in the Filter Criteria dialog box.
- Select
the appropriate item in the Operator list, for example, Equals or Does
not equal.
- Equals
- Does not equal
- Less than
- Less than or equal to
- Greater than
- Greater than or equal to
- Like
- Matches regular expression
- Starts with
- Contains
- Ends with
- Does not start with
- Does not contain
- Does not end with
- Does not match
- Not like
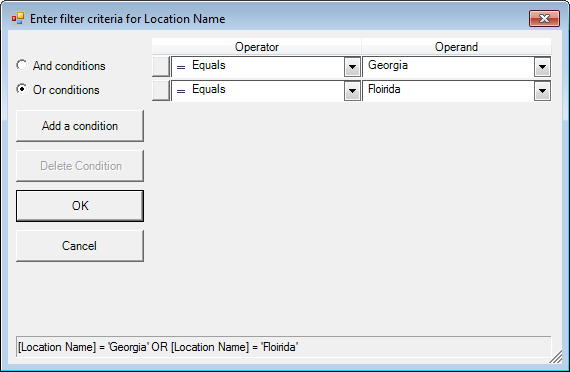
- Enter the value that you want to use for comparison in the Operand list. The operand can be a value, name, label, status, etc. In our example, the list will be filtered based on the location being (equal to) Georgia or Florida.
- Click the Add a Condition button if you want to base the filter on multiple conditions.
- If you have multiple conditions select the appropriate option.
- And conditions – all conditions are satisfied.
- Or conditions – either condition is satisfied.
- To
remove a condition, click
 next
to the condition to select it, and then click the Delete Condition button.
next
to the condition to select it, and then click the Delete Condition button.
- Select
the appropriate item in the Operator list, for example, Equals or Does
not equal.
- Click OK to save your conditions and filter the list.
|
When you apply a filter to a column, the only filters available for other columns are the values visible in the currently filtered range. |
You can compare the values in specified columns in a list.
- Click
the Filter icon ( or )
on the first column, for example, Location, and then click Custom.
- In the Filter Criteria dialog box, select the operator to be used for the comparison.
- In the Operand list, select the heading of the column that you want to compare, for example, [Drawer Name].
- In our example, the list would be filtered to display items for which the location name is the same as (equal to) the drawer name.