In other topics, we explain how to prepare the attachments that will be sent by fax and select the options related to the cover page, letterhead, annotations, etc. In this topic, we are going to explain how to designate the people to whom the fax will be sent.
Typically, the people to whom faxes will be sent are defined and added to address books maintained in ImageRight Enterprise Management Console. You then pick recipients from the predefined lists. However, as with most tasks in ImageRight, there are a number of ways that you can define fax recipients, add address groups, etc. We are going to explain the different methods here. Depending on your access rights, some of the methods may not be accessible. If you have questions about functionality that you cannot access, contact your ImageRight system administrator for more information.
It is also possible to send the fax message and attachments via e-mail. You simply enter an e-mail address as explained later as opposed to entering a phone number. At certain points, you may enter both a phone number and an e-mail address. If you enter both, the recipient will receive two copies, so only one entry should be sufficient.
- Click the Recipients tab in the Send To Fax Recipient dialog box if it is not already displayed.
- To add
recipient fax numbers, names, etc., to the list, do one of the following:
- In
the To box, type the phone number to which the fax should be sent. Click
 or press Enter to add the number to the list.
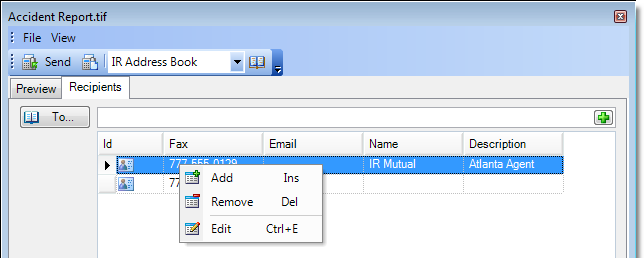
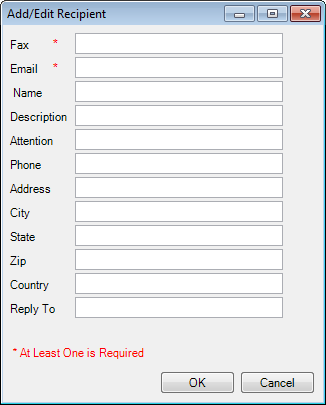
 - Right-click the list and click Add or press the Insert key to open the Add/Edit Recipient dialog box. Enter the fax number or e-mail address (at least one is required). Enter the other identifiable information as appropriate. Click OK to save your entries and add the person to the list.
- In
the To box, type the phone number to which the fax should be sent. Click

- To remove or change a recipient in the list, right-click the recipient and click Remove or Edit respectively on the menu or press the corresponding keyboard shortcut. If you select Edit, the Add/Edit Recipient dialog box will open, and you can make the necessary changes.
The column headers in the recipients list are self-explanatory, but a description of the icons that you will see in the ID column may be helpful.
-
 –
individual person (fax number)
–
individual person (fax number) -
 –
group of people (fax numbers)
–
group of people (fax numbers)
- To
select recipients from a predefined address book, click
 or click the To button in the Send To Fax Recipient dialog box to open
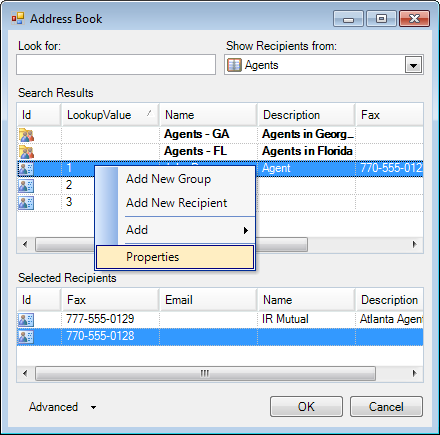
the Address Book dialog box.
or click the To button in the Send To Fax Recipient dialog box to open
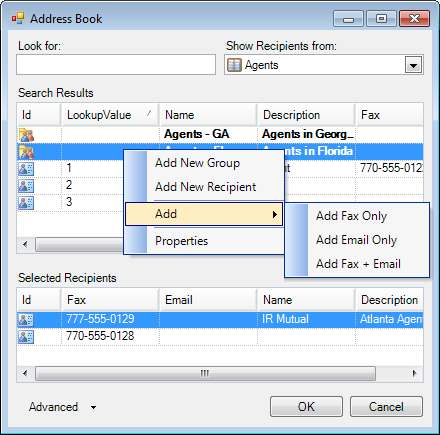
the Address Book dialog box. - You can enter a value in the Look for box to locate items in the Search results list. You have to enter a value that corresponds with a value in the Lookup Value column of the list.
- In the Show recipients from list, you can select the address book that contains the names and groups that you want to use.
- To add
names or groups in the Search results list to the Selected recipients
list (the people to whom the fax should be sent), do one of the following:
- Double-click the name.
- Right-click
the name and select one of the following commands:
- Add Fax Only – adds the name and fax number only
- Add E-Mail Only – adds the name and e-mail address only
- Add Fax + E-Mail – adds the name, fax number, and e-mail address (The recipient will get two copies.)
- Add a new recipient as explained next.
- Click OK to save the Selected recipients list and add them to the list on the Recipients tab.
There are several other methods that you can use to add recipients to the Selected recipients list or change recipients in the list.
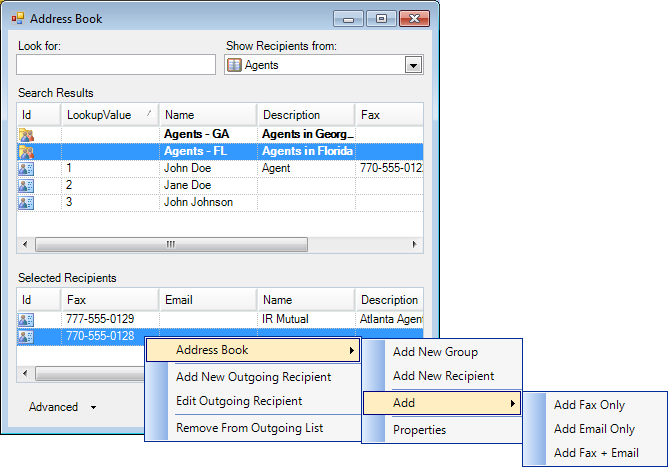
- Right-click
in the Selected recipients pane, point to Address Book, point to Add,
then click one of the following commands (defined earlier). The command
you select will be applied to the person that is selected in the Search
Results list.
- Add Fax Only
- Add E-Mail Only
- Add Fax + E-Mail
- You can add a new recipient, that is, a person who does not appear in the Search Results. Click Add New Outgoing Recipient to display the Add/Edit Recipient dialog box.
- Complete the necessary information in the Add/Edit Recipient dialog box as explained earlier. The entered information will be used only for the current fax.
- To edit a recipient's information, right-click the name and click Edit Outgoing Recipient to open the Add/Edit Recipient dialog box. Change the necessary information and click OK to save your changes. Changes that you make in this manner apply only to the current fax and will not be saved for future use.
- To remove a recipient from the list, right-click the recipient and click Remove From Outgoing List.
You can change address books by adding groups to them, and create and change recipients within the Address Book dialog box. The changes you make are maintained in ImageRight Enterprise Management Console. The new groups or other changes are global, that is, they can be seen (used) by everyone who sends faxes.
|
Consider changes that you make to address books and recipients carefully as they will affect all ImageRight users. |
To add a new address group, you can adapt our example as needed.
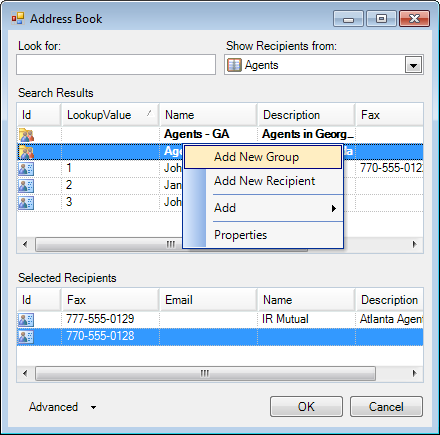
- Select the Address Book to which the group should be added in the Show recipients from list.
- Right-click in the Search Results list and click Add New Group.
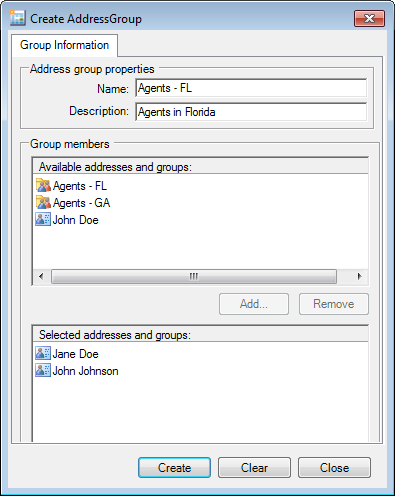
- In the Create Address Group dialog box, type a name and an easily identifiable description in the Name and Description boxes respectively.
- To add members to the new group, select the members in the Group members pane and click Add.
- To remove a member from a group, select the member in the Selected addresses and groups pane and click Remove.
- Click Create to save your changes and add the new group to the Search results list.
- Click Close before Create to return without saving changes.
- Click Clear to clear your entries and keep the dialog box open for additional use.
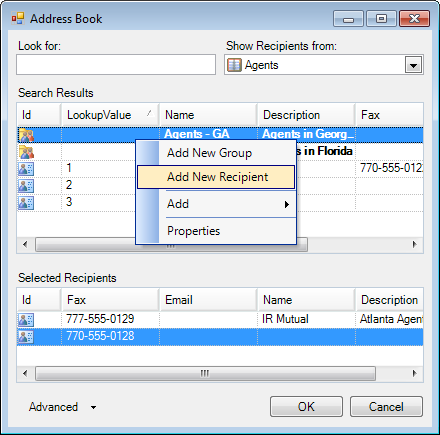
You can add a new recipient to the search results.
- To add a new recipient to the Search results list, right-click in the Search Results list and click Add New Recipient.
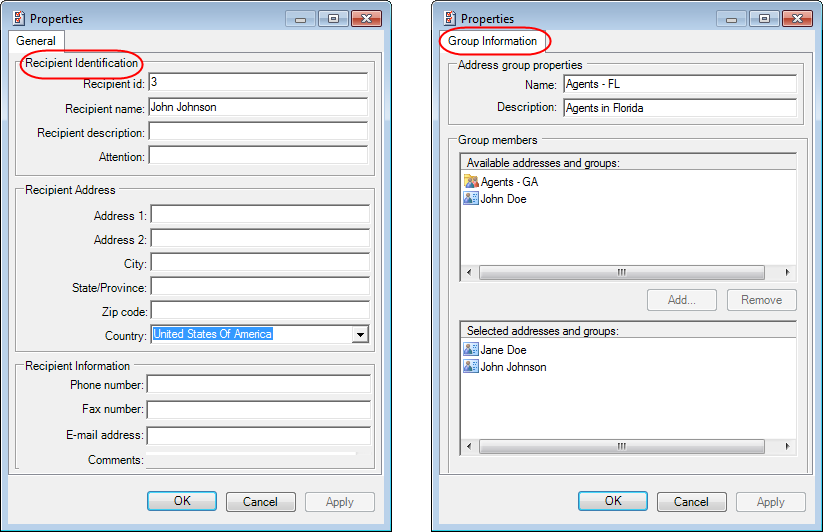
- Enter the Recipients information in the Create Recipients dialog box. The Recipient ID is a unique alpha-numeric identifier that you create. For example, if you are adding agents and want to identify the state in which they reside, you might use the state abbreviation followed by a number (GA01). The labels on the other boxes are self-explanatory.
- Click Create to save your changes and add the new recipient to the Search results list.
- Click Close before Create to return without saving changes.
- Click Clear to clear your entries and keep the dialog box open for additional use.

You can easily change the information related to a group or person.
- Right-click the member and click Properties.
- Change the information in the respective Properties dialog box.
- Click OK or Apply to save your changes.
- Click Cancel first to return without saving your changes.
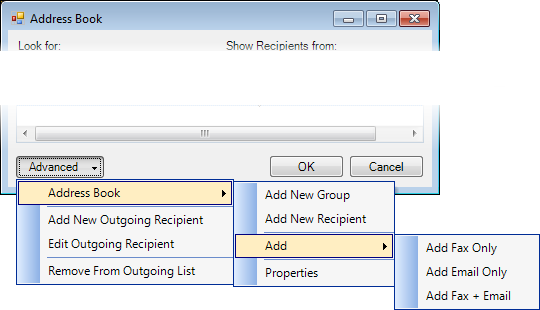
In our earlier discussion, we explained how to access a number of different menu commands that you can you use to manage fax recipients. You can access most of those same commands by clicking Advanced.