Desktop Scanner Tour
In this topic, we are going to point out some important elements of the ImageRight Desktop Scanner interface.
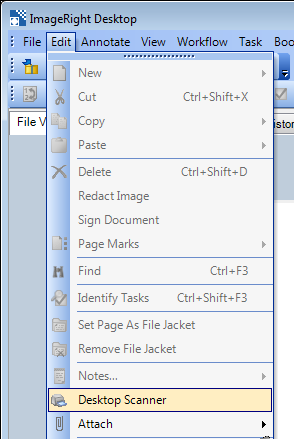
- To start Desktop Scanner, click Desktop Scanner on the Edit menu.
|
You can start Desktop scanner although you may not have turned on the scanner. You can select the scanner later. |
The main window presented when the program starts is used to configure the scan options. You select the options based on the needs of your organization and the descriptions provided later.
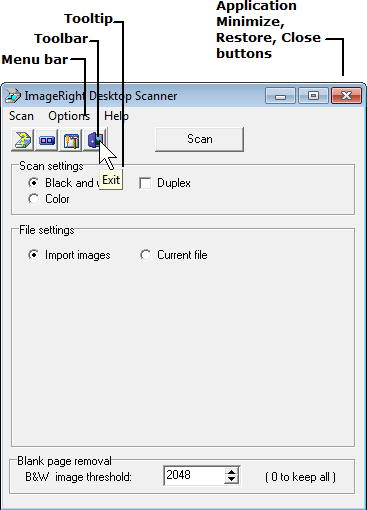
The menu bar is the starting point for setting up the program options to be used in the scan process. The menu items can be expanded to display a list of available commands that you can use to select the scanner being used, the view mode, close the program, and more.
As in most Windows applications, the toolbar, which is for the graphically focused user, provides icons that invoke many of the same functions as the commands on the menu bar.
It is sometimes difficult finding the correct toolbar icon to click. If you are not sure what some of the icons mean, point to them and a tooltip appears, displaying the button's name. You will find an overview of each icon in the table below.
Click an icon in the list to learn more.
|
Icon |
Name |
Description |
|---|---|---|
|
|
Select Scanner |
Select the scanner to be used from a list |
|
|
Compact/Full View |
Switch the interface view between compact and full |
|
|
Scanner Configuration |
Configure the scanner settings |
|
|
Exit |
Close the program |
|
|
Start the scan process |


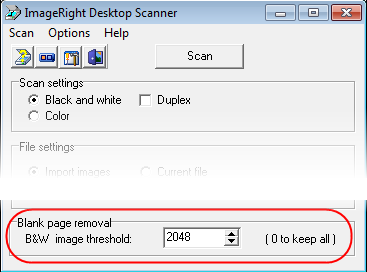
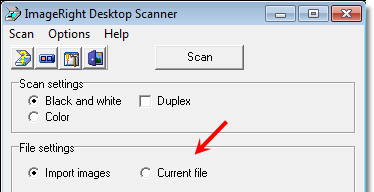
Scan Settings
The options in the Scan settings pane are defined below. Select the options that meet your needs based on the descriptions provided. The selections you make are remembered each time you close the program.
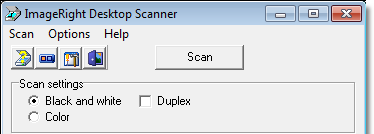
- Black and white – All documents will be scanned in black and white, often referred to as bitonal.
- Color – All documents (front and back if the Duplex option is selected) will be scanned in color, if a color capable scanner is used.
- Duplex – Indicates that both sides of the document will be scanned, creating two page images.
File Settings
In the File settings pane, you can control the filing options applied to the scanned images. The descriptions below should be helpful in selecting the option that meets your needs.
- Import – The Import dialog box will be opened after you scan a batch of documents. In that dialog box, you can select all the filing options necessary to designate where the scanned images should be stored. (see Import Images)
- Current file – Reserved for future use.
Blank Page Removal
The value entered in the B&W image threshold box is recognized and used by the program to differentiate between blank pages and pages with information. The entered value defines the minimum size in bytes that the images must be to be saved. If the size is below the minimum, the scanner will recognize the sheet as a blank page, and the page will be discarded.
Typically, the recommended setting is 2048. If you elect to change the setting, you should test the change thoroughly to ensure blank pages are discarded according to your needs. You can type the value in the box or use the spinner arrows to set the value.