You can use images as annotations. For example, you could use your company logo as an embedded image, making it possible to add the logo to an image quickly, just as easily as drawing a line on an image.
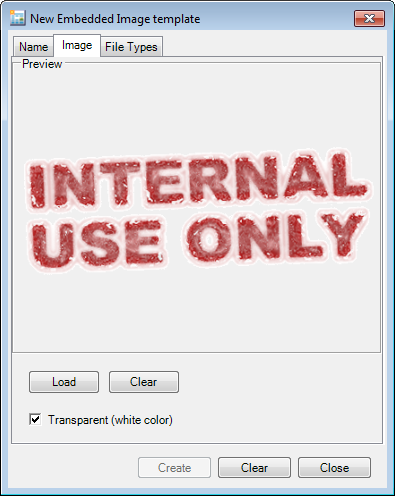
In our example, we are going to use an image to create an internal use only stamp.
- Select
Embedded Image in the list of annotation tools and click
 on the toolbar to open the New Embedded Image Template dialog box.
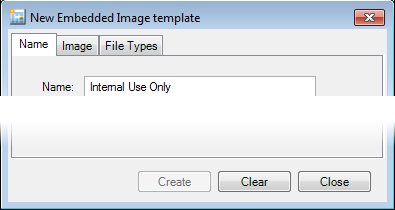
- On the Name tab, type an easily identifiable name in the Name box.
- On the Image tab, click Load.
- In the Load Image dialog box, find the image that you would like to use. Image files must be in the bitmap (.bmp) format.
- Select the image and click Open. Click Cancel to return without selecting the image.
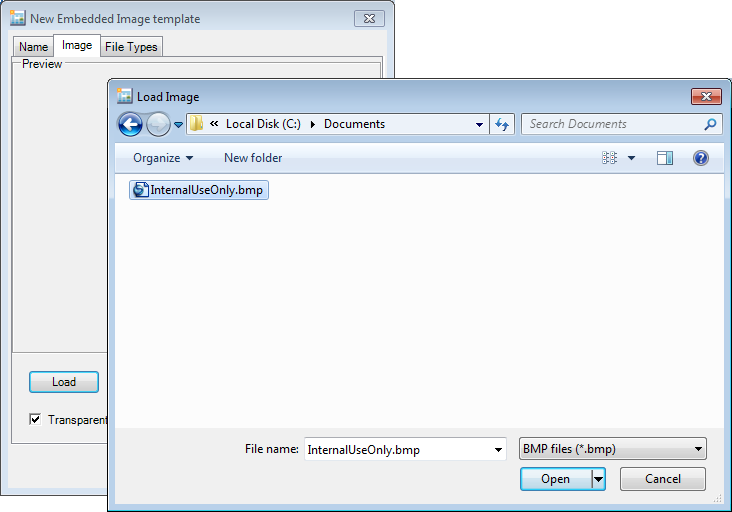
- The image will be displayed in the Preview pane.
- Click Clear to remove the image and start over. Alternatively, you can click Load and locate another image to replace the one in the preview.
- Select the Transparent (white color) option, and the background of the image will be transparent. If you uncheck the option, the background will be white. You should consider that a white background could cover text in the image when the annotation is applied.
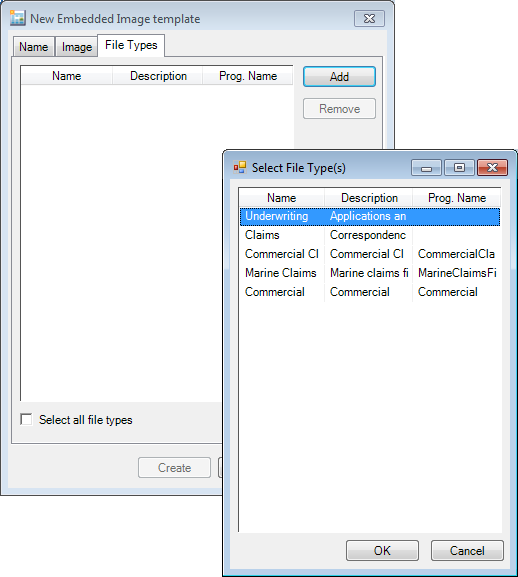
- On the File Types tab, you can designate specific file types with which the image annotation may be used. When you add a type here, the annotation may only be used on documents (images) included in the type's file structure, that is, the organized documents structure.
- Click Add to display a list of file types.
- In the Select File Type dialog box, select the file type. You can select multiple types by using Shift+click, Ctrl+click, or dragging the mouse pointer over the types to be selected.
- Click OK when your file type selections are complete.
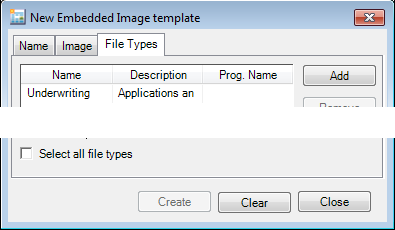
- As an alternative to adding specific file types, you can select the Select all file types option at the bottom of the dialog box. When you select this option, the annotation may be used with any file type in the storage structure.
- To remove a file type form the list, select it, and then click Remove.
- Click Create to save your changes. Click Clear to remove all entries and keep the dialog box open for further use. Click Close before Create to return without saving your changes.
Changing or Removing an Embedded Image
At some point, you may want to change an image that is used as an annotation.
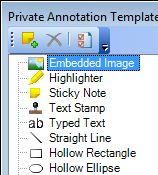
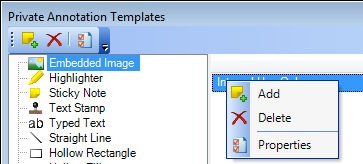
- Click Embedded Image in the left side of the Private Annotations template window to display a list of image annotations in the right side of the window that have been created.
- Right-click
the annotation that you would like to change, and then click a command
on the menu. Alternatively, you can select an annotation name and click
the corresponding button on the toolbar.
- Delete – removes the annotation from the list.
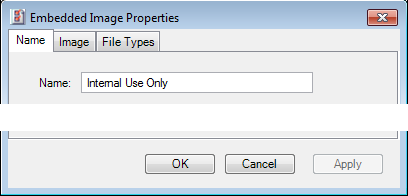
- Properties – opens the Properties dialog box where you can make changes.
- Make the
necessary changes in the dialog box. If you need information regarding
the properties and locating an image, see our earlier discussion regarding
the creation of the annotation's private attributes. You can:
- Change the image associated with the annotation on the Image tab.
- Change, add, or remove file types on the File Types tab. To remove a file type, select it and click Remove.
- Click OK or Apply to save your changes. Click Cancel first to dismiss the dialog box without saving your changes.