File Marks
Many people that use ImageRight open and work files that require special attention. For example, a file may require a review by the legal department or a special investigation. If you work with these types of files, you may want to mark the files in some way to make them easier to identify. By following our examples below, you can quickly add marks to any file. When you open a marked file, the mark will be your clue to the file's status.
|
File marks are created in ImageRight Enterprise Management Console and made available for use in Desktop. For more information about creating file marks, contact your ImageRight system administrator. |
- Open the
file you would like to mark and ensure it is displayed in the Desktop
file structure. If you have multiple files open, look at the icon in the
navigation pane. The icon on the file being viewed will be
 .
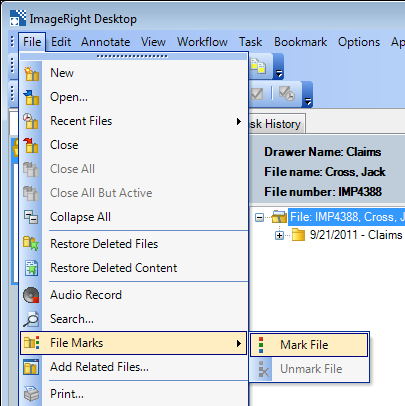
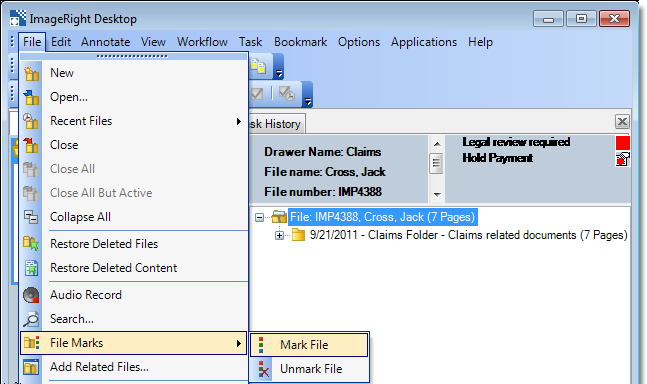
. - On the File menu, point to File Marks, and then click Mark File to open the File Marks dialog box.
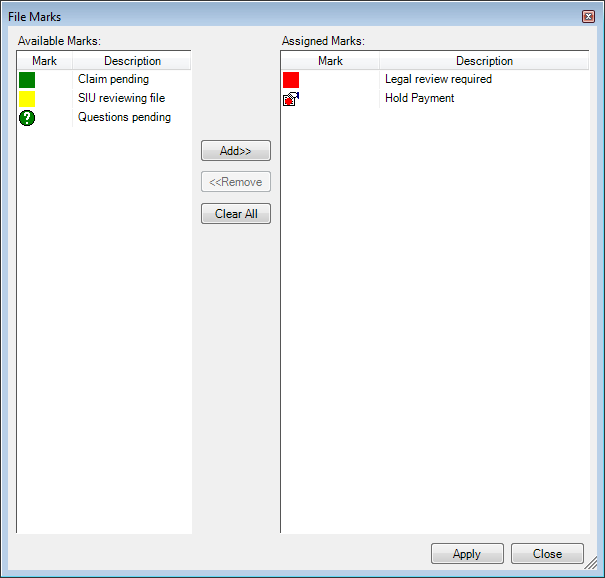
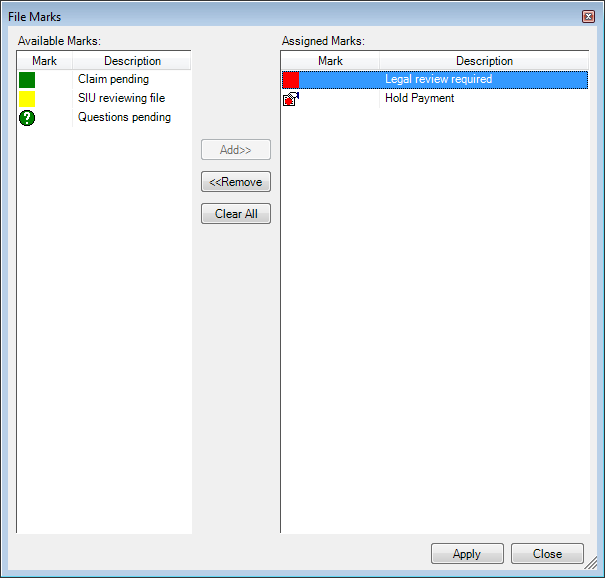
- In the Available marks column, select the mark, based on the description, that you would like to add to the file. You can select multiple marks using Ctrl+click or Shift+click.
- Click Add to move the mark to the Assigned marks column. As an alternative, you can double-click the mark to move it to the Assigned marks column.
- To remove
a mark from the Assigned marks column, do one of the following:
- Select the mark that you would like to remove and click Remove.
- Double-click the mark that you would like to remove.
- Click Clear All to remove all marks from the file.
- Click Apply to save your changes. Click Close first to return without saving changes.
|
You can resize the File
Marks dialog box. Point at the lower right corner.
When the pointer changes to |
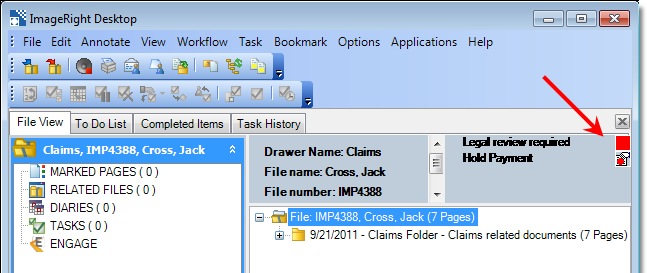
- The file marks appear in the file information pane.
|
If you can't read the description on the mark, point at the note, and a tooltip will appear. |
When a file no longer requires special handling, you may want to remove the marks. There are two ways to remove marks from a file. You can:
- Remove all marks with one action.
- Remove specific marks on a file.
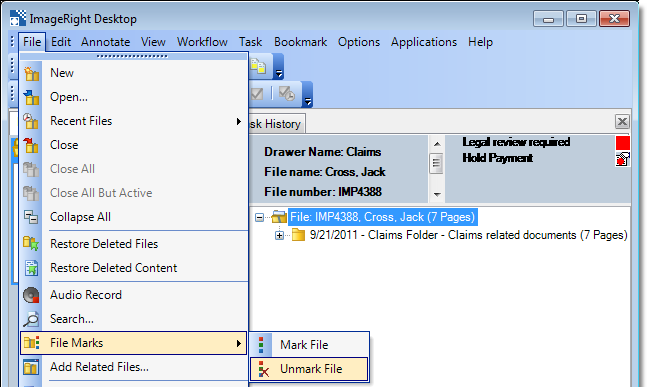
- To remove all the marks on a file, point to File Marks on the File menu, and then click Unmark File.
- To remove specific marks on a file, point to File Marks on the File menu, and then click Mark File.
- In the File Marks dialog box, select the mark in the Assigned marks column that you would like to remove, Legal review required in our example.
- Click Remove to remove the selected mark. Click Clear All to remove all marks. Click Apply to save your changes.
 ,
drag the box to the desired size.