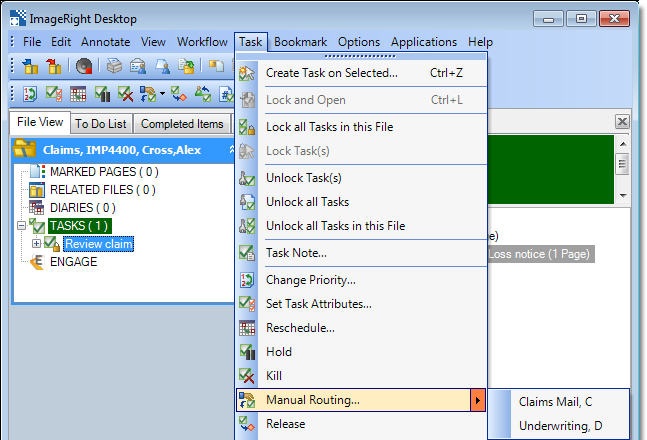
At some point, you may need to route a task so that it does not follow the standard path of the workflow. For example, you may find a task in the wrong workflow and need to route it to a completely different workflow.
You can use the Manual Routing command to route a task to a specified workflow, step, or person, often referred to as routing a task outside the workflow. You can also change other properties of the task.
- Lock the task and select it in the navigation pane.
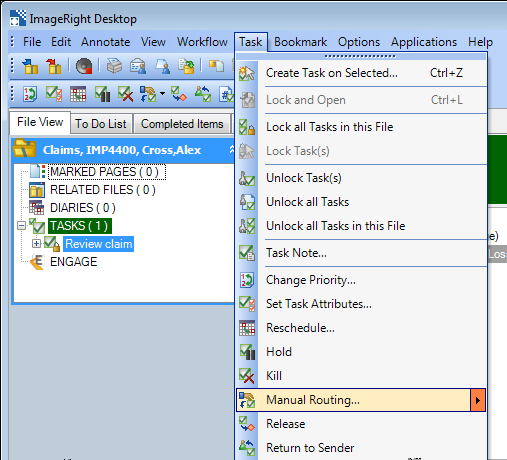
- On the Task menu, click Manual Routing to open the Manual Route dialog box.
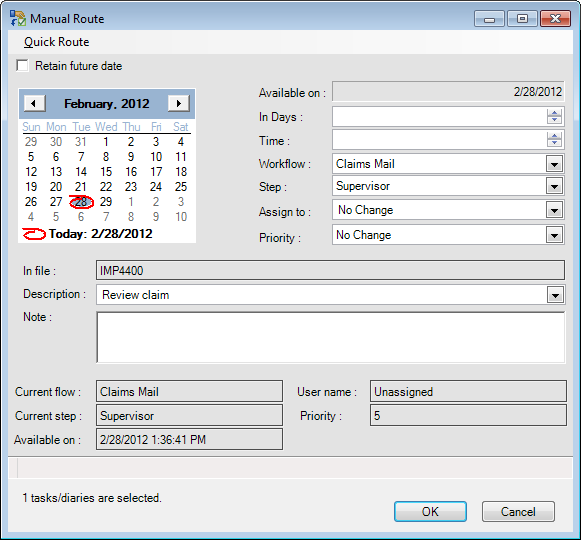
- If you
need to change the date the task will be available, unselect the Retain
future date option. This will make the calendar available so that you
can schedule the task for a future date. Set the new date in the Available
on box by doing one of the following:
- Click a date on the calendar. Click the arrows at the top of the calendar to move from month to month.
- Enter the number of days in the future that you want the task to be available in the In days box. You can type a new value or use the arrows to set the value.
- Enter the new time value in the Time box. You can select the value to be changed and type the new value or use the arrows to set the new time.
- Enter
the information for the following items:
- Workflow
- Step
- Assign to (name of the person to whom the task should be assigned)
- Priority (0 – highest to 9 – lowest)
- Enter a reminder, etc., in the Description box.
- You can add a task note in the Note box, if needed, to provide additional information. Perhaps you want to explain in more detail why the task was routed outside the normal workflow.
- Click OK to save your changes or Cancel to return without saving changes.
Quick Route
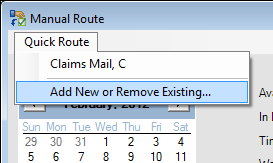
If you routinely route tasks to the same destination, creating a quick route will be a real time saver. You could think of a quick route as a favorite or shortcut. Once a route is created, you can click it on the Task menu or simply type the assigned keyboard shortcut to route the task. You can easily adapt our steps below to add, change, or remove a quick route.
- Select all the options related to the route for the task, that is, manual route, as explained earlier.
- On the Quick Route menu, click Add New or Remove Existing to open the Quick Route Favorites dialog box.
- In the Add New Favorite pane, type the name of the quick route in the box.
- Click the arrow next to Please select shortcut. Then click the letter that you would like to use as the keyboard shortcut to apply the route.
- Click OK or Apply to save your changes.
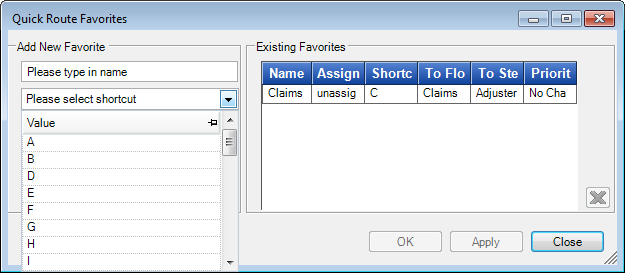
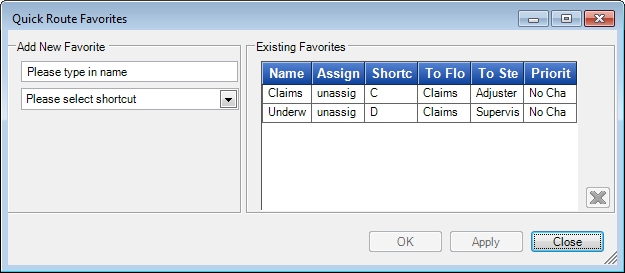
- To see the details of a quick route, for example, the assigned shortcut, open the Quick Route Favorites dialog box.
- To remove
a quick route that is no longer needed, select the route in the Existing
Favorites list, click
 , and
then click OK or Apply to save your changes.
You can use a number of methods to apply the quick route to a task.
- Lock a task, and then do one
of the following:
- On the Task menu, point to Manual Routing, and then click the name of the quick route that you want to use.
- Right-click the task, point to Manual Routing, and then click the name of the quick route that you want to use.
- Press Ctrl+Q, and then press the keyboard shortcut assigned to the quick route.
- On the Task menu, click Manual Routing to open the Manual Route dialog box.
- On the Quick Route menu, click the quick route that you want to use.
- Click OK to route the task.
