If you use the various, available options to search for files, you may be asking if it is possible to customize the results list to meet your needs. You can easily customize the list. While our explanations here are related to a specific list, you can apply our steps to virtually any list in ImageRight.
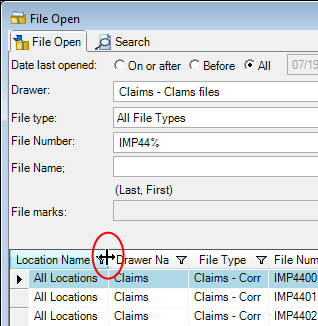
To change the width of columns, point at the border between the columns
and when the pointer changes to  do one of the following:
- Drag the column to the desired size.
- Double-click the border. The column will be sized automatically to the width of the longest item in the column.
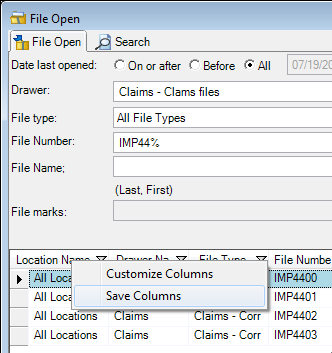
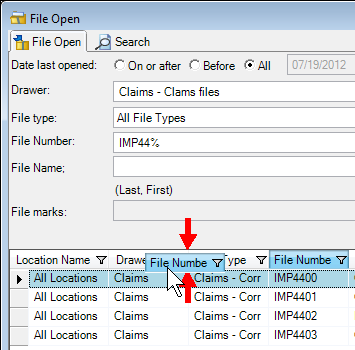
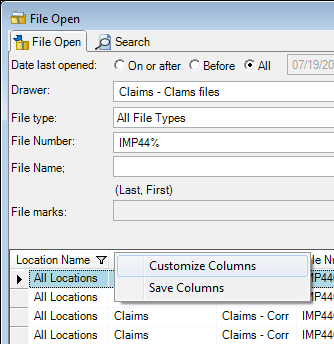
You can change the order of columns by dragging the column headings to new locations. Red arrows appear to indicate where the column will be placed when you release the mouse button. To save the new column layout for future use, right-click a column heading, and then click Save Columns.
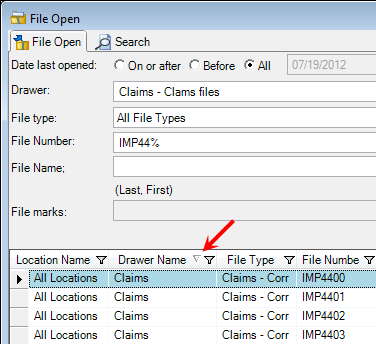
You can sort the items in the list by any of the column headings by simply clicking the column title. Clicking the heading again will sort the list in the opposite order. A small arrow will be added next to the column heading to indicate the direction of the sort order.
There are other alternatives to changing the display of the columns. You can add or remove columns in the display, change the default sort order, and you can save the modified column layout so that it will be used each time you start ImageRight Outlook Interface.
- Right-click a column header and click Customize Columns to open the Organize Columns dialog box.
- On the
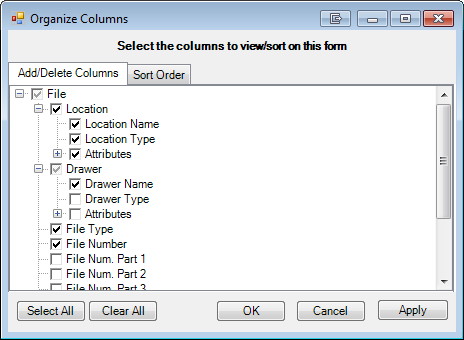
Add/Delete Columns tab, click
 or
or  to expand and collapse the list. Select the columns,
indicated by
  , that you want to display
in the list. To remove a column from the list, clear the selection next
to the column name. If you select the highest level in a branch of the
hierarchy, Location in our example, all items in the hierarchy will be
selected even if the list is not expanded.
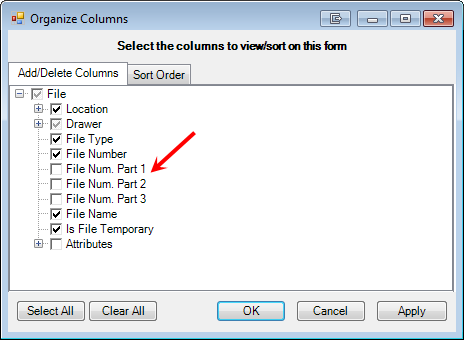
- When selecting the options related to the file number display, you should select the file number parts (File Num. Part 1 – 3) only if your organization uses or has used (one to three part) multipart file numbers. When you select File Number, all numbers will be displayed as a single number.
- To select all items in the list or unselect all items in the list, click Select All or Clear All respectively.
- Click
the Sort Order tab. Here, you can manage the manner in which the list
is sorted.
- In the left column, select the column headings you would like to use as the basis for sorting the list items. The headings will be added to the Sort Order column.
- To add all the column headings selected on the Add/Delete Columns tab to the sort order or remove all the headings, click Select All or Clear All respectively.
- To
change the ascending or descending sort direction of a column (heading),
select an item in the Sort Order list, and then double click the icon
to change the direction.
 – ascending
 – descending
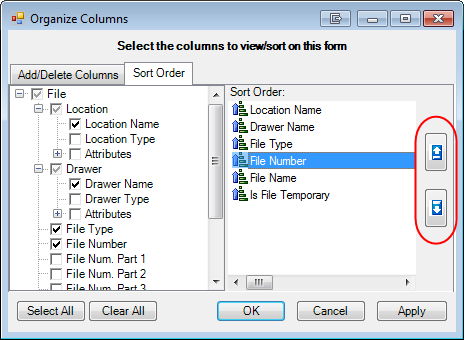
- To manage the order in which the heading sort order is applied you can change the order of the headings in the Sort Order column. Select the heading that you would like to move, and then click the up and down arrows to move the heading to the correct order. In our example, the list will be sorted first by Drawer Name, then by File Number, and finally by State.
- Click OK or Apply to save your changes. Click Cancel first to return without saving changes.
- To save the your column layout changes, right-click a column heading, and then select Save Columns.
