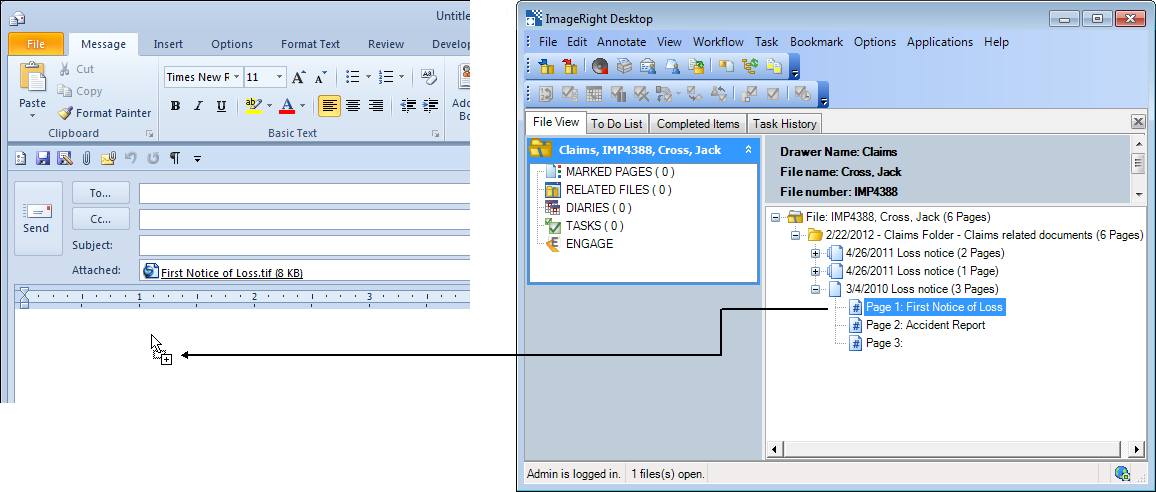
Sending multiple pages attached to an e-mail message from different folders or documents is as simple as a point and click of the mouse. You can select consecutive items by using Shift+click or non-consecutive items by using Ctrl+click. It is best to complete all your selections before you continue the process of sending the e-mail message, but later we will explain how you can add items not selected in Desktop. We will even explain how to attach items that are outside the ImageRight system.
- Select the items in Desktop that you want to send.
- On the
File menu, point to Send To, and then click Mail Recipient.
As an alternative, you can click on the toolbar.
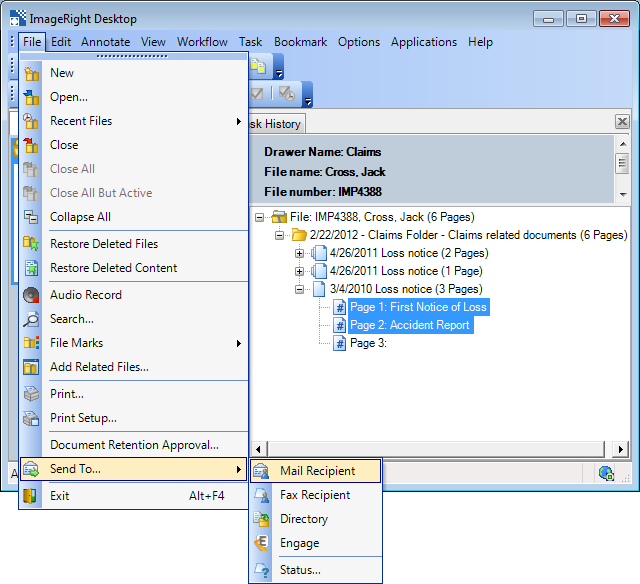
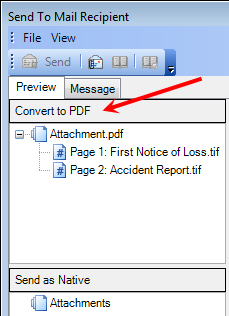
- The items
in the Convert to PDF list will be converted to PDF and attached to the
e-mail message.
- If you send multiple images (TIFFs for example), they will be converted to a multi-page PDF.
- An item in its native format, for example a word processing document, will be converted to a PDF attachment.
- If a document and an image are listed under the same Attachment branch, they will be converted into one multi-page PDF.
- To send multiple items in the list as multiple PDF files, you must create separate attachments, using the Create Attachment command, and then drag the items to place them under a new attachment. To create a new attachment, right-click in the Convert to PDF pane and click Create New Attachment on the menu.
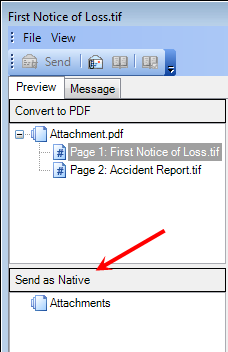
- Items
in the Send as Native list will not be converted to PDF. This means you
can send items in their native format.
For example, you can send a word processing document without it being converted to PDF. To add items to the list, simply drag them from the Convert to PDF list and drop them in the Send as Native list. The arrow (not shown) indicates the placement of the attachment being moved.- If you send a document in this manner the person receiving the document will be able to edit the document as needed, provided he has access to the related application.
- Each item in the Send as Native list will be attached to the message separately.
You can add items to the Convert to PDF or Send as Native List pane while the Send To dialog box is open.
To attach items that are not in ImageRight, select an attachment in
either pane, and then click ![]() on the toolbar or select Attachments on the File menu.
You can also click the Browse button at the bottom of the dialog box.
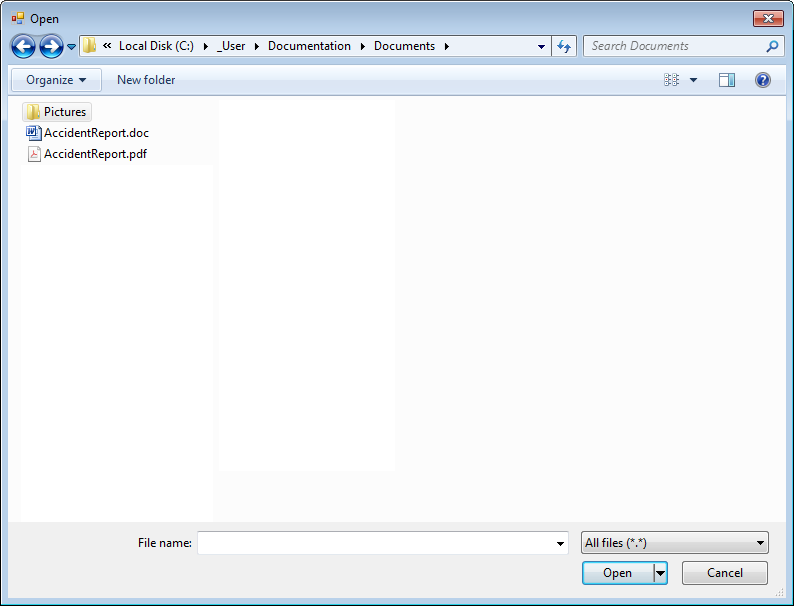
In the Open dialog box, locate and select the file that you want to attach.
Click Open to attach the file or simply double-click the file. The file
will be added to the Convert to PDF pane. To send the item in its native
format, simply drag it to the Send as Native pane.
on the toolbar or select Attachments on the File menu.
You can also click the Browse button at the bottom of the dialog box.
In the Open dialog box, locate and select the file that you want to attach.
Click Open to attach the file or simply double-click the file. The file
will be added to the Convert to PDF pane. To send the item in its native
format, simply drag it to the Send as Native pane.
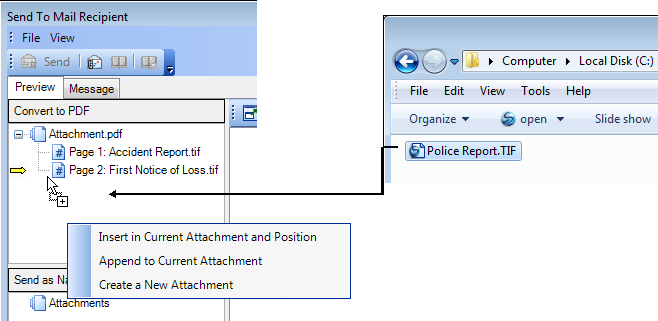
You can drag files from Windows Explorer and drop them into the list. The arrow that appears will help you position the item. When the menu appears, choose from the correct command based on these descriptions:
- Insert in Current Attachment and Position – place the item between others in the same attachment
- Append to Current Attachment – place the item in the last position of the same attachment
- Create a New Attachment – place the item in a new attachment
You can drag items from other ImageRight files into the lists. This will be helpful when you need to send documents from two or more files.
|
When moving or adding items to an attachment, you can select multiple items using Shift+click or Ctrl+click. |
You can also drag ImageRight items directly into an e-mail message window to create attachments.
- Start an e-mail message, as we did using Microsoft Outlook.
- Locate the item in Desktop that you want to attach.
- Drag the item to the message window and drop it to create an attachment. You can select multiple items using Shift+click or Ctrl+click.
If you drag the:
- File level, all items in the file will be attached.
- Folder level, all items in the folder will be attached.
- Document level, all pages in the document will be attached.
Documents, spreadsheets, etc., (Microsoft Word documents for example) are attached in their native format. That is, the items are not converted to images. Images are also attached in their format, for example TIFF or JPEG.
