In most cases, you will perform all your work in Desktop without actually touching a paper document. That is, all your work will be performed on electronic images. However, you can print documents, pages, files, etc., that are in ImageRight.
Follow the guidelines below to ensure accurate and successful printing. To print:
- A single page of a document, select only that page.
- All pages associated with a document, select the document level.
- All documents and pages in a folder, select the folder level.
- Every document and page in the file, select the file level.
|
Be careful when choosing the items to print. If your choice is at the file level, all documents and all pages in that file will be printed. Imagine printing a 500-page file. |
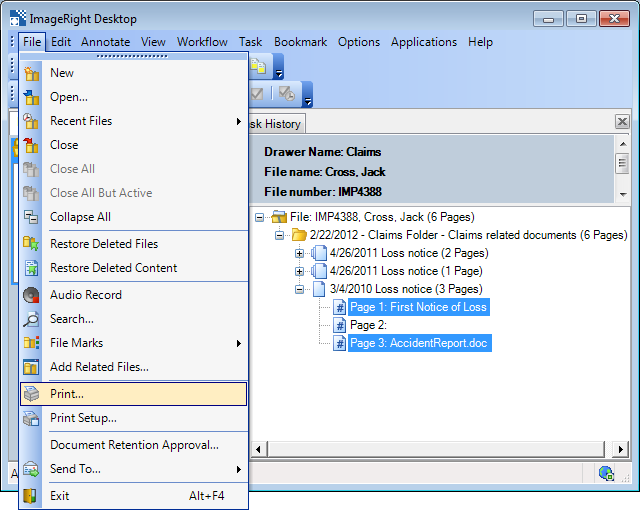
- Select the items that you want to print, for example pages 1 and 3. You can select consecutive items by clicking the first item, holding down Shift, and then clicking the last item. To select items that are not consecutive, press and hold down Ctrl then click each item.
- On the File menu, click Print to open the ImageRight Print dialog box.
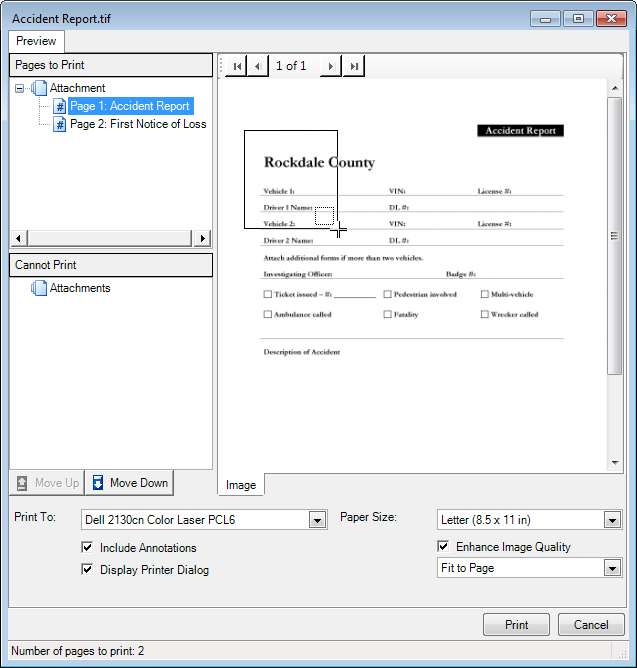
- The selected
pages are displayed in the Pages to Print list. To see a preview of a
page, select the page in the list. To enlarge or change the orientation
of the page, do one of the following:
- Press Ctrl+Ctrl to enlarge the view of items other than PDF files.
- Drag the mouse pointer across a section of the page (draw a box around a section). When you release the mouse button, the section will be enlarged. Double-click the page to restore it.
- To change
the order in which the pages will be printed, do one of the following:
- Select the page that you would like to move and click Move Up or Move Down at the bottom of the pane.
- Drag pages to the new positions as needed.
- Pages that cannot be printed appear in the Cannot Print list. One example of pages that cannot be printed is an Adobe LiveCycle PDF with dynamic fields. To print the items, you must open them in their native application.
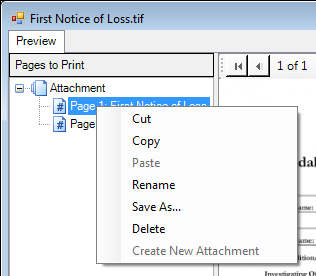
- There
are several menu commands that you can apply to the items in the list.
Right-click a page and select one of the commands on the menu.
- Cut – cuts the selected page in its current location so that you can move it to another location.
- Copy – copies the selected page to the Clipboard so that you can paste a copy in a new location.
- Paste – pastes a copy or moves a cut page in a new location.
- Rename – change the page description by typing a new name.
- Save As – saves the selected items as a TIFF file in a location you select.
- Delete – removes the selected items from the list so that they are not printed.
- Using
a drag-and-drop operation, you can add items from ImageRight file to the
list of pages to be printed. This will be helpful when you need to print
items from two or more files.
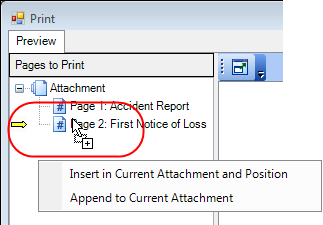
- Move the Print dialog box so that you can see Desktop.
- Drag
the items to the Pages to Print list. The arrow that appears will you
help you position the items. When the menu appears, click the correct
command for the final placement of the items to define the printed order
of the items.
- Insert in Current Attachment and Position to place the items between others.
- Append to Current Attachment to place the items in the last position.
- Select
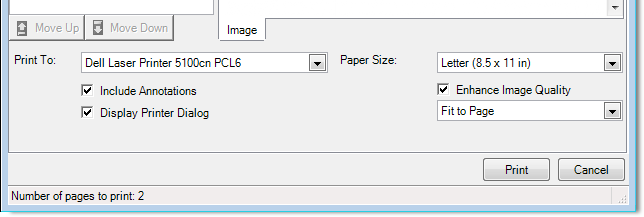
these options in the bottom portion of the dialog box as needed.
- Print to – select the printer to be used in the list.
- Include annotations – annotations on a page will be printed. For more information about including annotations with PDF files, see Split PDFs into Individual Pages.
- Display printer dialog – Windows Print dialog box will be displayed.
- Paper size – size of the paper to be used.
- Enhance image quality – to achieve the best quality when printing images. If you select this option, you may also select one of the following options:
- Fit to page – reduces or enlarges each image to match the selected paper size.
- Actual size – prints image in its actual size, but it may be cropped to fit the printable area of the selected paper size.
- After setting all the appropriate options, click Print to continue.
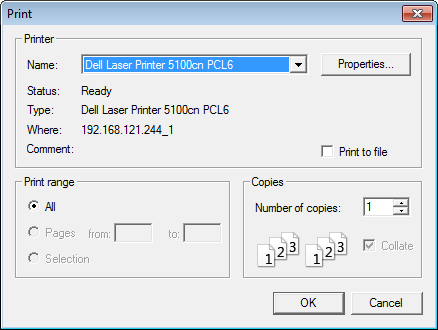
- In the Windows Print dialog box (presented if you select the Display printer dialog option), select the printer that you would like to use and the number of copies.
- Click
Properties to configure the properties of the printer, for example, color
or black and white printing, just as you would for any document being
printed.
The preferences that you can configure are dependent on the printer software and are not related to Desktop functionality; therefore, we are not going to explain the details. - Click OK to complete the print job. Click Cancel to return without printing.
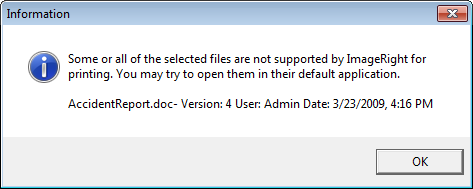
If you are printing documents and images that have different file types, for example, a Microsoft Word or Microsoft Excel file and a TIFF image, you may encounter a message similar to the one shown in our example.
