Printing and Copying Notes
At some point, you may need to print or copy notes that have been added to a file. You might want to take a copy of the notes to a meeting or share them with someone who does not use ImageRight Desktop.
We are going to explain how to print or copy a file note. Our fundamentals can be applied to all types of notes.
- File notes
- File calculate notes
- Folder notes
- Folder calculate notes
Copying Notes
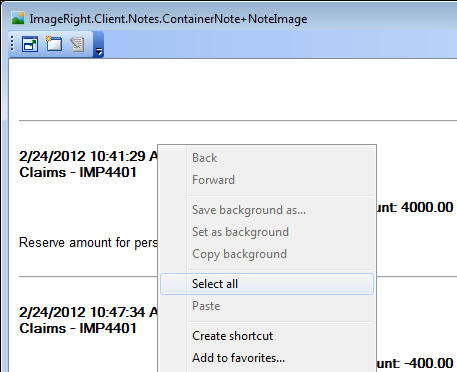
In our first example, we are going to copy the text of a note. Using the copy and paste commands, you could quickly add note text to a memo or e-mail message.
- With
the note displayed, select the text using one of the following methods:
- Right-click and click Select All or press Ctrl+A.
- Use the mouse to select the text by dragging.
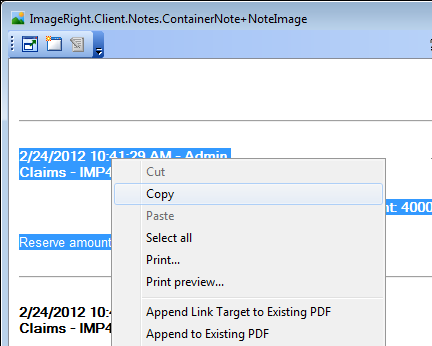
- To copy
the text to the Clipboard, do one of the following:
- Right-click, then click Copy.
- Press Ctrl+C
- After copying the text, you can paste it into another document.
Printing Notes
Just as easily as you can copy a portion of the notes, as explained earlier, you can print all the notes that you are viewing.
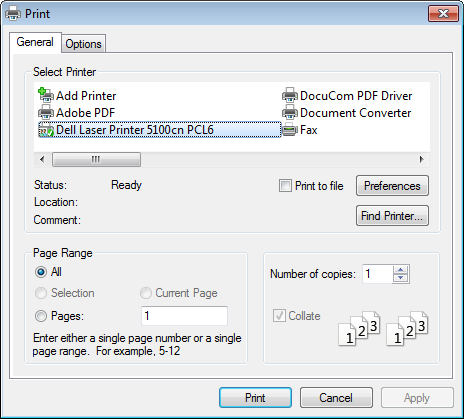
- With the notes displayed, right-click and click Print.
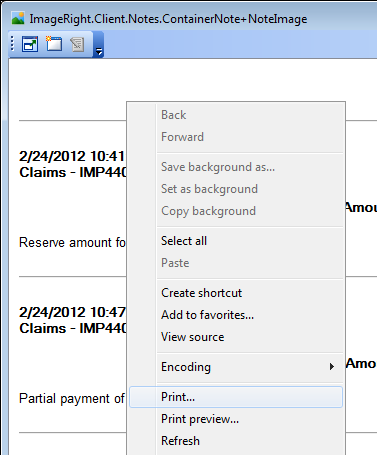
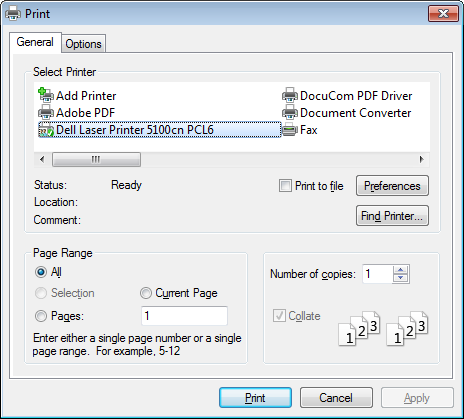
- In the Windows Print dialog box, select the printer that you would like to use.
- Configure the printer preferences, page range, number of copies, etc. Click Preferences to configure the properties of the printer, for example, color or black and white printing, just as you would for any document being printed. The preferences that you can configure are dependent on the printer software and are not related to Desktop functionality; therefore, we are not going to explain the details.
- Click Print to complete the print process. Click Cancel to dismiss the dialog box and return without printing.
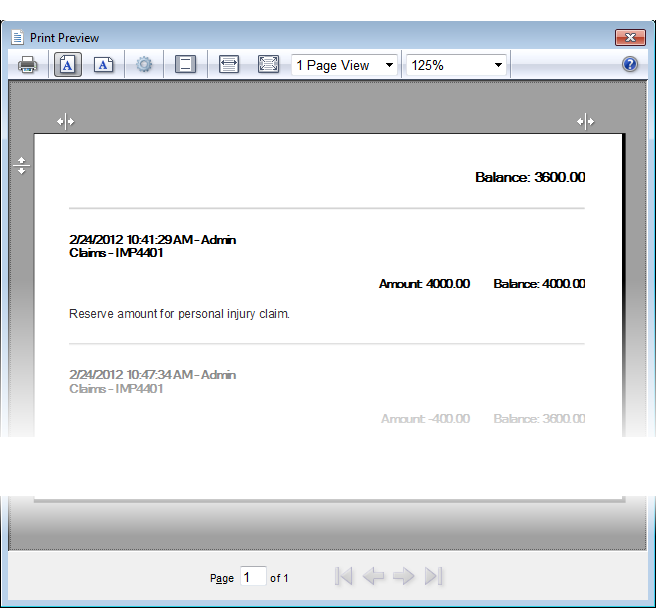
Preview Notes Before Printing
You can look over notes to see the appearance of the printed page before they are actually printed. Also, you can adjust page orientation, scaling, and margins.
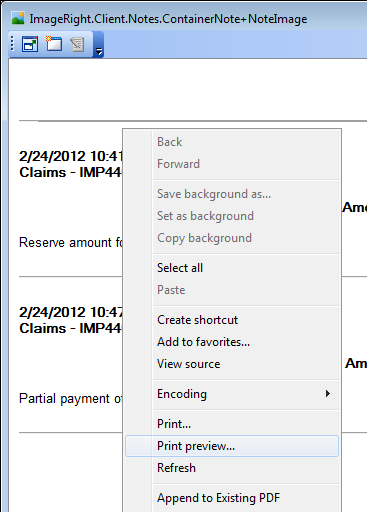
- To preview the notes, right-click and click Print Preview.
- Press
Esc or click
 to exit Print Preview mode without printing.
Using the options described in the table below, you can change how the notes are displayed on the screen or how they appear on the printed page.
|
Click this |
To do this |
|---|---|
|
|
Open the print dialog box to print using the current settings |
|
|
Print the page vertically (portrait orientation) |
|
|
Print the page horizontally (landscape orientation) |
|
|
Change paper size, orientation, or margins and add header or footer |
|
|
Turn on or off the header and footer |
|
|
Zoom the page to the width of the preview screen |
|
|
Zoom the page to show the full page |
|
|
View multiple pages |
|
|
Stretch or shrink the page size to fill the printed page |
|
|
Drag the markers to change where the page will print |
|
|
Specify the page to display |
|
|
Go to first page |
|
|
Go to previous page |
|
|
Go to next page |
|
|
Go to last page |


More printer specific tasks, such as printing a range of pages or choosing paper size are set in the Print dialog box, not in Print Preview. Press Alt+P or click the Print button to open the Print dialog box.
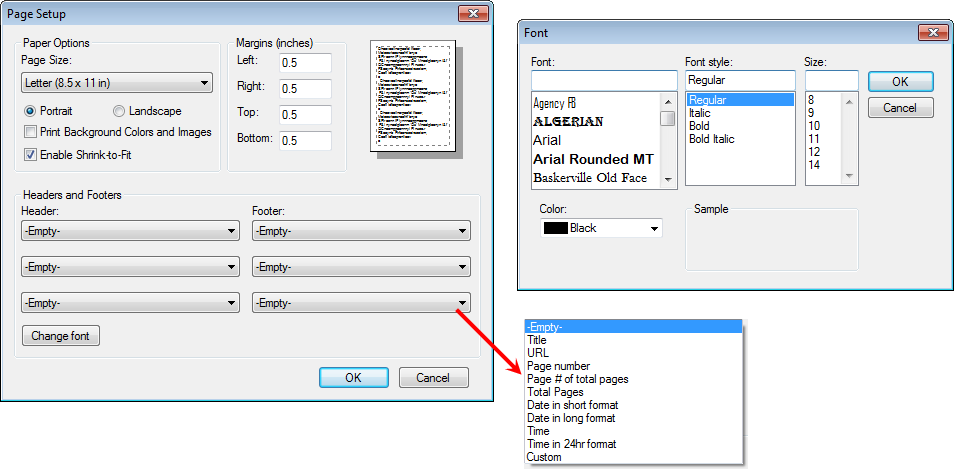
You can add a header and footer for the printed page. The header and footer that you create will be used each time you print notes until you change it again.
- Click
 in the Print Preview window to open the Page Setup
dialog box.
in the Print Preview window to open the Page Setup
dialog box. - Select the settings for the paper size, margins, orientation, etc., as needed.
- You can select the names of the items that you want to appear in the header or footer from the lists. The first item you select will appear left aligned on the page. The second item will be centered. The third item will be right aligned. You can select Custom and enter customized items to appear in the header or footer.
- Click Change Font to open the Font dialog box and choose the font characteristics to be applied to the header and footer.
- Click OK to save your changes or Cancel to dismiss the dialog box without saving changes.
|
As an alternative to using the Print command as explained earlier, you can select the note in the file structure to be printed and click the Print command on the File menu. |