Using the Set Cut-Off Date command, you can set the cut-off date on the file, folder, or document level of a file. The date you set triggers the calculation of the retention date, the date (based on the retention rules) until which content (documents) must be retained in the ImageRight system. Before you continue, you may want to review Retention Management to learn more about the application of retention policies.
We are going to explain how to set the cut-off date at the document level. You can easily adapt our steps to set the date for the file or folder level. Along the way, we will explain how to view the cut-off and retention dates associated with a document. We will end by explaining how to remove a cut-off date.
- Open the file (or create a new file) for which you would like to set the cut-off date.
- Select
the appropriate level in the file (document in our example). The cut-off
date will be set for the selected document only. If you select the:
- File level, the cut-off date will be propagated to all documents in the file.
- Folder level, the cut-off date will be propagated to all documents in the folder (including documents in nested folders).
- Document level, the cut-off date will be set for the selected document only.
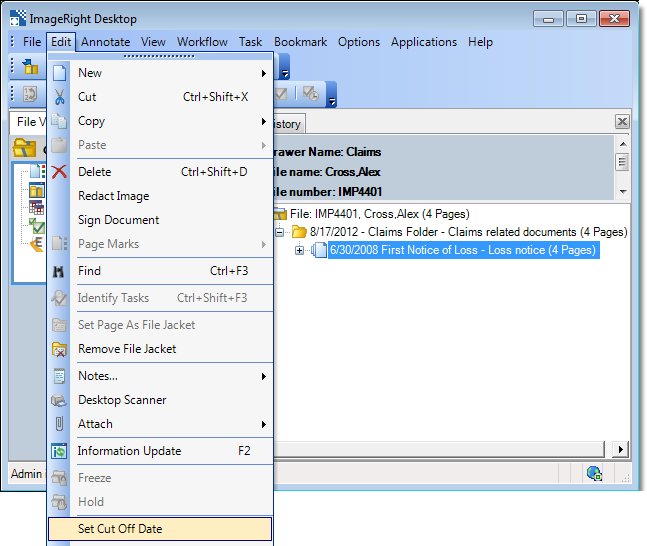
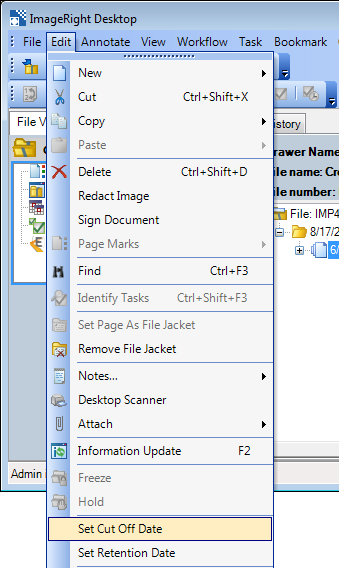
- On the Edit menu, click Set Cut-Off Date. Alternatively, you may right-click the appropriate level in the file, and then click Set Cut-Off Date on the menu.
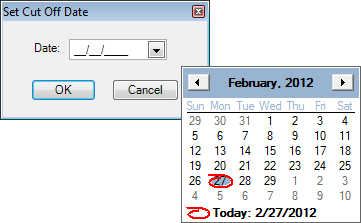
- Enter
the cut-off date in the Set Cut-Off Date dialog box. You can only enter
the current date or a date in the future.
- You may click the arrow in the dialog box, and then pick the date from a calendar.
- Click the arrows at the top of the calendar to move through the months.
- Click the desired day to set the date.
- Click OK to save the cut-off date.
- Click Yes when the warning message appears to confirm the date, or click No to cancel the action.

The cut-off date will be evaluated against existing retention rules (configured in ImageRight Enterprise Management Console). If the date matches any of the rules, a retention date will be calculated and applied to the corresponding file, folder, or document.
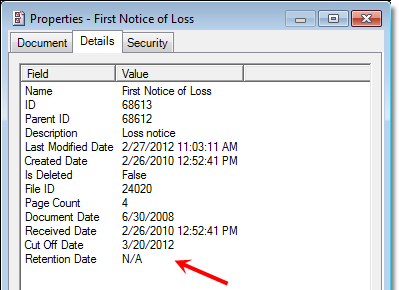
You can easily view the cut-off date assigned to a document and the calculated retention date, if appropriate.
- Open the file that has a cut-off date assigned.
- Select the document for which you would like to view the cut-off date.
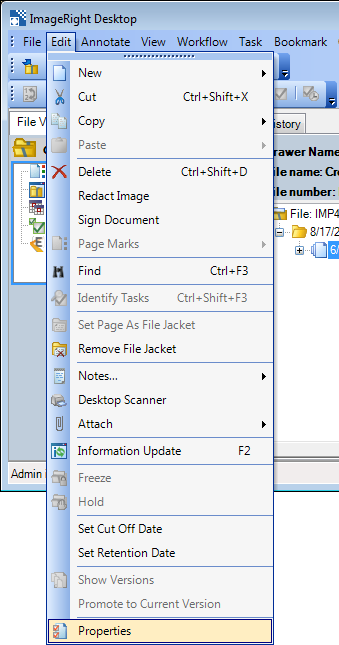
- On the Edit menu, click Properties. As an alternative, you may right-click the document, and then click Properties on the menu.
- Click the Details tab in the Properties dialog box to see the cut-off date and the retention date (if applicable).
At some point, you may want to remove or change a previously assigned cut-off date. You should consider any changes you make carefully as overriding an existing date may affect existing retention dates.
- Open the file and select the file, folder, or document for which you want to remove the date.
- On the Edit menu, click Set Cut-Off Date.
- In the
Set Cut-Off Date dialog box, change the date to the new date or remove
the date that appears. If
you change or remove the date at the:
- Document level, the date will be changed or removed for the selected document only. The retention date will be removed also.
- File level, the date will be changed or removed from all documents in the file.
- Folder level, the date will be changed or removed from all documents in the folder (including nested folders).
- Click OK to save your changes.

- Click Yes when the warning message appears to confirm the change, or click No to cancel the action.
