Status
Using the Status command you can check the status of printing, outgoing faxes, and the process of exporting content related to workflow tasks.
In brief terms, the creation of queues and processors to handle certain print, fax, and export jobs is accomplished in ImageRight Enterprise Management Console and ImageRight Workflow Studio. Once the configuration is in place, you can check the status of the jobs when you send faxes or use a predefined print queue. The exporting of content related to workflow tasks happens automatically when a task reaches an export step in a workflow.
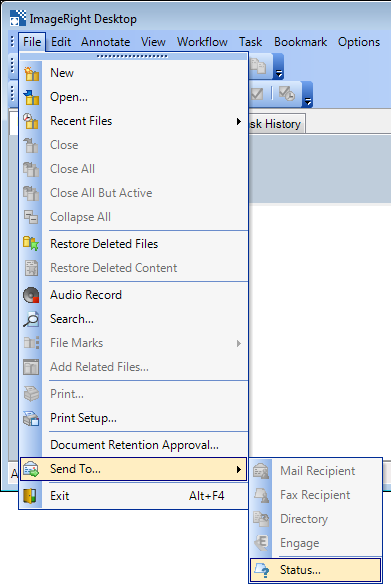
- To open the Status window, point to Send To on the File menu, and then click Status.
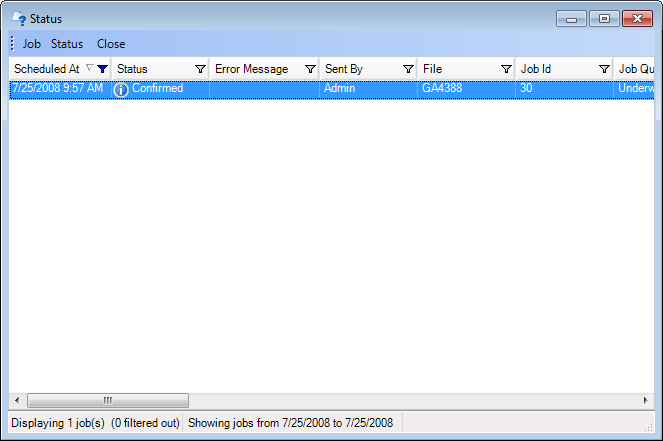
With a quick review of the Status column, you can track the progress of pending items. The information in the columns may also be helpful if you are trying to determine why a fax may not have been sent or a print job did not complete. For example, you might determine that you entered the destination phone (fax) number incorrectly. You may see these statuses displayed in the Status column:
- Cancelled – Processing of fax, print, or export job terminated.
- Confirmed – Fax, print, or export job completed successfully.
- Failed – Job did not complete. (Fax was not sent successfully. Print job did not complete. Export process did not complete.)
- Partial Success – All pages of the fax or the print job were not processed successfully.
- Pending – Fax, print, or export job is waiting to be processed (not complete).
- Sending – Fax program is processing the fax. Print processor is printing the items.
- Converting to fax format – Export job is being processed.
|
If a fax is unsuccessful, you might find it helpful to review the (optional) fax confirmation if you placed one in the file where the fax originated. |
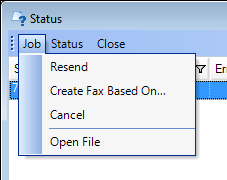
You can use the commands on the Job menu to manage the print, fax, and export jobs. Start by selecting the job that you would like to manage in the list, and then choose the appropriate command. You can also right-click the item in the list and click the commands on the menu.
- Resend – Processes the job again.
- Cancel – Cancels the processing of the job.
- Open File – Opens the file related to the fax or print job in ImageRight Desktop.
You can update the status display by selecting the Refresh command on the Status menu.
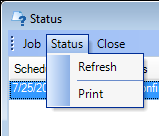
At some point, you may need to print the displayed list to share with others. To do so, use the Print command on the Status menu. If you print the list, you should consider that you cannot change the paper layout (size, orientation, etc.). Therefore, we suggest that you customize the column layout and filter the list as explained later. By customizing the column layout to reduce the number of printed columns, you can ensure that the list will not exceed the page size. As for filtering the list, you can print only those items that meet your requirements, for example, print a list of only the faxes that were cancelled.
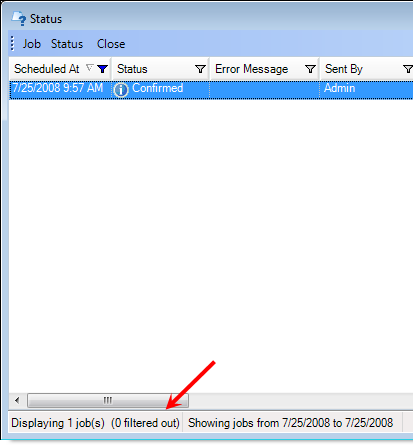
You may find the information in the status bar helpful. For example, you can see the number of fax, print, and export jobs in the list, the number that has been filtered out (temporarily hidden), and the date range or range of days applied to the list.
To close the Status display, click Close on the menu bar or click  .
.

You can customize the appearance of the columns to apply a layout that makes it easier for you to see the information that you need. We are going to explain how to add or remove columns and change the column order. Later, we will explain how to filter the list to minimize the number of rows that are displayed.
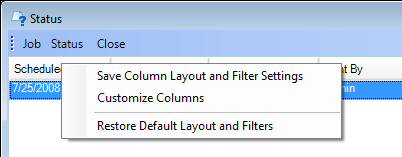
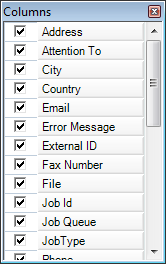
- Right-click the column heading and click Customize Columns to open the Columns list.
- In the
list, select the columns that you would like to display, indicated by
 .
. - When your
selections are complete, click
 to dismiss the list.
- Drag the column headings to arrange them in the desired order. Red arrows appear to help you align the headings.
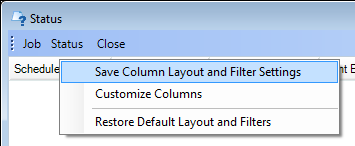
- To save your column layout, right-click a column heading and click Save Column Layout and Filter Settings. This command will save both the column layout and filters that you have applied as explained later. Your customized settings will be remembered each time you view the status until you change them again.
- To restore the default column layout, that is, remove your custom settings, right-click the header row and click Restore Default Layout and Filters.

Filtering is a quick and easy way to find and work with a subset of items in a list. You can apply filters to the list displayed in the Status list just as you can in most other lists displayed in ImageRight. After you apply the filters, the list or range displays only the rows that meet the criteria you specify for a column or columns. Unlike sorting, filtering does not rearrange a list. Filtering temporarily hides rows that you do not want displayed.
In our first example, we are going to explain how to filter the list based on the date items are scheduled. Later we will explain how to customize filters for the other columns.
- Click
the filter icon (
 or
or  )
on the Scheduled At column heading to open the Date Filter dialog box.
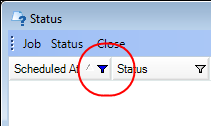
- Select
the date filter method that you would like to use.
- Date Range – Items that were processed during the selected (inclusive) date range will be displayed in the list.
- Number of Days – Items sent within the number of days leading up to the current date will be displayed in the list.
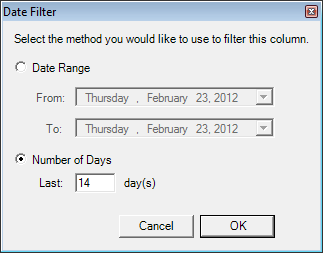
- With Date
Range selected, do one of the following:
- Select the date value to be changed in the From and To boxes and type the new date value or use the arrow keys to advance the date value.
- Click the arrow next to each box and select the date value from the calendar. Click the arrows at the top of the calendar to move through the months.
- With Number of days selected, enter a value in the Last box.
- Click OK to save your changes.
- The list will be updated to display only those items meeting your date criteria.
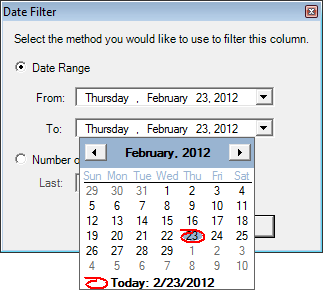
You can filter the remaining columns based on the values they contain.
- Click
the Filter icon (
 or
or  )
on the heading of the column that you want to filter. The appearance of
the Filter icon indicates the filter status of the column.
 –
no filter applied
 –
filter applied
- Select
the item in the list that you want to use to filter the list. The list
will be filtered automatically after each selection.
- All – all items in the column
- Custom – enter specific criteria as explained later
- Blanks – all rows with no value in the column
- NonBlanks–all rows with a value in the selected column
- Text or identifier (Pending for example)
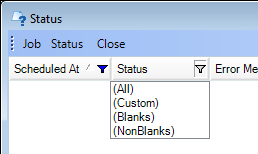
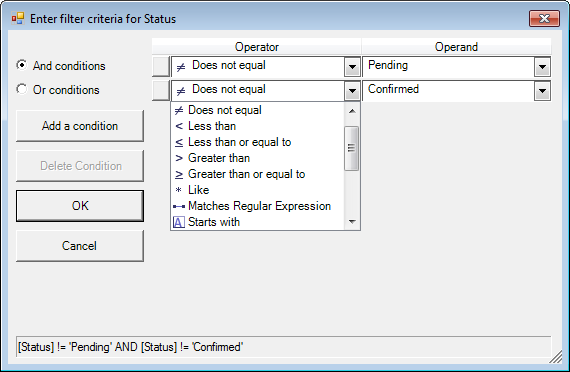
- To enter
custom criteria, select Custom to open the Filter Criteria dialog box.
- Select
the appropriate condition in the Operator list. The comparison operator
is used to compare two values.
- Equals
- Does not equal
- Less than
- Less than or equal to
- Greater than
- Greater than or equal to
- Like
- Matches regular expression
- Starts with
- Contains
- Ends with
- Does not start with
- Does not contain
- Does not end with
- Does not match
- Not like
- Enter the value that you want to use for comparison in the Operand list. The operand can be a value, name, label, status, etc.
- Click the Add a Condition button if you want to base the filter on multiple conditions.
- If
you have multiple conditions, select the appropriate option.
- And conditions – all conditions are satisfied.
- Or conditions – either condition is satisfied.
- To
remove a condition click
 next
to the condition to select it. Then click the Delete Condition button.
- Select
the appropriate condition in the Operator list. The comparison operator
is used to compare two values.
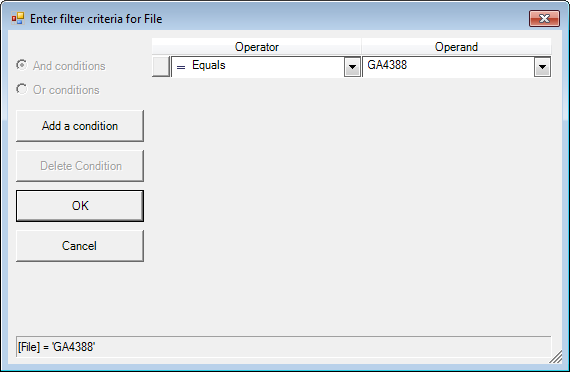
- Click OK to save your conditions and filter the list. In our example, the list would be filtered and display all the items sent from file number GA4388 (file number equals GA4388).
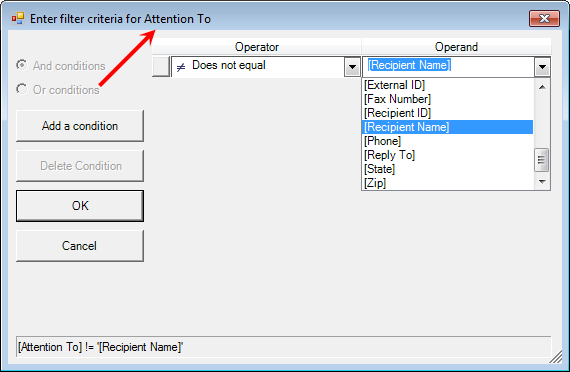
You can compare the values in specified columns of the status list.
- Click
the Filter icon (
 or
or  )
on the first column, for example, Attention To, and then select Custom.
 - In the Filter Criteria dialog box, select the operator to be used for the comparison.
- In the Operand list, select the heading of the column that you want to compare, for example, [Recipient Name].
- In our example, the list would be filtered to display items for which the Attention To name is not equal to the Recipient Name.
You can save the filters that you configure, and they will be applied each time you open the Status window, until you change them again.
- With the filters applied, right-click the header row and click Save Column Layout and Filter Settings. This command will save both the column layout and filters that you have applied.
|
When you apply a filter to a column, the only filters available for other columns are the values visible in the currently filtered range. |
