Using InsurLink
We are happy to provide you with access to your insurance information anytime via the web. By now you should have received an invitation email with information to activate your InsurLink account. The email looks similar to the one below:
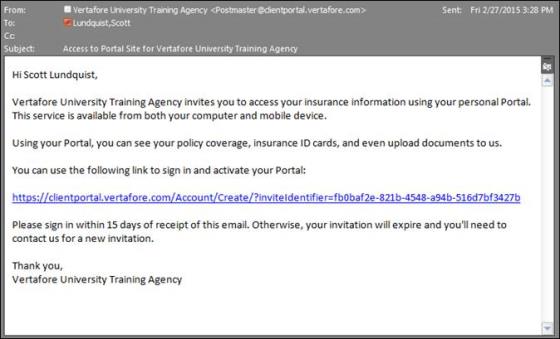
Use the link in the email to open and activate your account for InsurLink. If you haven’t received the email* or you didn’t activate the account within 15 days of receiving the email, contact us for a new account activation email.
* If you haven’t received the email in your Inbox, check your Junk email folder.
You can access InsurLink on your desktop computer, smart phone, or tablet providing you with flexibility. InsurLink contains tabs of information that include an Overview, Policies, Auto ID Cards, Claims, Documents, and Certificates.
What you see may differ depending on your permissions.
Overview Tab
The Overview tab displays your Quick Links, announcements from your agency, recent documents, and a list of your agency contacts.
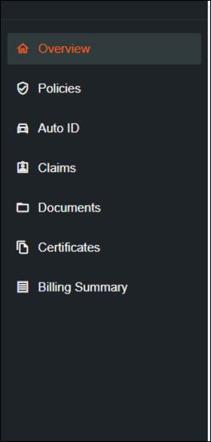
You can also access any of the functions from within the tabs in the Quick Links section. This includes functions such as adding drivers to a policy, submitting a claim, downloading an auto ID, and more.

Policies Tab
The policies tab displays all your current and future policies. Each policy includes the policy number, the type of business (such as Homeowners or Private Passenger), the policy term, and an icon for the insurance company providing the coverage, as well as a View Summary link: a link to a PDF, or a Not yet available notation.

Click the View Summary link to see the details of the policy like the following example:

To request a change to the policy do the following:
- Click the policy in the grid.
- When the Policy Summary page loads, scroll to the bottom of the page and click Request a Change.
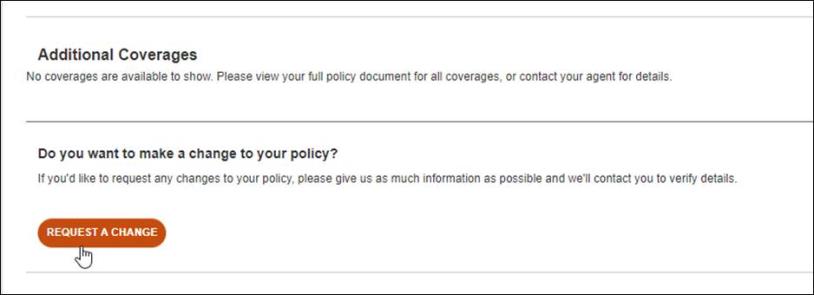
- On the Request Policy Change window, enter the change you’d like to make. Whether it’s to add/remove a driver or increase/decrease coverage limits. Complete the other information and when you’re finished click Submit.
A follow up is sent to your agency.
The change request date and status appear on the Policy Summary page. A member of our staff will process the change and let you know when it’s done.

Auto ID Tab
Your current auto policies are examined for vehicles insured on the policy. When a vehicle is found it appears on the Auto ID tab. On this tab you can view, download, email, and print an Auto ID card for a policy.
Being able to view online is handy if you need your Auto ID card, but don’t have it with you. You can use your smart phone or tablet to access InsurLink and produce an electronic copy of your card.

Claims Tab
On this tab you can view claims entered by our agency as well as submit a claim.
Based on your permissions you may or may not be able to enter a new claim.

Do the following to submit a claim:
- On the Claims tab, click Start a New Claim.
- The first thing you need to do is choose the policy for which you are filing the claim.
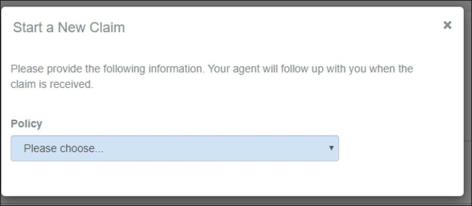
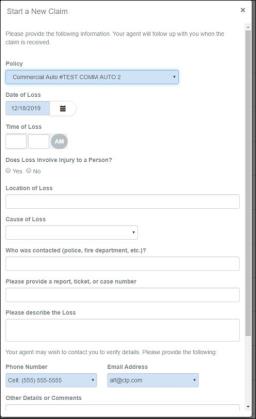
- Complete the fields on the Claim form. Some selections you choose from a list while others you type in the information.
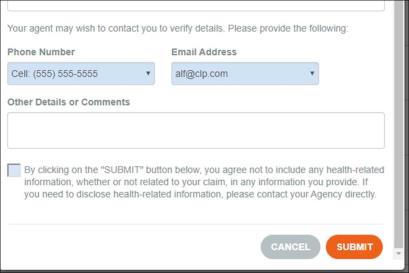
- When you have finished entering all the information, click Submit.
- After submitting the claim, you will see the claim you have entered with a status of Pending and a notation of Sent to Agent.
- When an agent reviews and enters the claim in the management system, the status will change to Open. They can then continue to change the status as they work through the claim.
- Once the agent closes the claim, the status will change to "Closed".
*Note: If you submit more than one claim on the same policy, you will receive a notification that you’ve already submitted a claim for that policy. You can still choose to submit the new claim, but a warning message will appear first*
Documents Tab
On the Documents tab you’ll see documents we have shared with you as well as any you have uploaded to InsurLink The documents are stored in a secure encrypted form.
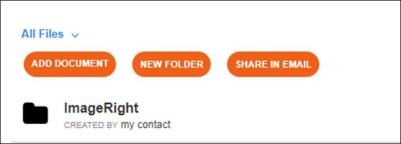
Use the Actions drop-down to open, move, rename, delete, or Share a link to the document in an email.

To add a document, click Add Document above the document list.

Certificates Tab
If you have commercial lines policies with us and you use certificates you may see the certificates tab. The certificates in the list are called Master Certificates because they contain all the information that may be required by multiple certificate holders.

When you click a certificate in the grid, another web page opens showing all the current certificate holders. You can print an existing certificate, request a certificate for a new holder, or email a certificate.
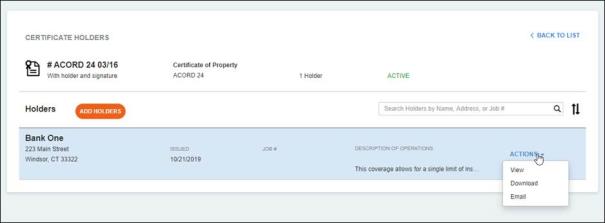
If you have been given permission to add holders, you will be able to add holders directly to a Certificate by clicking Add Holders. You will then be prompted to fill in the necessary information (required fields are in blue):
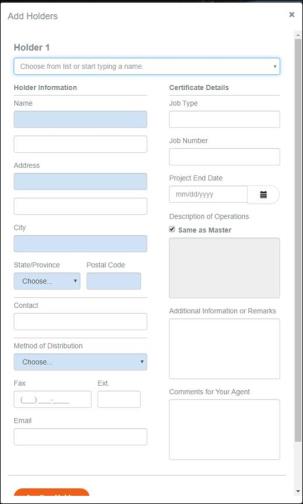
Once you add the holder, they will immediately add to the list of holders on that certificate. You can then download or view the sub-cert immediately.
Billing Summary Tab
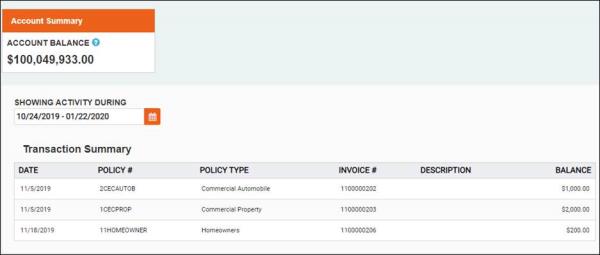
This is where you can see a summary of all open invoices on your account. You will always see your open account balance on the top left, and then you can filter by any date range to see invoices within that time period.
Other Functions and Features of InsurLink
Header
The Header includes important menus.
Hi (username)
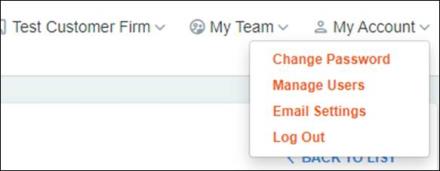
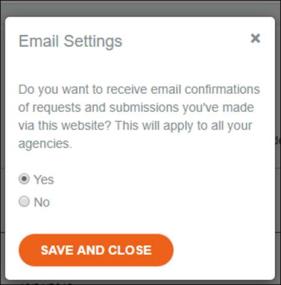
Here is where you can Change your Password, Manage Users, change your Email Settings, and Log Out. The Manage Users option allows you to add users who will have access to your InsurLink. When you click Manage Users you will see a list of Contacts that we’ve entered for your account.
If you do not see the name and email you are looking for, contact Vertafore and ask us to add the contact and email address. The Email Settings selection allows you to opt out of email confirmations for requests and submissions you have made on the web site.
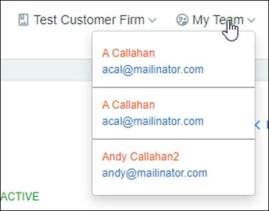
My Team
The information listed is the people in our agency responsible for your account. With this information so convenient, you can easily contact us if needed.
