Enable Multi-Factor Authentication
MULTI-FACTOR AUTHENTICATION FOR VPI AND VPB
Summary
Multi-Factor Authentication (MFA) is a security process for authenticating users across more than one method of information. Rather than simply having users login with a password, MFA requires that users login across two methods. By using more methods than just a username and password, you can support stronger security practices for users accessing your applications.
FURTHER DEFINED
Authenticating a user is done to help ensure only authorized users are able to get into an application. A user name and password is the typical way to have users gain access, but in certain scenarios you may want to require more security steps.
A user name and password is something unique that only an authorized user would have. This is secret knowledge to them, and is considered a Knowledge Factor. There are other types of factors to consider, and for a login process to be defined as MFA you need to use at least two factors across three factor categories. The categories are:
- Knowledge Factors – Something you know
- Possession Factors – Something you have
- Inherence Factors – Something you are
As mentioned earlier, a user name and password counts as a knowledge factor. This is something only a user should know. To be MFA you would also have to require a secondary factor in the Possession or Inherence categories. Here are the examples of the secondary factors that are available with our MFA feature:
- Emailed Security Token
- Smartphone App (provided by Ping ID)
- Voice call with temporary token
The three examples above are all possession factors, as the temporary tokens and the smartphone app count toward ‘something you have’. Any one of the above combined with a username and password will qualify for our Multi-factor Authentication as Knowledge Factor (password) and Possession Factor (temporary token) are being used to authenticate.
HOW IT WORKS
Options
After your organization has turned on the feature, users logging in to VPI or VPB will initially be sent to a screen to register for MFA. During the registration, users can select one of the following for the second factor:
- Smart Phone App
- Voice Call
SMART PHONE APP
Our smart phone app is provided by PingID, and it can be downloaded from the iOS and android stores. Search for “PingID” and look for the app called PingID. Look for the Icon:

VOICE CALL
You can register a phone number to obtain your second factor. This authenticates during login using an automated voice call to the specified phone number which provides a code to enter. Enter the code into the screen and submit to complete your log in session.
Use an email address to obtain your second factor. This will send your temporary code to the designated email address during log in. Enter the code into the screen to complete your log in session.
MFA - Trusted Device
(A user authenticating from the same browser will only have to authenticate every 30 days)
After you authenticate successfully using MFA, your device (i.e. laptop, desktop computer, mobile phone) will be recognized for a 30-day period as a trusted device. Trusted devices are those that have been used to log in successfully using the MFA feature. You will be required to run the MFA login process every 30 days for trusted devices, as the MFA trust will expire at that time. Additionally, anytime you log in from a new device for the first time you will be required to run through the MFA login process. Trusted device caveats:
- Browser authentication actually requires two MFA logins to establish trusted device status. The cookie facilitating this feature is not generated during the initial MFA logon.
- After establishing trusted device status, if using the same browser to log on to MFA enabled VPI/VPB with a different login, or another Vertafore MFA enabled application, the trusted device cookie is overwritten and this feature is lost.
- Clearing browser cache will also result in the loss of trusted device status.
- Loss of trusted device status means only that MFA authentication is not automatic.
LET’S GET STARTED
Step 1 - Turn on MFA for your organization
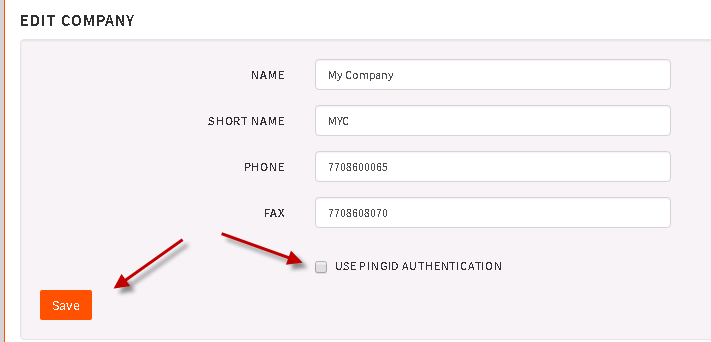
Multi-Factor Authentication is available for opt-in at the both General Agent and Carrier login level. The MFA feature is not turned on by default. To enable it for your Company check the “USE PINGID AUTHENTICATION” box next to the feature and save the setting. All Company logins are impacted once USE PINGID AUTHENTICATION in enabled for that Company.
You can find the opt-in setting after logging on to VPI by going to:
Configuration > My Company > Edit Company
Step 2 – Register a secondary factor with Ping
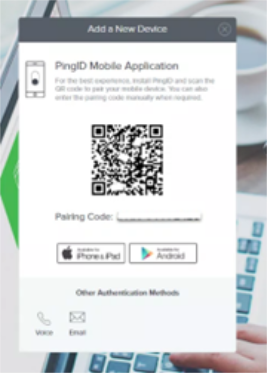
The next time you log into your MFA-enabled product, you will see the screen (shown below) that asks you to set up your Multi-Factor Authentication. Please click on START.

The recommended option is the PingID App that can be installed on your smartphone. Once installed, you can scan the QR code on the screen or enter the pairing code manually. This is the recommended process, but you can also use the VOICE or EMAIL option at the bottom of the page to set up a phone number or email address to receive the Pairing Code.
Step 3 – User Flow
- A user goes to VPI or VPB to login as normal.
- User enters their name and password.
- During login attempt, the screen runs the MFA feature, and asks the user to select from the factors previously registered:
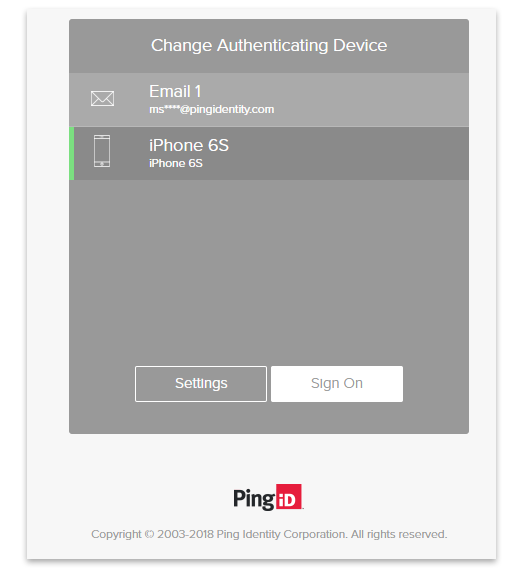
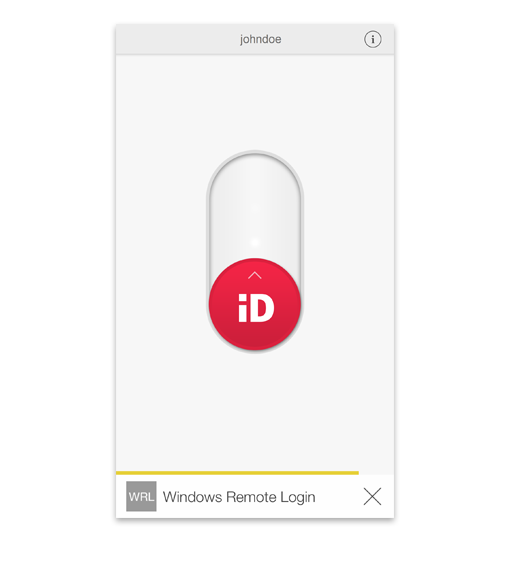
- If a smart phone is selected, the PingID application will send you a push notification for you to unlock your phone and open the app. The screen will show a “switch” that you need to swipe up to confirm access:
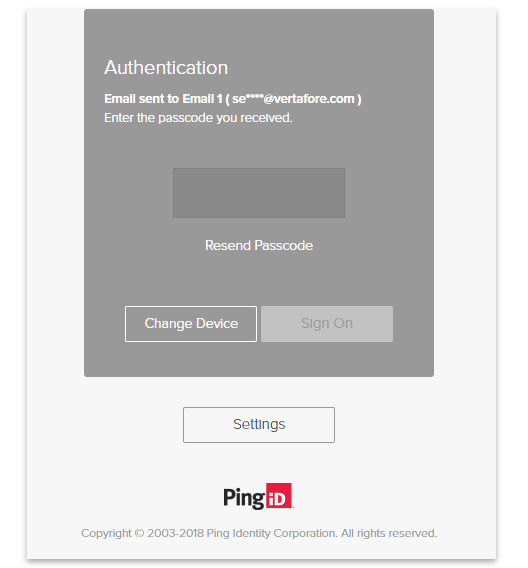
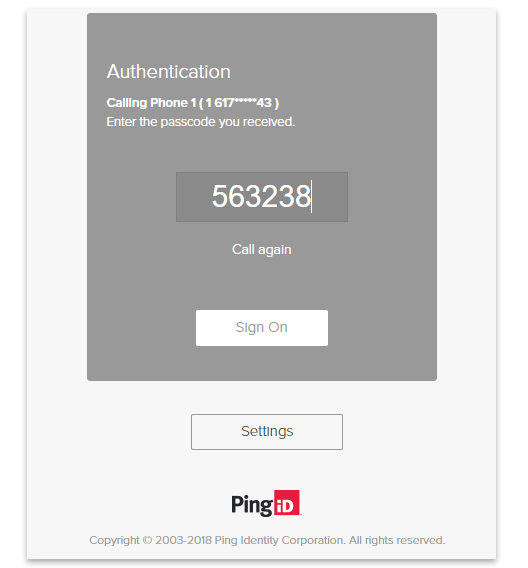
- If you select the Voice call or Email method, then you will receive a call or email giving you a temporary code to enter. Enter the code in the following screen:
- When you complete the secondary factor you see a success screen:
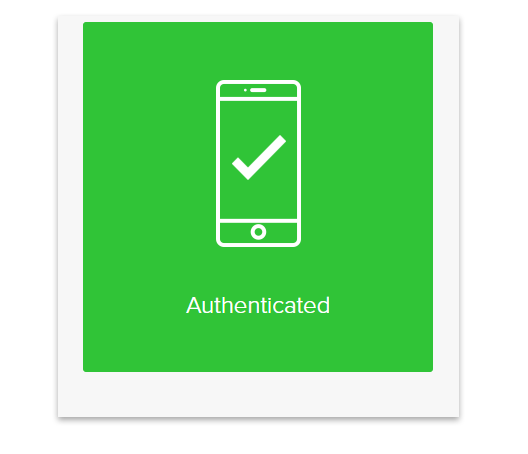
Congratulations, you have authenticated through MFA. You will now be redirected to VPI or VPB.
REGISTRATION PROCESS
As mentioned earlier, when your agency has opted-in for MFA, users will be required to register with Ping ID. This registration will have to be done for each Vertafore solution you use.
It is recommend that you configure more than one authentication method. In order to add an additional method, it is necessary to first authenticate using an existing method. If access to a single method is lost, you are effectively locked out. In that case, you must contact Customer Support and request a user reset. Once the reset is accomplished, you can start the registration process as if for the first time.
Here is the registration process:
Step by Step
- First time users are sent to the registration page when logging on to VPI or VPB with USE PINGID AUTHENTICATION enabled for the General Agent or Carrier Company:
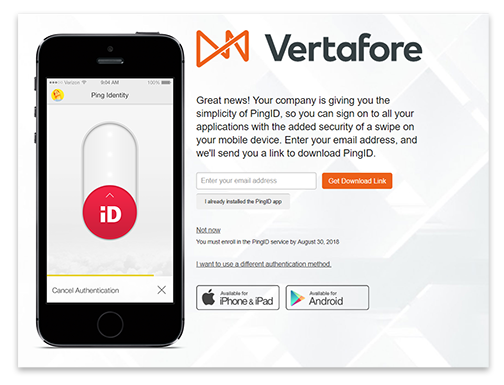
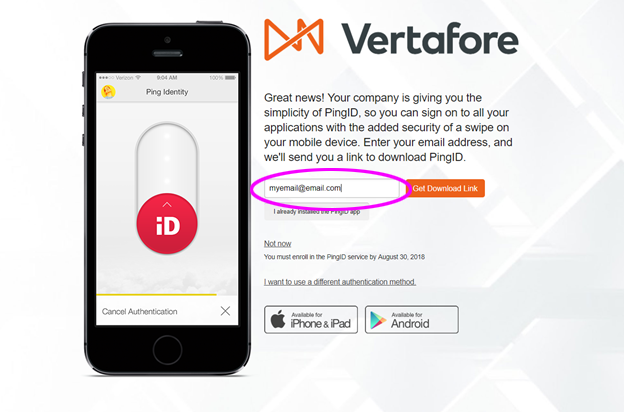
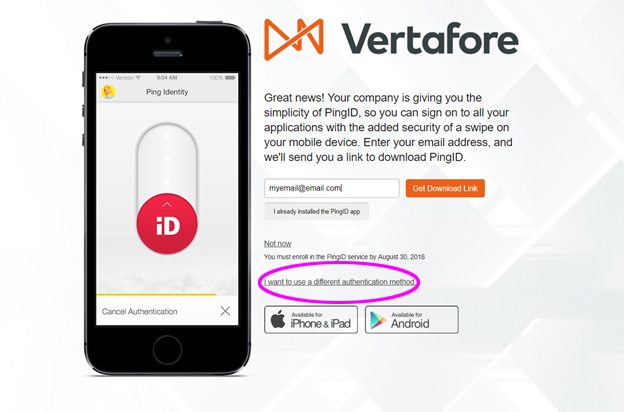
- If you want to use the Ping ID app, enter your email address to get a download link for your application. Use the same email address that you use to log in to your Vertafore application.
- You will taken to the “Finish Pairing Ping ID” page:
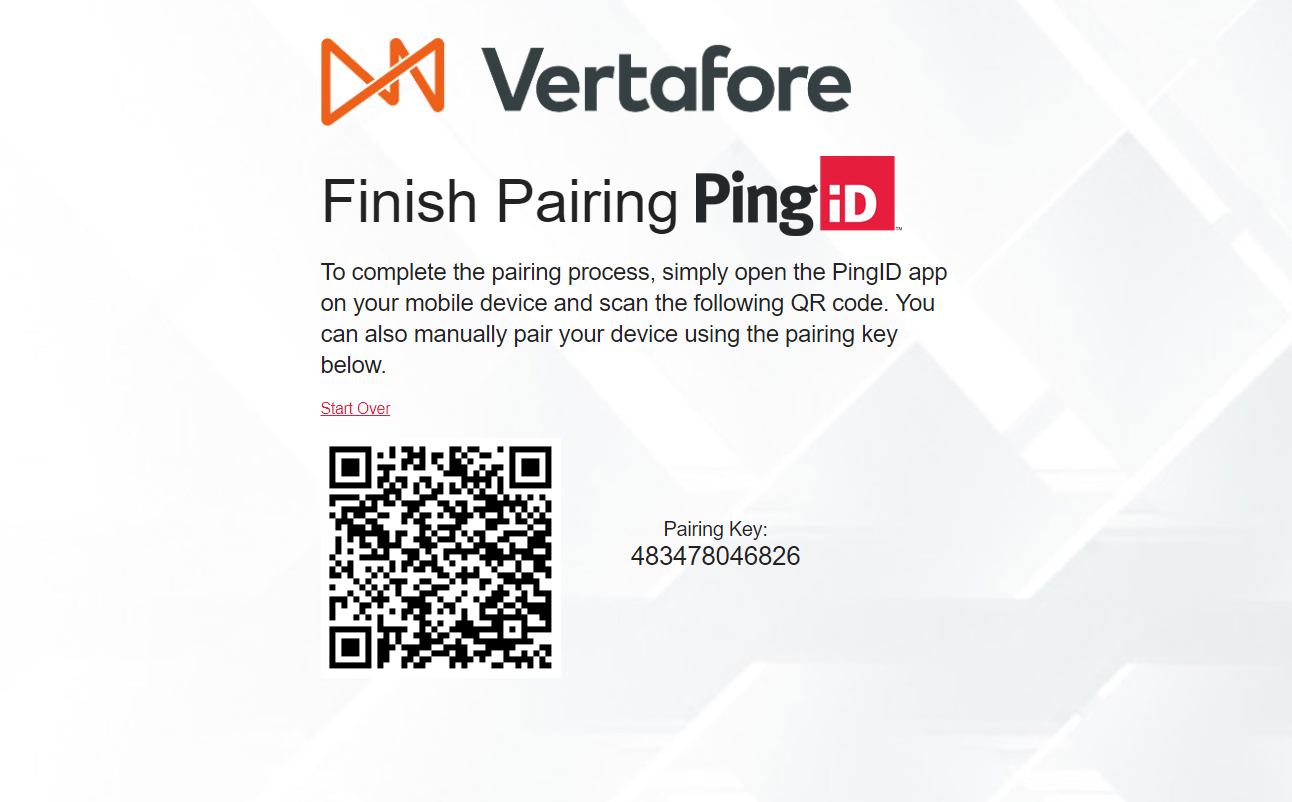
- On this page you can open the Ping ID mobile app that you previously downloaded (iOS or Android store) and use the Manual Auth option to QR scan the code on the page.
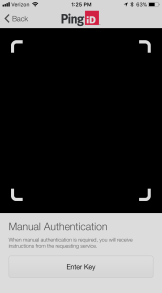
This will finish pairing your Ping ID app with your registration.
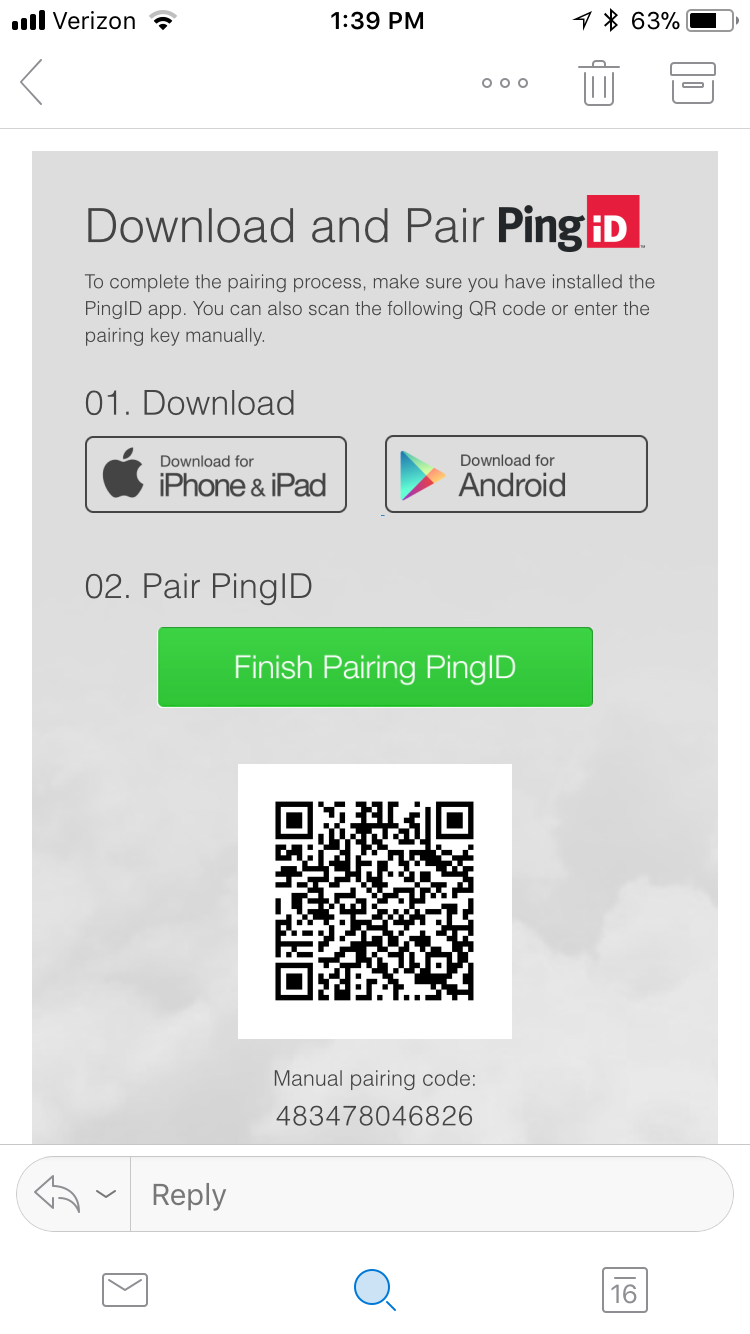
- Additionally, instead of using the app code reader you can go to your email inbox on your mobile phone to review the registration email. Tap on the green button to finish pairing your device.
REGISTERING YOUR EMAIL OR PHONE NUMBER
If instead of using the Ping ID app you would prefer to get a temporary code via email address or phone call, you can also register one of those as your second factor.
Step by Step
- When registering, click on the “I want to use a different authentication method” link.
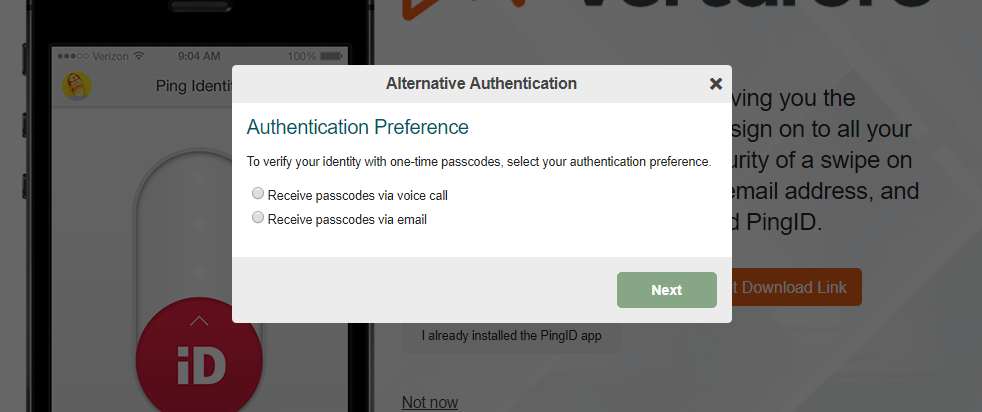
- This will allow you to select voice call or email:
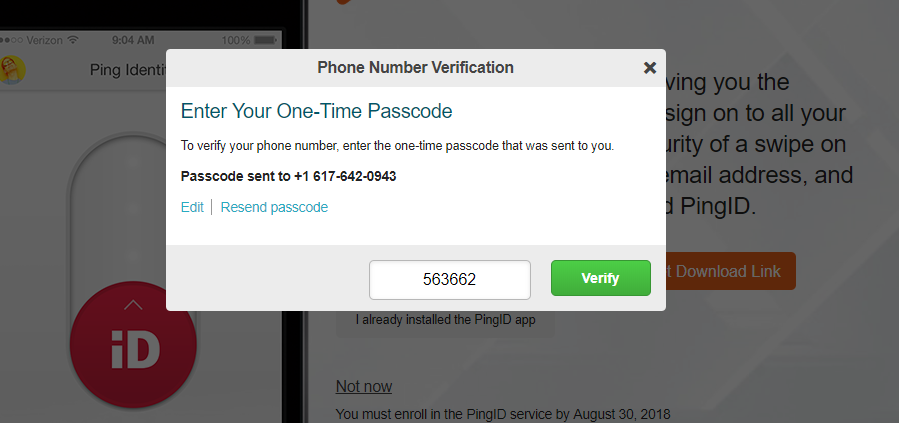
- Make your selection, and then verify using the code that is provided to you by voice call or email.
- Now any time you need to authenticate using these methods simply enter the code that is given to you on your voice call or at your email address.
CHANGING YOUR SETTINGS
- At any time you attempt to authenticate using MFA, you will see a settings button at the bottom of each authentication screen.
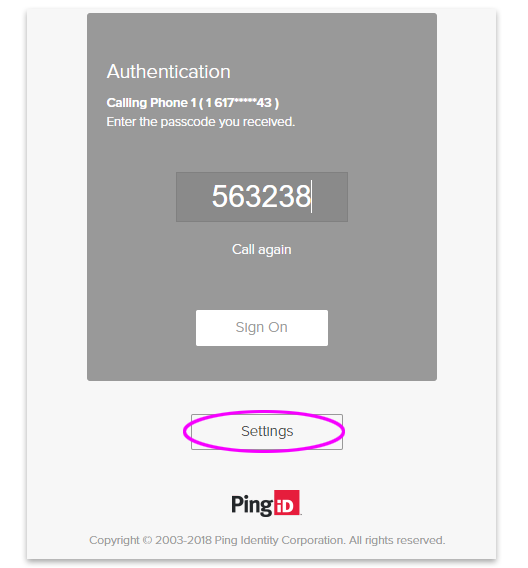
- Click this button to enter the settings area of your Ping account. Remember each Vertafore solution that you use will have a separate registered account, so make sure you click the settings page that shows for each Vertafore Solution that you attempt to log in to.
- On the settings area you can add another factor to your options. This way you can ensure you have more than just one secondary factor available to use.

- To delete an existing registered method, click on the menu icon on the right for the given method.

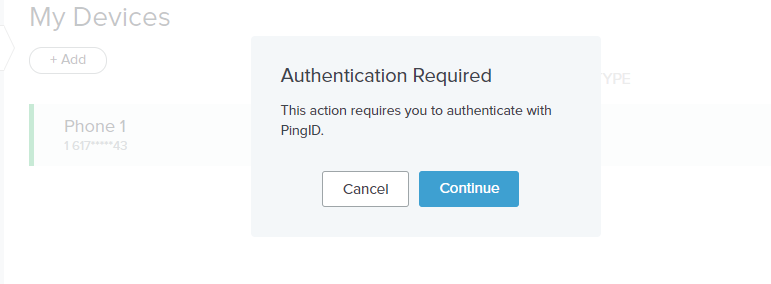
- You will have to authenticate the existing registered method to approve editing and deleting.
