Notification Service Setup
|
For additional information regarding the Outbound Notification Service (ONS), please refer to the ONS 101 General Help Page. |
AMS360 integrates with many third-party software products. Integration often includes the need to know when information that has been changed in AMS360 should be passed to the integrated software. The Notification Service provides this ability. The setup data entry form allows you to configure this information exchange.
-
Navigate to AMS360 Administrator Center
-
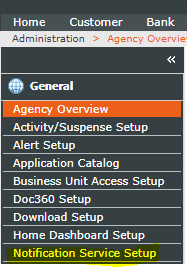
On the General Menu, click Notification Service Setup.

-
To access Notification Service Setup, an AMS360 user should have access to the menu item.

-
Notification Service Client is receiving software, a destination name, or any identifier you wish to use for the client name. Each notification client can have zero or more contacts, and zero or more notification receivers known as Notification Recipients.
-
You can add, edit and delete notification clients.
-
When adding a notification client, a “Notification Client” name is required.
-
When a notification client is deleted, all contacts and notification receivers configured under that client are also deleted.

-
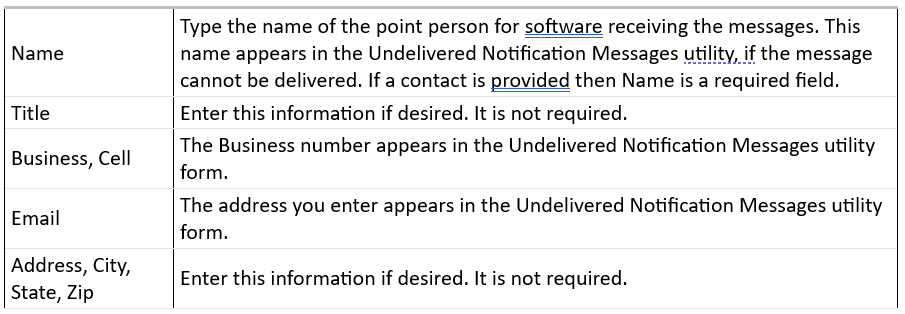
You are not required to enter contact information in this section. However, doing so makes it easier to locate the primary and backup contact, in the event a notification cannot be delivered. Contacts you enter in this section become available in the lists in the following section.
-
Add information to a type-in grid by entering text directly into each field on the grid; otherwise, click New (or Edit) and enter the following information. When finished, click Add (or Update). The updated information appears in the associated grid. To add multiple entries, repeat this procedure.

Set the destination and delivery status in the following fields. The information in this section is critical. Click New (or Edit) and enter the following information. When finished, click Add (or Update). The updated information appears in the associated grid. To add multiple entries, repeat this procedure.
|
Recipient Name |
This is a required field. Type the software or program to receive the notification message. |
||||||||||||||||||||||||||||||||||||||||||||||||||||||||||||||||||||||||||||||||||||||||
|
Destination Address |
This information is critical. Type the location where the data will be sent. You can type a directory location or an FTP site, wherever you will access the data for your needs. |
||||||||||||||||||||||||||||||||||||||||||||||||||||||||||||||||||||||||||||||||||||||||
|
Authentication Code |
If the destination location requires authentication, type the code. |
||||||||||||||||||||||||||||||||||||||||||||||||||||||||||||||||||||||||||||||||||||||||
|
Notification Version |
Indicates the version of the Notification Service to use. The version corresponds to the one used by your third-party vendor. For example, a third-party program was written to accept the format of data transfer available in Version 1 of the Notification Services. This will only work with Version 1, unless the program has been modified to accept Version 2. The version you select will determine the Notification Types available to be sent in the Notification Service. Notification Types Available by Version
|
||||||||||||||||||||||||||||||||||||||||||||||||||||||||||||||||||||||||||||||||||||||||
|
Primary Contact |
Select the Primary Contact. Names you entered in the Contacts section are available in the list. |
||||||||||||||||||||||||||||||||||||||||||||||||||||||||||||||||||||||||||||||||||||||||
|
Backup Contact |
Select the Backup Contact. if desired. The names you entered in the Contacts section are available in this list. |
||||||||||||||||||||||||||||||||||||||||||||||||||||||||||||||||||||||||||||||||||||||||
|
Delivery Status |
You can control the status of delivery of the notifications. Options are as follows:
|
-
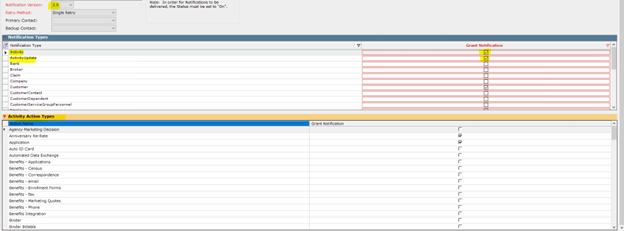
Data changes made in an entity will trigger a notification. Check with your System Administrator for details on data entities in your Web Service SDK. The Notification Version you selected in the Recipient Section will determine the types appearing in the grid. Version 2 has more types than Version 1. while Version 3 has more types than Version 2.
-
Select the type of information to be included in the notification message by selecting the appropriate Grant Notification check boxes.
-
If a notification type “Grant Notification” check box is checked, an Insert/Update/Delete notification of those type of entities will be sent to the registered Notification recipients.
-
Refer to the table in the “Recipient Information” section to understand which version supports which notification type(s).
-
Activity Action Types are only available for Version 3 recipients
-
Activity Action Types on display in the grid are Policy or Submission Activity Actions, created by using the Activity/Suspense Setup in the Administrator center.

-
To create a notification for Activity/Activity update, the selected activity action should be one of the selected Activity actions from the notification service setup process.
-
If no activity action type is selected, an Activity/Activity update will not generate a notification.

A new functionality has been added to the “Notification Service Setup” form to provide functionality that allows users to specify the recipient to continue to block notification messages until acknowledged, or else allow a single re-try (after five seconds). The blocked message will now be deleted if not acknowledged and not delivered after one attempt.
Th notification service setup form has been updated with a new drop-down menu that allows users to select “Single Retry” or “Blocking” options:

-
GET notifications/client
-
POST notifications/client
-
PUT notifications/recipient
-
POST notifications/create
-
OnsService to delete notifications depending on retry method
-
Updated sps_ONSRExt and spu_ONSR stored procedures
What's Next?
Do you need more information about undelivered messages? See Undelivered Notification Messages.