The Associations/Programs menu command is used to create, maintain, and track production for groups of insureds that work together as a whole. For example, various outlets of Joe's Sandwich Shop may work independently, but all report to the same corporate headquarters. Your agency may write business for all or most of the individual outlets. The Program/Association Table Maintenance dialog box is used to create an association/program for Joe's Sandwich Shop as an insured, making it easier to track the entry of submissions, policies issued, premiums, and claims for individual outlets.
You can also create associations/programs to associate groups of retail agents/brokers together. The association/program that you create here can be selected on the Membership tab when adding/editing the agent/broker.
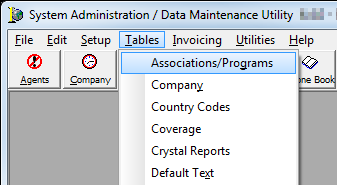
- On the Tables menu, click Associations/Programs.
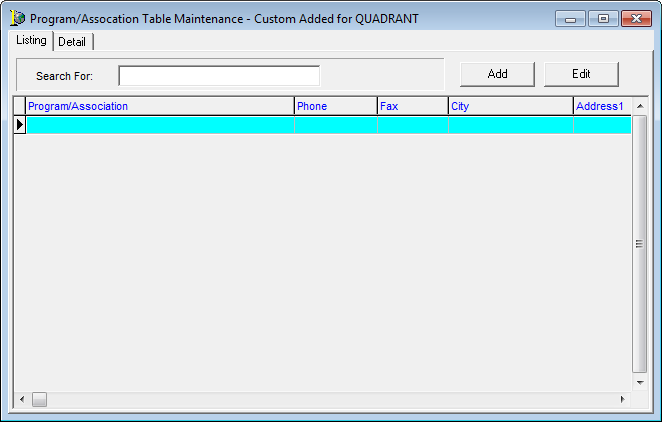
- On the Listing tab, located in the Program/Association Table Maintenance dialog box, click the Add button to create a new program/association. If you want to edit an existing entry, select the entry or type the entry name in the Search For box to locate the entry, and then click Edit.
- In the Basic Information pane, located on the Detail tab, enter the name of the program.
This will most likely be the common name used for all locations or individual entities or the name of a parent company. - Select Active to indicate that this entry is active in the AIM system.
- Enter the parent company (home office) information in the boxes defined next.
- Phone – telephone number
- Fax – fax number
- E-mail – e-mail address
- Mailing Address (Basic Information tab)
- Physical Address as explained later (Basic Information tab)
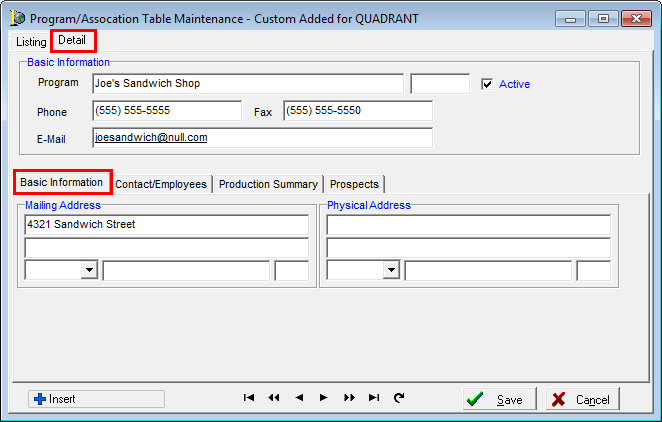
- Enter the zip code and press TAB to populate the city and state fields or type the zip code, city and state.
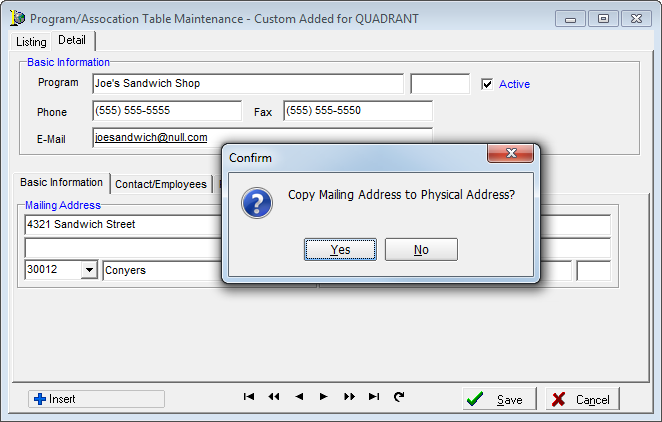
In the Confirm dialog box, click Yes to copy the mailing address information that you just entered to the physical address fields. Click No if the physical address is different from the mailing address. If you click No, enter the physical address in the Physical Address pane.
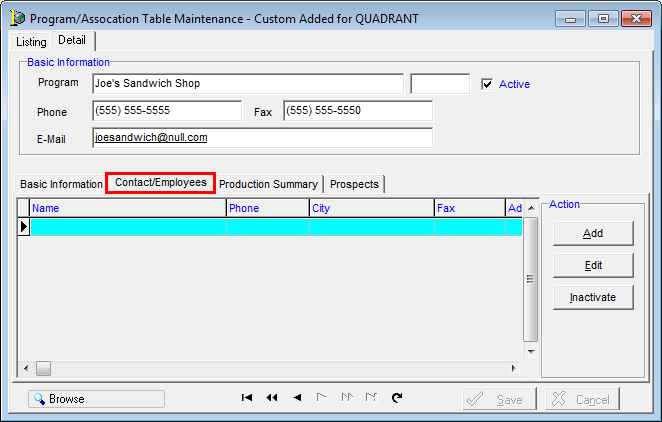
- On the Contact/Employees tab, click Add to add contacts for the company.
- Use the steps described in Contacts to add a contact.
- Use the arrow buttons at the bottom of the dialog box to navigate between companies. Refer to the table below to see the function of the navigation buttons.
|
Button |
Function |
|---|---|
|
|
Move to the first record. |
|
|
Skip past the previous ten records. |
|
|
Move to the previous record. |
|
|
Move to the next record. |
|
|
Skip past the next ten records. |
|
|
Move to the last record. |
|
|
Refresh the current record. |
