Comm Schedule
In this topic, we continue our discussion configuring the Product table located on the Tables Menu.
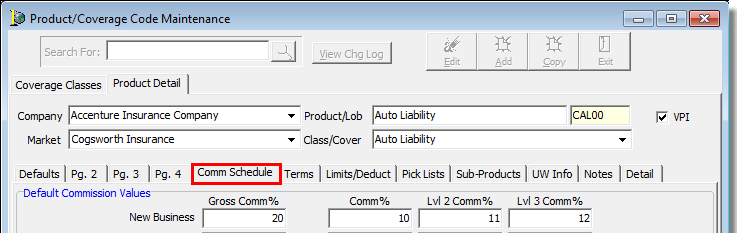
The Comm. Schedule tab in Product/Coverage Code Maintenance is used to configure the default commission schedules for the product. You can configure both new and renewal business schedules at multiple levels as well as specific rates for an individual carrier of the product. The commission amounts that you configure here will appear in the AIM Quote dialog box.
In the following table, we will discuss the buttons shown in the Action pane of the Comm. Schedule tab.
|
Button |
Function |
|---|---|
|
|
Add new commission rate schedule for specific carriers of this product |
|
|
Edit an existing commission rate schedule |
|
|
Copy agent commission records from one product to another product record |
|
|
Inactivate the selected commission rate schedule |
|
|
Activate the selected commission rate schedule |
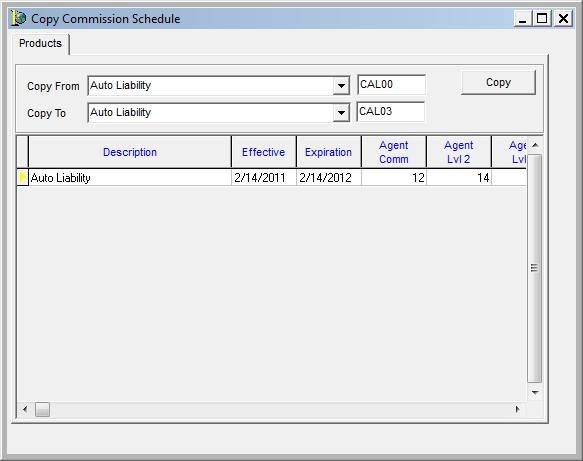
- Click Group Copy to display the Copy Commission Schedule dialog box.
- On the Products tab, select the source and destination of the commission schedule.
- Copy From – source product
- Box (unlabeled) – Product ID
- Copy To – destination product
- Box (unlabeled) – Product ID
- Copy From – source product
- Click Copy to copy the commission schedule.
The Active Only option, located in the Action pane, is a filter that is used to control whether only the active commission rate schedules are displayed.
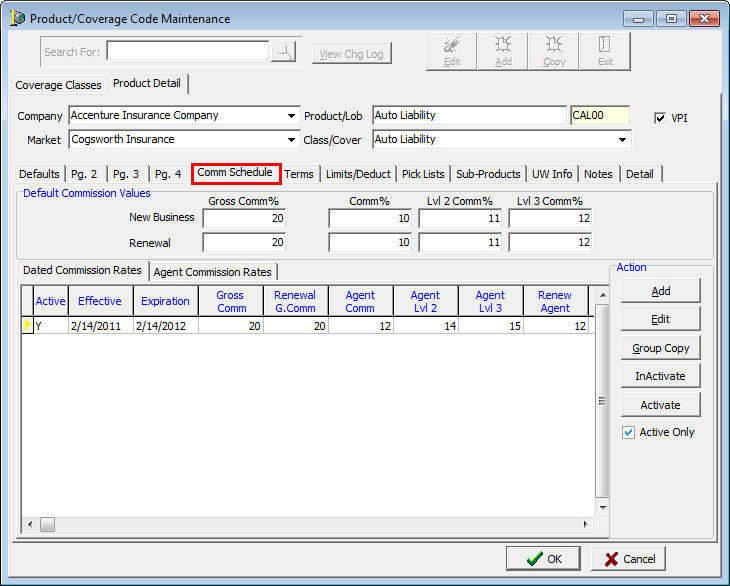
- The percentage rates for the commissions applicable to the product are added in the Default Commission Values pane (working from left to right). The percentages you enter will be displayed in the AIM Quote dialog box. The displayed percentages will be based on whether the quote is for new or renewal business and the agent's/broker's commission award level. The level (Comm/award lvl) is defined (as bronze, silver, or gold) on the Agent Detail tab in the Retail Agent/Broker Table Maintenance dialog box (see Add a New Retail Agent Broker).
- New Business
- Gross Comm % – default gross commission
- Comm % – default agent commission when the agent has a bronze award level assigned
- Lvl 2 Comm % – default agent commission when the agent has a silver award level assigned
- Lvl 3 Comm % – default agent commission when the agent has a gold award level
- Renewal
- Gross Comm % – gross commission
- Comm % – bronze award level
- Lvl 2 Comm % – silver award level
- Lvl 3 Comm % – gold award level
- New Business
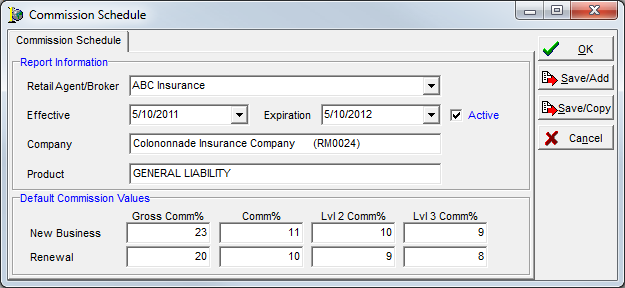
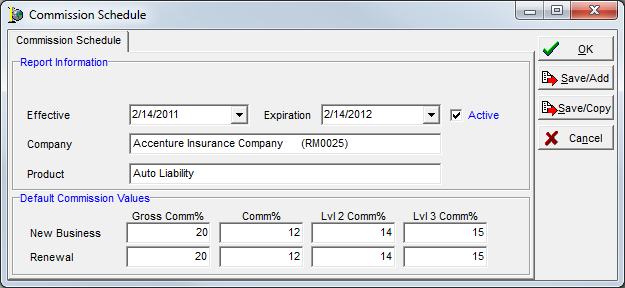
- Click the Add button on the Dated Commission Rates pane to open the Commission Schedule dialog box to create a new commission rate schedule, that is commission rates with specific expiration dates.
- Enter the appropriate information in the Report Information pane based on these definitions.
- Effective – the date the commission is to be effective. You can enter the date or click
 to use the Calendar.
 - Expiration – the date the commission is to be expire. Enter the date or click to use the Calendar.
- Active – makes the commission rate active.
- Company – company name is populated automatically based on the selection made on the Product Detail tab.
- Product – company name is populated automatically based on the selection made on the Product Detail tab.
- Effective – the date the commission is to be effective. You can enter the date or click
- Enter the commission percentages in the Default Commission Values pane (working from left to right).
- New Business
- Gross Comm % – gross commission
- Comm % – bronze award level
- Lvl 2 Comm % – silver award level
- Lvl 3 Comm % – gold award level
- Renewal
- Gross Comm % – gross commission
- Comm % – bronze award level
- Lvl 2 Comm % – silver award level
- Lvl 3 Comm % – gold award level
- New Business
- Click:
- OK to save your changes.
- Save/Add to save your changes and retain the dialog box to begin the process of adding a new schedule.
- Save/Copy to save your changes, copy the schedule, and retain the dialog box. You can modify the copied schedule as needed to create another new schedule.
- Cancel to abandon your changes without saving.
You also have the ability to create commission rates with expiration dates for specific agents.
- Click the Add button in the Agent Commission Rates pane to open the Commission Schedule dialog box to create a new commission rate schedule, that is commission rates with specific expiration dates.

- Select the agent or broker in the Retail Agent/Broker list.
- Enter the appropriate information in the Report Information and Default Commission Values panes using the same steps that we described above.