This topic continues our discussion of the ODBC DSN setup for Crystal Reports that began in Setup ODBC DSN for Crystal Reports.
To change the client alias, you will need to open SQL Server Client Network Utility. Depending on your version of Windows, the executable for this application may reside in multiple locations on your computer. Choose the correct executable for your operating system based on the information provided below.
64-Bit Operating Systems
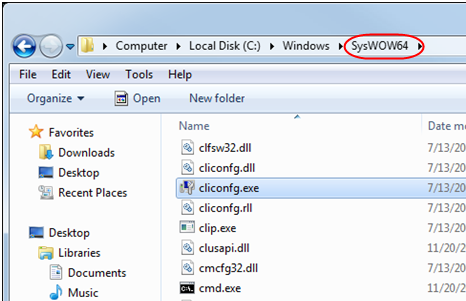
For 64-bit operating systems, you must start SQL Server Client Network Utility from the C:\Windows\SysWOW64 folder. Use the steps that follow to start the application.
- Browse to the C:\Windows\SysWOW64 folder.
- Double-click cliconfg.exe.

32-Bit Operating Systems:
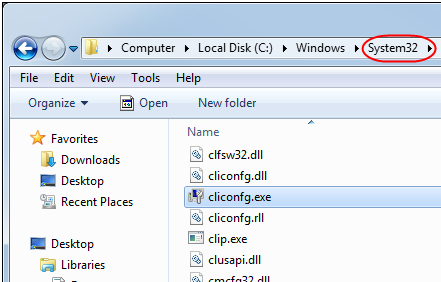
For 32-bit operating systems, you must start SQL Server Client Network Utility from the C:\Windows\system32 folder. Use the steps that follow to start the application.
- Browse to the C:\Windows\system32 folder.
- Double-click cliconfg.exe.

- As an alternative, for 32-bit systems only, click Start, and then click Run or click in the Search box.
- Type cliconfg.exe and launch the executable to open SQL Server Client Network Utility.
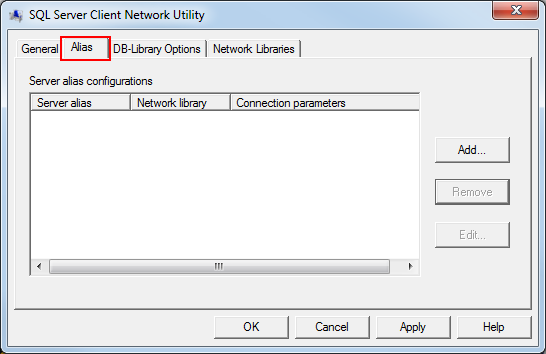
SQL Server Client Network Utility
We will now show you how to add a new reports alias to SQL Server Client Network Utility.
- In SQL Server Client Network Utility, click the Alias tab.
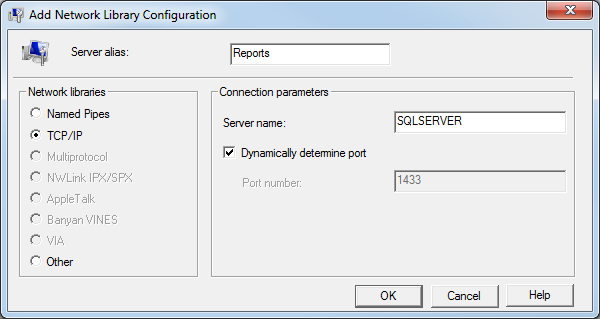
- Click Add.

- In the Server alias box, type Reports.
- In the Network libraries pane, select TCP/IP.
- In the Server name box, located in the Connection parameters pane, type the name of your SQL server.
- Click OK.
