Configure Master Data Sets
The ability to restrict access to specific retail agents or companies by organization or division was introduced in Agency Information Manager (AIM) 6.7. The term company includes not only market, risk and dual companies, but inspection and finance companies as well as taxing entities.
Upon upgrade, this feature is not enabled automatically. Master data sets must be enabled in the CIS database. If you require assistance enabling this option, contact the AIM Product Support staff.

|
Enabling master data sets in your CIS database represents a significant change to your AIM environment. We recommend that you enable this option in a test environment prior to enabling it in your production environment. |
By default, all agents and companies are assigned to all organizations and/or divisions.
In this document, we discuss the configuration of this feature, as well as demonstrate the impact in AIM. This feature does not impact AIM Accounting.
Configuration of this feature is performed in Data Maintenance Utility (DMU).
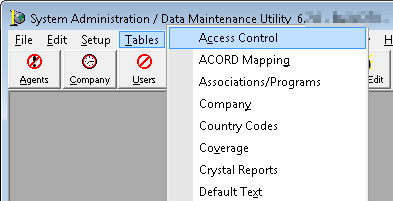
- To begin, click the Tables menu, and then click Access Control.
Data Access Control
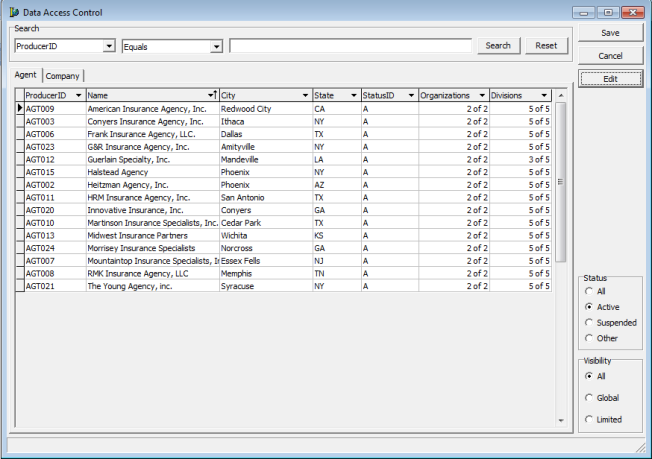
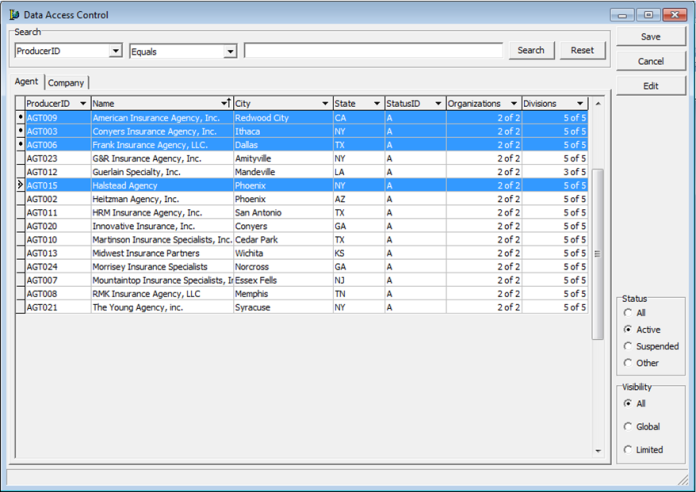
The Data Access Control dialog box displays the retail agent listing.
- To search for a specific retail agent or company:
- Click either the Agent or Company tab.
- In the Search pane, select the search criteria from the available lists.
- Select the parameter from the list.
- Enter the search criteria into the Search field, and then click the Search button. The search results are displayed in the grid. The grid columns are defined as follows:
- ProducerID – the system-generated ID for the producer or company
- Name – name of the agent or company
- City – physical address, city of the agent or company
- State – physical address, state of the agent or company
- StatusID – the status ID of the agent or company.
- Organizations – if enabled, the number of organizations to which this agent or company has been assigned
- Divisions – the number of divisions to which this agent or company has been assigned
As with most grids in AIM, the column headers can be dragged and dropped to suit your view. Grid changes are not be saved from session to session. You can sort the grid results by clicking any column header.
- If you need to reset the grid to remove search criteria, click the Reset button.
- If you need to filter your search results, select the appropriate options in the filter panes.
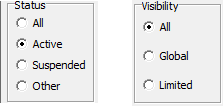
- Status
- All – displays all agents or companies regardless of status
- Active – displays only those agents or companies in active status
- Suspended – displays only those agents or companies in suspended status
- Other – displays only those agents or companies in statuses other than those outlined above.
Visibility
- All – displays all agents or companies, regardless of assignment to specific organizations or divisions
- Global – displays only the agents or companies that are assigned to all organizations or divisions
- Limited – displays only the agents or companies that are not assigned to all organizations or divisions.
- Status
In the following steps, we outline how to assign an agent or company to specific organizations or divisions.
- Click to select the desired agent or company in the grid. You can use the Shift and/or Ctrl buttons to select multiple grid entries.
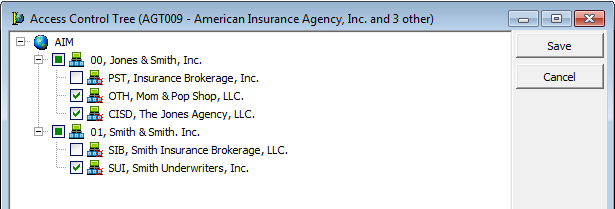
- Click Edit to view the Access Control Tree dialog box.
The title bar of Access Control Tree displays the name of the selected agent or company. If multiple selections are made, it displays the name of the first selected agent or company and the number of additionally selected agents or companies.
As noted earlier in this workflow, all organizations and divisions are granted access by default.
- Select the organizations and/or divisions that should have access to the selected agents or companies.
- Selecting the organization will result in all divisions being enabled as well.
- Clear the selected divisions that should not have access to the selected agents or companies.
- When complete, click Save to save the edits, or Cancel to abandon them.
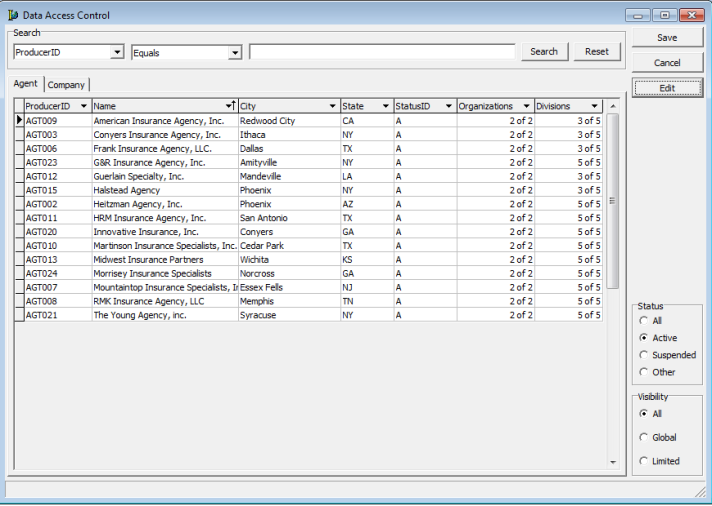
- In Data Access Control verify that the number of organizations and divisions to which the agent or company has been assigned is accurate.
- Click Save to save your edits and close Data Access Control or click Cancel to cancel your edits and close the window.
To demonstrate the results of allowing or disallowing access to an agent or company in AIM, consider the following outline.
In this example, we are using two organizations: Jones & Smith, Inc. and Smith & Smith, Inc. Each consists of several divisions, as outlined below:
| Organization: | Jones & Smith, Inc. |
| Divisions: |
The Jones Agency, LLC. Mom & Pop Shop, LLC. * Insurance Brokerage, Inc. * |
| Organization: | Smith & Smith, Inc. |
| Divisions: |
Smith Insurance Brokerage, LLC. Smith Underwriters, Inc. * |
In our example, the retail agent – Halstead Agency – was limited to access only by members of those divisions marked by an asterisk above.
User Chris McHale is a member of the Mom & Pop Shop, LLC division, while user Joe Abbott is a member of the Smith Insurance Brokerage, LLC division.
When Chris attempts to enter a new insured or submission, the Halstead Agency is available for selection.
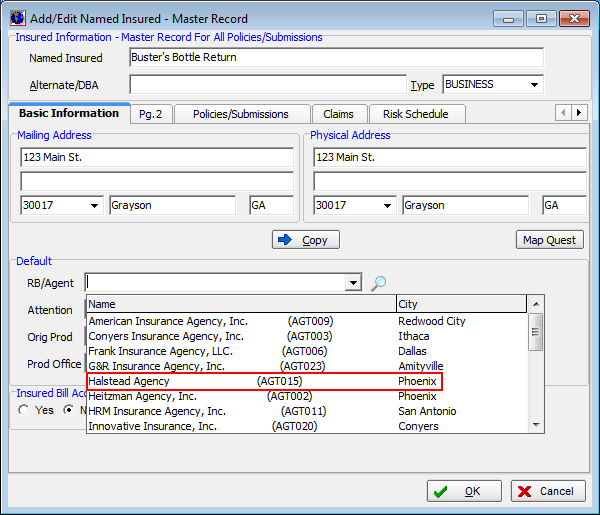
However, when Joe attempts to add a new insured or submission for the Halstead Agency, that retail agency is not available for selection.
The same results apply when either user attempts to select a company during the quote or bind process. If that organization or division is not allowed access to the company, it will not be available for selection by a user belonging to that organization or division.
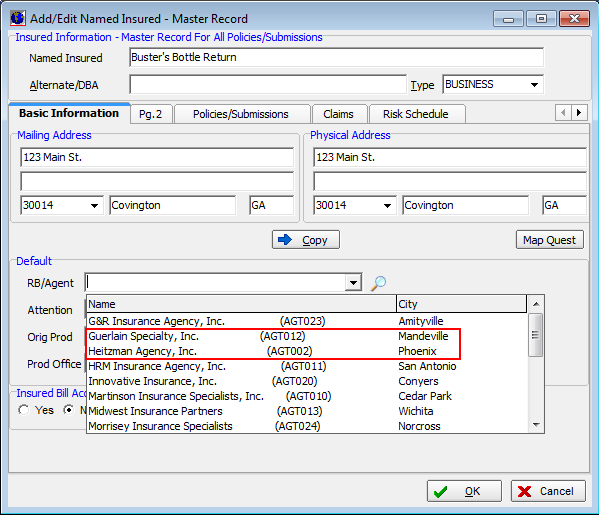
The following fields in AIM are affected by limiting access to agents and companies:
Agents:
- Policy Data > Claims > New Claim > Claims Tracking (2 fields).
- Admin Submission Entry > Retail Agent field
- Advanced Search – Producer Name selection in Search Criteria list
- Agent of Record > New Agent/Broker field
- Inspection Log -> RB/Agent field
- Add/Edit Insured > RB/Agent field
- Phone Book > Retail Agt/Broker option
- Module > Policy Setup
- Renewal Submission Entry > Retail Agent field
- Submission Entry > Retail Agent field
- Submission Log > Advanced Filters - RB/Agent field
- Submission > Edit > Submission – Retail Agent field
- Submission > Copy to New Submission – Retail Agent field
- Submission > Edit > Insured – RB/Agent field
Companies:
- Renewal Manager > Market list
- Renewal Manager > Risk list
- Market Finder Wizard > Mkt Wiz Company list
- Production Report > Company (Market) and Company (Risk) and magnifying glass company search
- Fee Schedule – Paid To field
- Quote Detail > Mkt Co. list
- Quote Detail > Risk Co. list
- Policy Data – Reinsurance tab
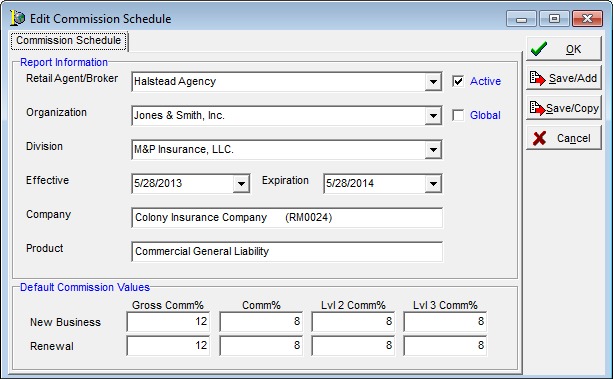
Commission rates may be configured in the Product table, the Company table or the Retail Agent/Broker table. Changes introduced into these tables include the addition of the Organization and Division fields into the detail tabs for commission schedules, as well as the Global check box which when selected applies the commission schedule to all organizations and divisions.
Whether commission rates are set in any of these tables, the hierarchy of commission rates is as follows:
- Agent commission rates, if active records exist
- Dated commission rates, if active records exist
- Default commission values
