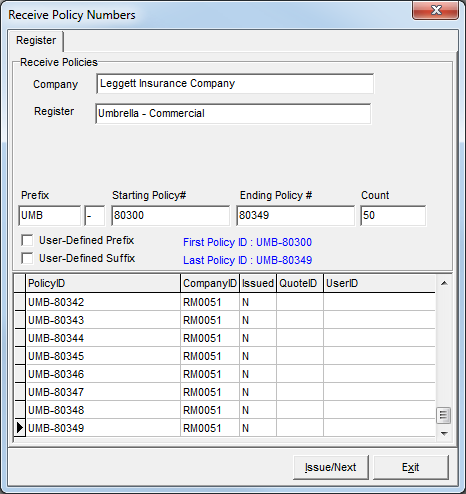
In this topic, we continue our description of the commands located on the Tables Menu.
The Policy Registers (New) table differs from the Policy Register module in that you can use Policy Registers (New) to assign one policy number block to multiple divisions, teams and/ or products.

|
For more information about the columns and the information shown in the policy register related lists, see Policy Register. |
- On the Tables menu, click Policy Registers (New).
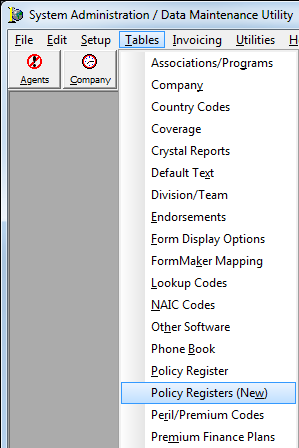
The Policy Register dialog box is used to add registers, that is, blocks of policy numbers. The buttons defined in the following table are there to assist you with adding, editing, or deleting policy numbers.
|
Button |
Function |
|---|---|
|
|
Add a new block of policy numbers |
|
|
Edit an existing register |
|
|
Copy the selected register |
|
|
Delete the selected register |
|
|
Close the dialog box |
The Filter pane on the bottom right side of the dialog box is used to filter the contents of the Policy Numbers tab.
- All – All registers are shown.
- Active – Only active registers are displayed.
- Inactive – Only inactive registers are displayed.
We will discuss the process for adding a new register to the Policy Register module. The information that we present can be used later to edit existing registers.
- Click the Add button in the Policy Register dialog box.

|
Boxes and fields shaded in yellow are required fields. You must type information in these boxes to add or save the record. |
- Enter the appropriate information in the Lookup Code pane based on the following definitions:
- Company – company that provided the policy numbers
- Active – makes the entry in AIM
- Description – identifiable description for the register
- Product Codes – products (codes) to which this register applies
- You must enter a / before and after each product code
- Divisions – ID codes of the divisions that can use the register
- Teams – ID codes of the teams that can use the register

|
When entering products, divisions or teams, type / followed by the team or division ID, followed by another /. For example /DIV1/DIV2/ and so on. Type /ALL/ if the entry applies to all divisions, products or products. |
- Click Save to save your changes.
Alternatively, you can click Save/Add to save your changes and begin adding a new register or click Cancel to abandon your changes.

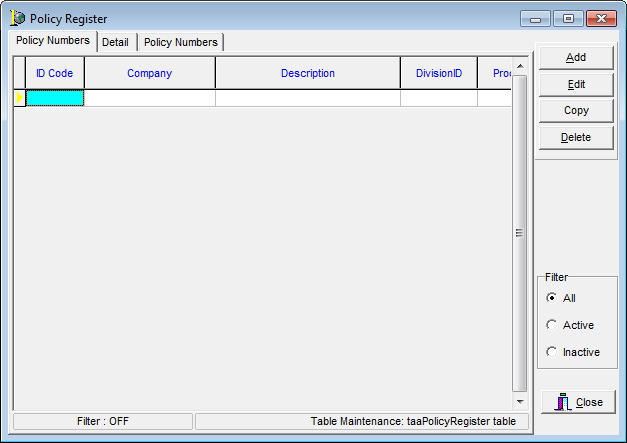
- Select the register that we just created, then click the second Policy Numbers tab.


|
The Issue, Delete, Edit, Spoil, and Return buttons on the toolbar are reserved for future development. |
- Click the Receive button on the toolbar of the Policy Numbers tab.
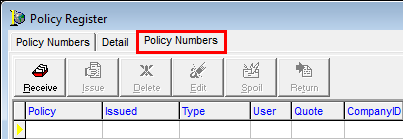
- Enter the information defined next in the Receive Policies pane of the Receive Policy Numbers dialog box.
- Prefix – prefix to assign to all policy numbers (optional)
- Unlabeled box to the right of the prefix – character to separate the prefix from the policy number (optional)
- Starting Policy # – first policy number in the block of policy numbers
- Ending Policy # – last policy number in the block of policy numbers
- Count – (for verification) number of policy numbers that you are attempting to add to the register
- Select User-Defined Prefix if users will be defining the policy prefix in AIM.
The user-defined prefix will be added in addition to the prefix assigned in DMU. - Select User-Defined Suffix if users will be defining the policy suffix in AIM.
The user-defined suffix will be added in addition to the suffix assigned in DMU. - Click Issue/Next to add the block of policy numbers to the register.
Alternatively, you can click Exit to abandon your changes without adding the policy numbers.
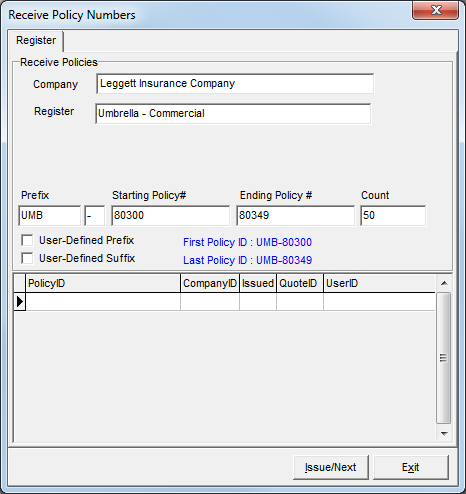
- Verify that the policy numbers appear in the grid, then click Exit.
