In this topic, we continue our discussion of commands located on the Invoicing Menu.
Management of the various tax rates required by individual states are a critical part of your AIM system. The Tax table is used to add, edit, or delete tax rate information required by the states in which you do business.
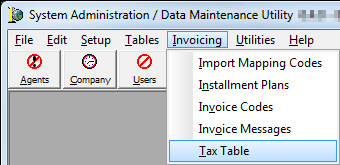
- On the Invoicing menu, click Tax Table.
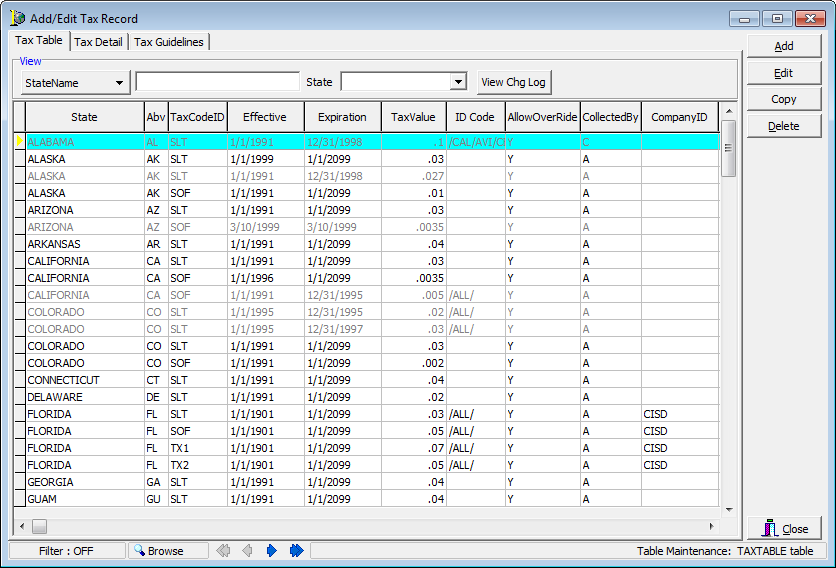
Taxes for states are displayed on the Tax Table tab in the grid layout. In the following table, we will discuss the various button located in the Add/Edit Tax Record dialog box and their respective functions.
| Button | Function |
|---|---|
|
|
Add a new tax record |
|
|
Edit an existing tax record |
|
|
Copy the selected tax information for insertion into a new tax record |
|
|
Delete the selected tax record |
|
|
Close the Add/Edit Tax Record dialog box |
In the steps that follow, we will discuss how to search the Tax table for tax records, and how to add a new tax record. This information can be used later to edit existing tax records.
- Click
 on the StateName button to select a search operator.
Choose from the following options:
on the StateName button to select a search operator.
Choose from the following options:- State – two letter state abbreviation
- StateName – name of the state
- Effective – date that the tax record goes into effect
- In
the text box, type a search parameter that corresponds to the search operator
that you just selected.
For example, if you selected Effective, type the effective date of the tax record. - In
the state list, select a state to limit the search results to the state
that you select.
As an alternative, you can click ALL to view tax records from all states. - Click
the Add button to begin adding a new tax record.
- To use an existing record as a starting point, select the record in the grid, click Copy, and then modify the record as needed.
- To change or delete an existing record, select the record, then click Edit or Delete. You can modify our steps as needed to change an existing record.

|
Boxes and fields shaded in yellow indicate a required field. You must enter text into these fields in order to be able to save your changes. |
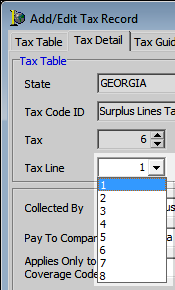
- Enter
the properties of the tax record on the Tax Detail table.
- State
- Municipality – must be enabled in the States table. The entry used only with Kentucky municipality taxes.
- Tax Code ID – select the tax code (type of tax) that you are adding. The list is populated with the tax transaction codes in the Invoice Codes table. The ID appears in the unlabeled box next to the Tax Code ID box.
- Tax – percentage or flat amount
of the tax.
- Select either Percent or Amount (Flat) in the unlabeled box to define the tax amount (type).
- The Value box is populated automatically based on the entries in the preceding Tax boxes.
- Tax Line – select the which tax
line the tax will occupy on invoices. This number should not be duplicated
within the same state.
- Minimum – minimum tax amount to be used on invoices
- Max – maximum tax amount to be used on invoices
- Collected By – select the entity
that is responsible for collecting the tax
- Company
- In House (your agency)
- Other
- Retail Agent/Broker
- Not Applicable
- Pay To Company ID – company to which payments are made. This list is populated with companies that have a category of taxing entity in the Company table.
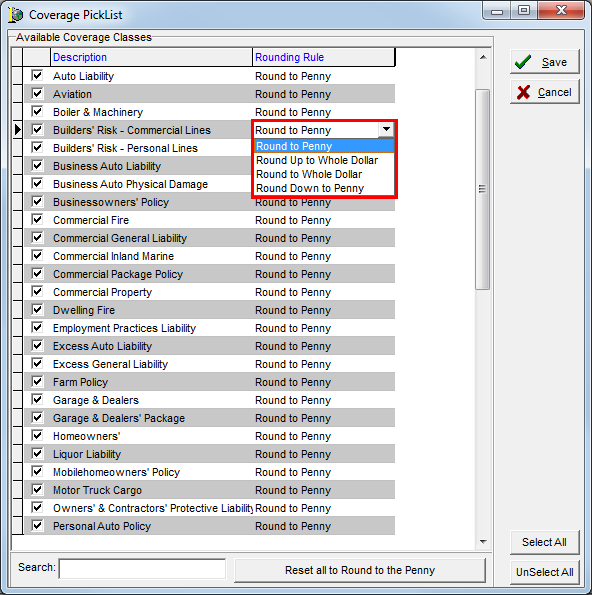
- Applies Only to These Coverage Codes – coverage code that the tax applies to.
- Each code should be begin and end with a /. For example, if you want to include all coverage codes, type /ALL/.
- Alternatively,
you can click the Select Codes and Rounding button, and then pick the
coverage classes in the Coverage PickList dialog box.
- In the list, click Select All to select all coverage codes or Unselect All to deselect all coverage codes.
- Click Save when you are finished editing coverages or click Cancel to abandon your changes.
- Click
Round to the Penny on individual codes and select a rounding option from
the list.
Alternatively, you can click Reset all to Round to the Penny to ensure that taxes on all state codes are rounded to the penny.
- Include Fees – tax should apply to the fees as well as the premium.
- Allow Override – person creating the invoice will have the ability to override the tax rate.
- Fully Earned – tax is fully earned.
- Exclude TRIA – indicate whether the tax applies to Terrorism Risk Insurance Act (TRIA) premium
- Assign to Admitted Companies – tax applies to an admitted company.
- Use Endorsement Date – tax rate will be calculated based on the date an endorsement is processed or the original inception of the policy.
- Optional – tax is optional on policies, that is, users can remove the tax.
- Assign to Exempt Insured – tax should apply to a tax exempt named insured.
- Applies to Policy and/or Endorsement – tax applies to the selected option.
- Effective – date the tax rate is
effective. You can type the date or click and use
the Calendar.
- Expiration – date the tax expires.
You can type the date or click
and use the Calendar.
- Rounding – rounding method that applies to the tax.
- Applies To – tax applies to the selected agent type.
- Premium % – percentage of the premium to which the tax applies
- Section – type of coverage that the tax applies to
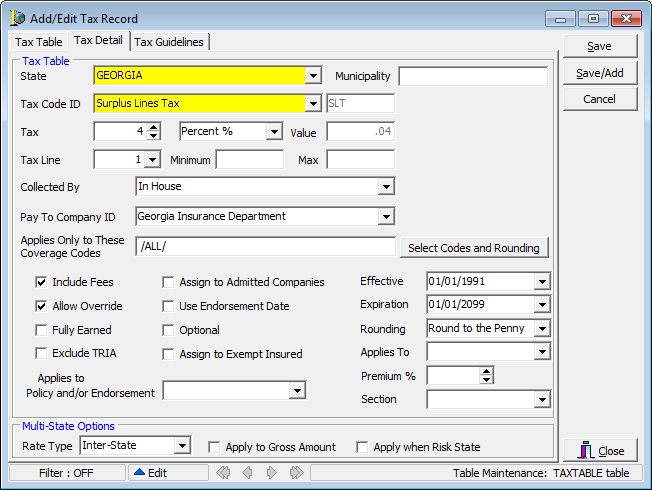
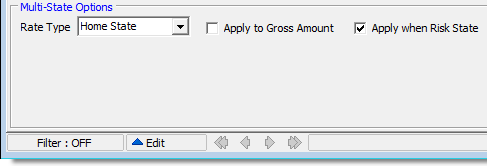
- In
the Multi-State Options pane, enter the Non-admitted and Reinsurance Reform
Act (NRRA) multi-state tax rules, if applicable.
- Rate Type – specific tax rule set
that will be applied to the tax calculation. The list is only available
when Surplus Lines Tax or Stamping Office Fee is selected in the Tax Code ID list.
- Blended – All home state premiums are taxed at the normal home state rates and any out of state premium is taxed at a special blended rate.
- Home State – All taxes and fees are calculated at the home state rate.
- Inter-State – If the policy is a multi-state policy, a different rate applies to the whole premium.
- Apply to Gross Amount – Applies the tax to the total amount of the premium
- Apply when Risk State – applies the tax to the amount of the risk state only
- Rate Type – specific tax rule set
that will be applied to the tax calculation. The list is only available
when Surplus Lines Tax or Stamping Office Fee is selected in the Tax Code ID list.
|
|
The Apply to Gross Amount and Apply when Risk State options become available when you have selected a valid tax ID code. |
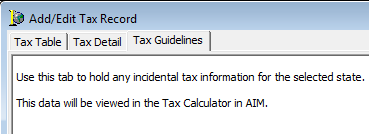
- Click the Tax Guidelines tab.
- Enter any incidental tax information for the state to which the tax applies. The information will be displayed in the AIM Tax Calculator.
- Click
Save to save your changes or click Save/Add to save your changes and begin
adding a new tax rate.
Click Cancel to abandon any unsaved changes.