In this guide, we will show you the typical steps required to issue a policy in Agency Information Manager (AIM) using Vertafore Policy Issuance (VPI). Please refer to the AIM/VPI Setup guide for information on how to configure your AIM system to integrate with VPI. This guide assumes that you are already familiar with processing quotes and policies in AIM.
- In AIM, enter a new submission.
- In Submission Entry, enter all relevant information including the expiring policy number if applicable.
- Enter all applicable information on the Submission Detail tab.
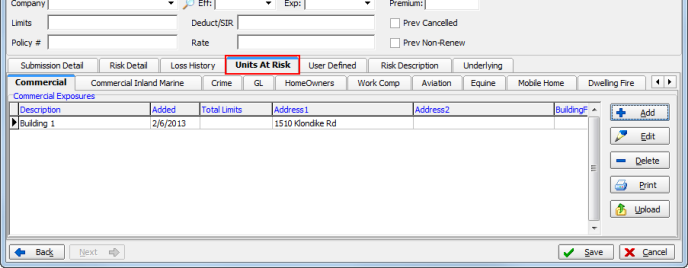
- On the Units At Risk tab, enter any applicable information about units at risk on the appropriate tabs. For package policies, enter the property only on the Commercial tab and capture the liability information on the GL tab.
- Quote the submission per your normal workflow.
-
In Submission Entry – Quote Detail – Pg. 2,select the following:
- Market company
- Product
- Risk company
- Form
|
The selected product affects the VPI endorsement list when the policy is issued. |
- In the Terms group box, some of the information is populated automatically. Enter the following information, as required by your agency.
- Premium (Click
 to enter premium distribution, which is required for Commercial Package policies.)
 - TRIA Premium
- MEP
- Coinsure
- Deduct.
- Retro
- Eff.
- Term
- Exp.
- Premium (Click

- In the Limit and Deductible grids, enter the applicable limits and deductibles. You can click in the Coverage and Applies to/Limit boxes to select from a list.
|
Limit defaults can be specified for products in Data Maintenance utility. |

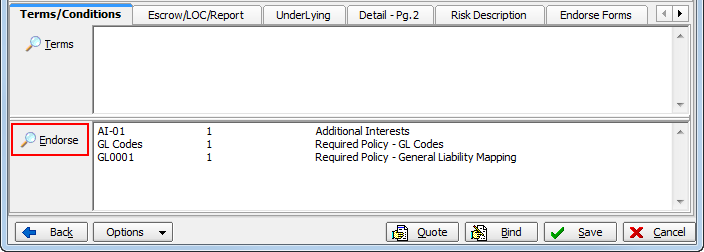
- On the Terms/Conditions tab, click the Endorse button. This causes AIM to communicate with VPI and open VPI Policy Endorsement Coverages.
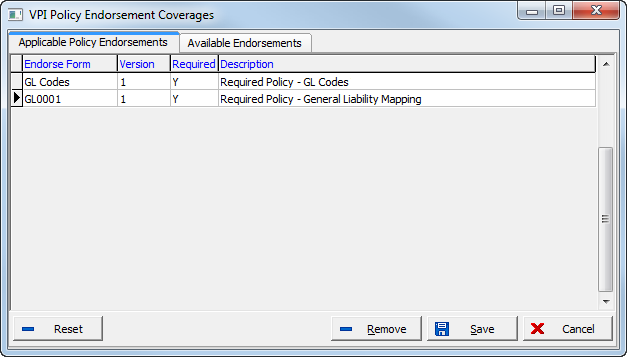
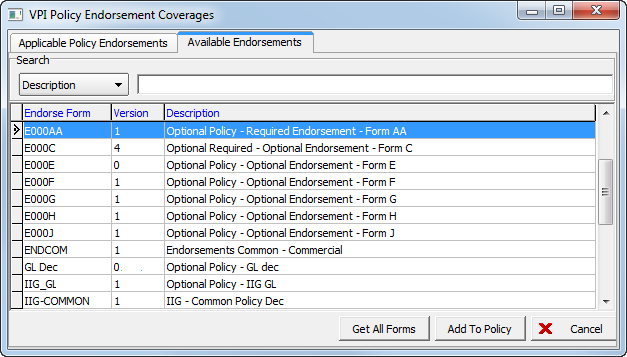
- In VPI Policy Endorsement Coverages, use the buttons described in the table below to manage the forms to be displayed on the quote and policy. On the Applicable Policy Endorsements tab, forms that are displayed with a Y in the Required column of the grid are required based on the selected coverage and products for the carrier. If an N is displayed, the form is optional.
|
Click |
To Do This |
|---|---|
|
|
Reset to display the required forms list from VPI. You must click Save to save the grid after resetting. |
|
|
Remove the selected form. |
|
|
Save your changes to the grid. |
|
|
Abandon your changes and close VPI Policy Endorsement Coverages. |
|
|
Select all forms. |
|
|
Add the selected forms to the quote and policy. |
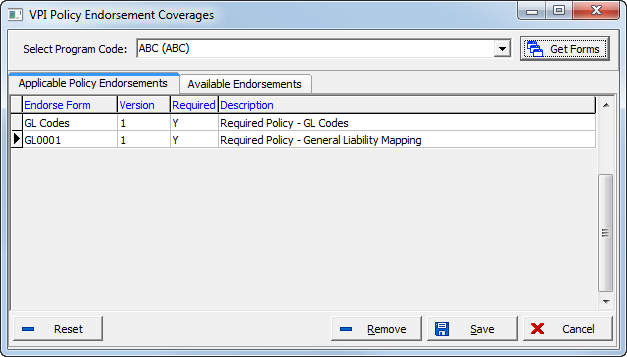
- If multiple program codes have been setup for the selected product, the Select Program Code box appears in VPI Policy Endorsement Coverages. Click
 and select the applicable program code. If only one program code applies, it will default automatically.
 - Click Get Forms to add the endorsement forms that apply to the selected program code.
- Select the forms that apply to the quote or policy on the Applicable Policy Endorsements tab.
- On the Available Endorsement tab, you can select the endorsement forms that you want to add to the policy and click Add To Policy. If a program code is defaulted or selected, the list of available endorsement forms is filtered to include only the endorsement forms associated with the selected program code. Selected forms are added to the Applicable Policy Endorsements tab.
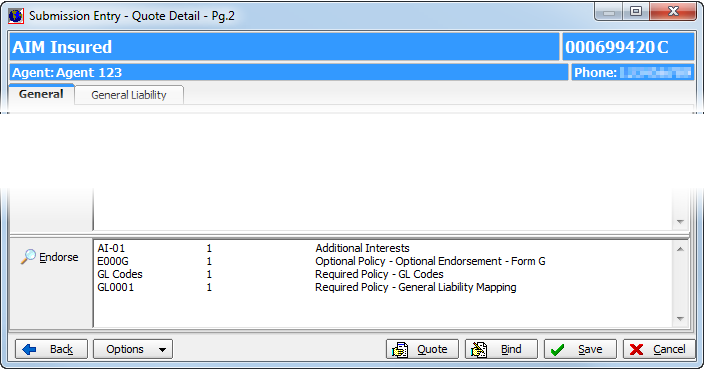
- In Submission Entry – Quote Detail – Pg.2, click Quote to quote the submission. The documents shown in the Endorse pane are added to Document Processing.
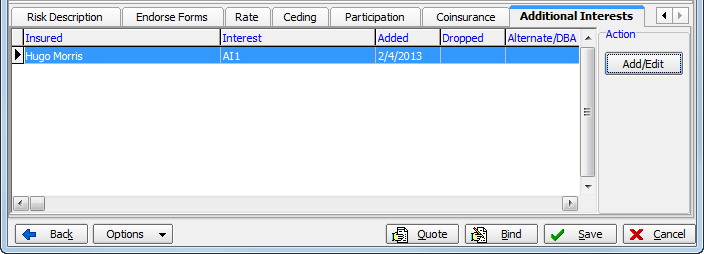
- If you need to add additional interests to the policy before it is bound, click the Additional Interests tab, and then click Add/Edit and edit the additional interests as required. Additional interests must be mapped in order for them to appear on the VPI policy.
- Click Bind to issue the binder.
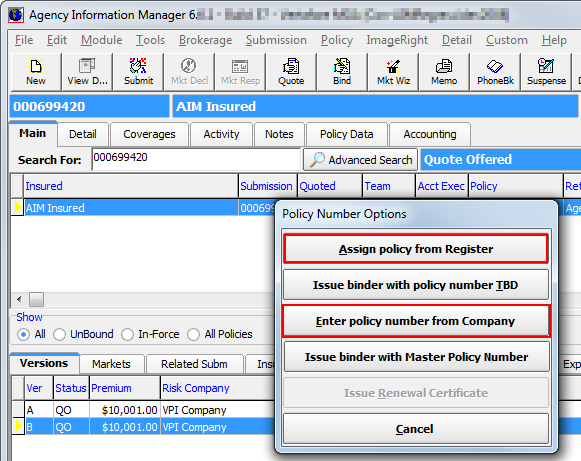
- In the Policy Number Options dialog box, you must select either Assign policy from Register, or Enter policy number from Company. You cannot issue a policy using VPI with a TBD policy number.
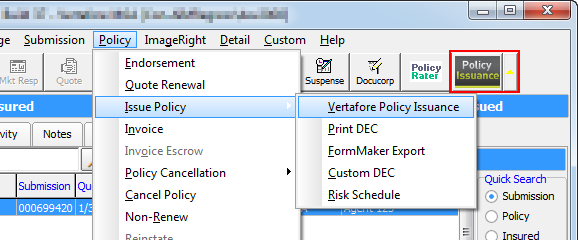
- On the Policy menu, point to Issue Policy, and then click Vertafore Policy Issuance. Alternatively, you can click Policy Issuance on the speed bar.
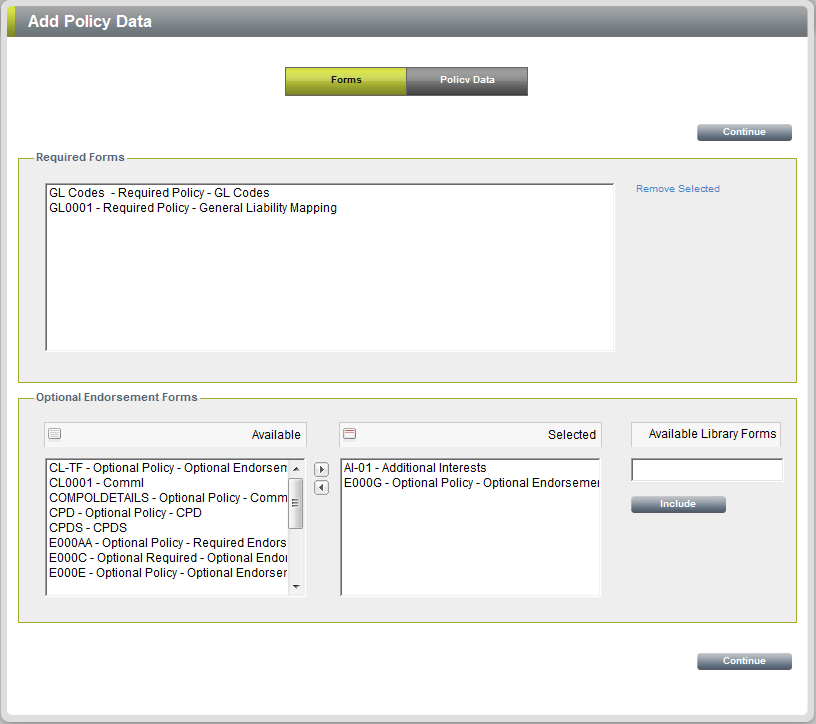
- In VPI, review the required and optional forms as needed, and then click Continue.
|
Required forms are not transmitted to VPI but are rather included by VPI automatically. Optional forms are transmitted to VPI to be included with the required forms. |
- Review the resulting PDF, for accuracy. Upon closing the VPI document in the PDF viewer, the PDF is attached to the policy on the Attached Files tab in AIM.
- On the Policy menu, click Mail-Out Policy and mail the policy according to your agency’s normal workflow.
We continue our discussion of policy issuance with VPI in Issue Endorsements Using VPI.


