Using a Layered Policy Schedule (or multilayered policy), you can create and invoice a policy that includes layers of risk covered by other policies. For example, if you are covering a large risk such as a high rise building, your company may opt to divide that risk into policy layers where different companies cover the total risk at different levels; e.g. $0 to $10,000 or from $10,000 to $25,000 and so on.
|
Currently, the layered policy schedule feature works only as shown below. It does not support multi-state policies, renewals, or cancellations. |
Click a link below to view a particular area of interest.
Bind and Invoice a Policy with a Layered Policy Schedule
Add a Bound Policy to a Layered Policy
Delete a Policy from a Layered Policy
Create a Layered Policy
Use the steps below to create a layered policy.
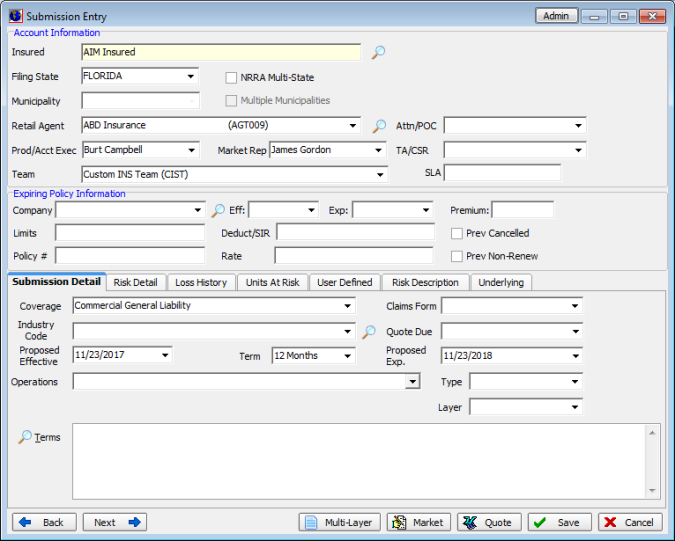
- Create a new submission.
- Fill out the Submission Entry dialog box.
- Click the Multi-Layer button.
If you need to access an existing layered policy schedule or add layers to an existing quote, click the Submission menu, and then click Layered Policy Schedule.
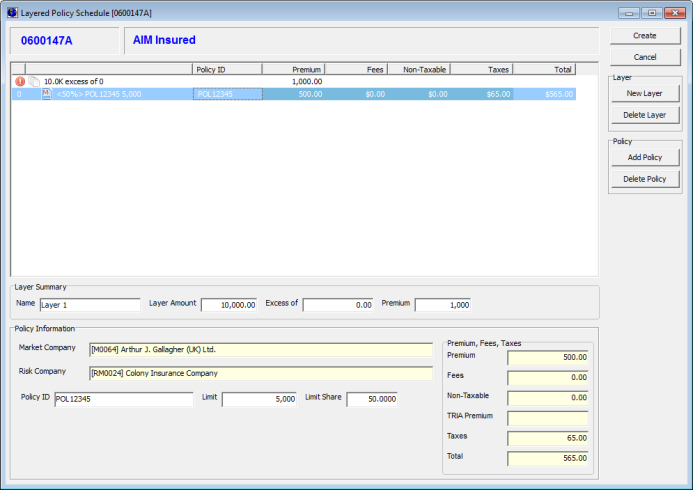
- In the Layered Policy Schedule dialog box, select the top layer, and then enter the appropriate information about the layer in Layer Summary.
- Name – name of the layer; e.g. Layer 1 or Layer 2
- Layer Amount – amount in dollars that the layer covers
- Excess of – the amount in dollars where the layer is used; for example, Layer 2 may become active only after losses in excess of $100,000 have been incurred.
- Premium – total amount of premiums applied to the policies within the layer
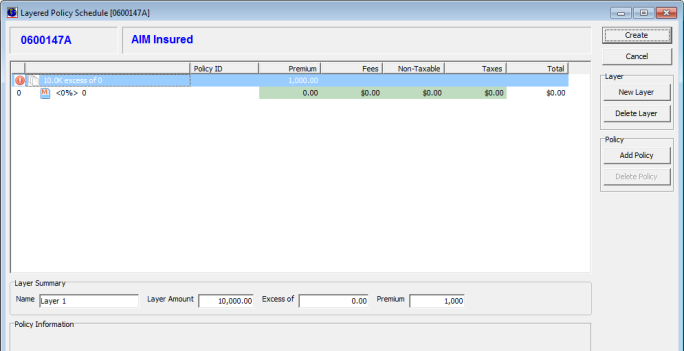
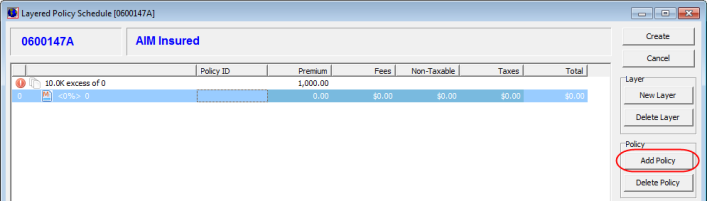
- Double-click the policy line under the layer to enter policy information. Alternatively, you can click the layer, and then click Add Policy. The main policy is denoted by
 .
.
- Fill out the Submission Entry dialog box as usual, selecting the appropriate market company, risk company, product, and terms as required, and then click Save.
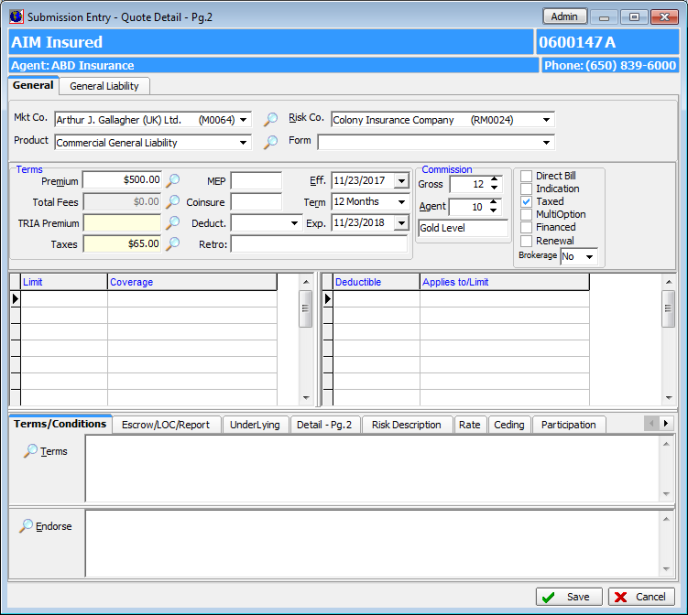
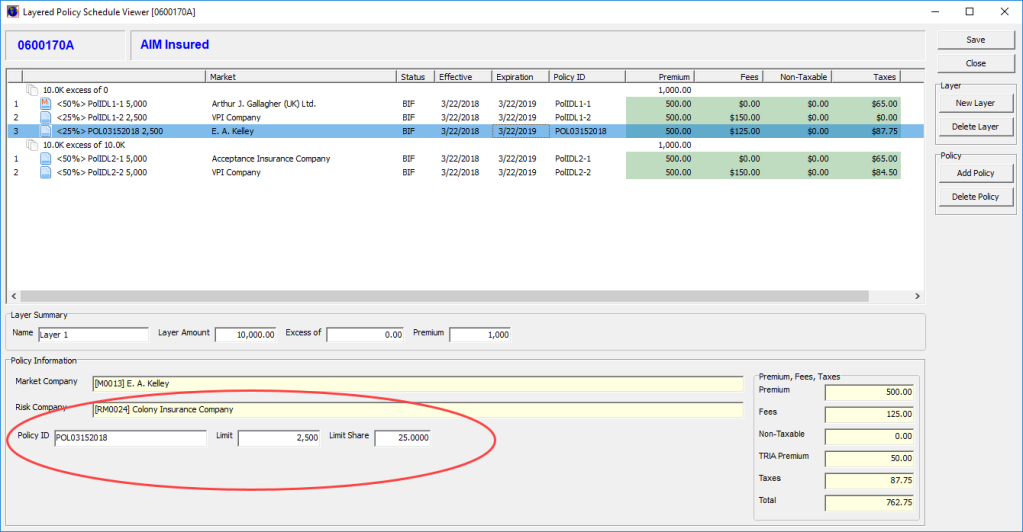
- In the Policy Information pane, enter the following information:
- Policy ID – policy number
- Limit – policy limit
- Limit Share – percentage of the overall layer limit covered by the policy limit
Note: The Limit Share field is updated automatically based on the amount entered in the Limit field and vice versa.
- Click Add Policy again and repeat the process of adding policies until the layer limit is covered by the policies within the layer.
Note: If the layer limits are not covered 100%, ![]() appears next to the layer to let you know that the layer is not fully covered.
appears next to the layer to let you know that the layer is not fully covered.
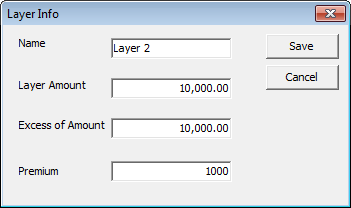
- To add a new layer, click New Layer to create a new layer. Enter the following information in the Layer Info dialog box.
- Name – name of the layer
- Layer Amount – amount in dollars that this layer covers
- Excess of Amount – dollar amount at which the new layer begins (typically where the previous layer ends)
- Premium – total amount of premiums applied to the policies within the layer
- Populate the new layer with policies as described earlier and click Save.
- Add layers and policies to sufficiently cover the risk.
- When all layers and policies have been added, click Create.
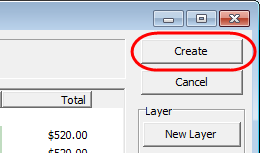
The layered policy schedule is created for the version of the quote with which you are working (e.g. version A). You can create additional quotes and use the initial layer created for version A and edit the layer as needed. The layered policy schedule can be unique for each version of the quote (versions B, C, D, etc.).
If you are making changes to a previously bound layered policy, such as changing the Limit Share percentage or the Limit Amount, those changes are tracked in the Activity log. You can double-click the entry in the Activity log to see details about the changes.
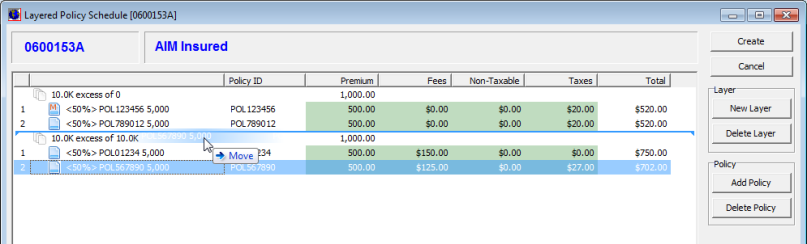
Move a Policy Between Layers
If you need to move a policy between layers, you can simply drag and drop the policy to the desired location.
- Click the policy to be moved.
- Drag the policy to the new location.
- Make any needed corrections to the affected layer to ensure that the layer does not exceed 100% coverage.
Bind and Invoice a Policy with a Layered Policy Schedule
In the steps below, we show you how to bind a policy with a layered policy schedule.
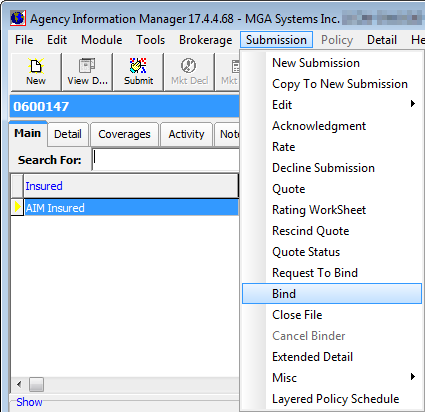
- Open the submission in AIM.
- Click the Submission menu, and then click Bind.
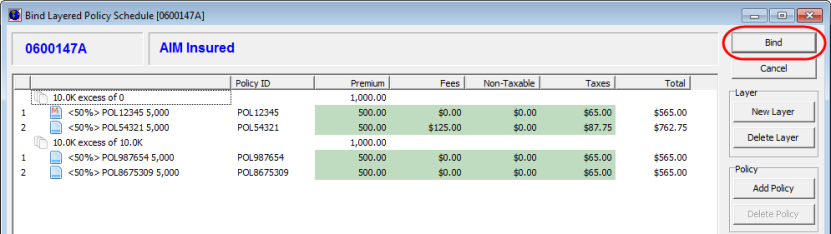
- In the Bind Layered Policy Schedule dialog box, click Bind.
- In Submission Entry - Quote Detail - Pg.2, click Bind.
- If Surplus Lines taxes are applied, make any necessary changes in Surplus Lines Tax Calculator, and then click OK.
- In Issue Binder, click Bind.
- In Document Processing, you can save, fax, print, or e-mail the document. If you want detailed information about the Layered Policy Schedule to appear in the document, you will need to add a repeatable section to the document in Document Designer using the Quote_Layers merge source.
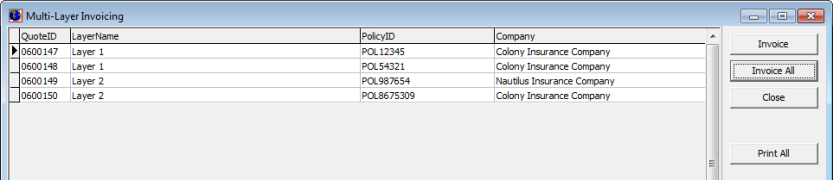
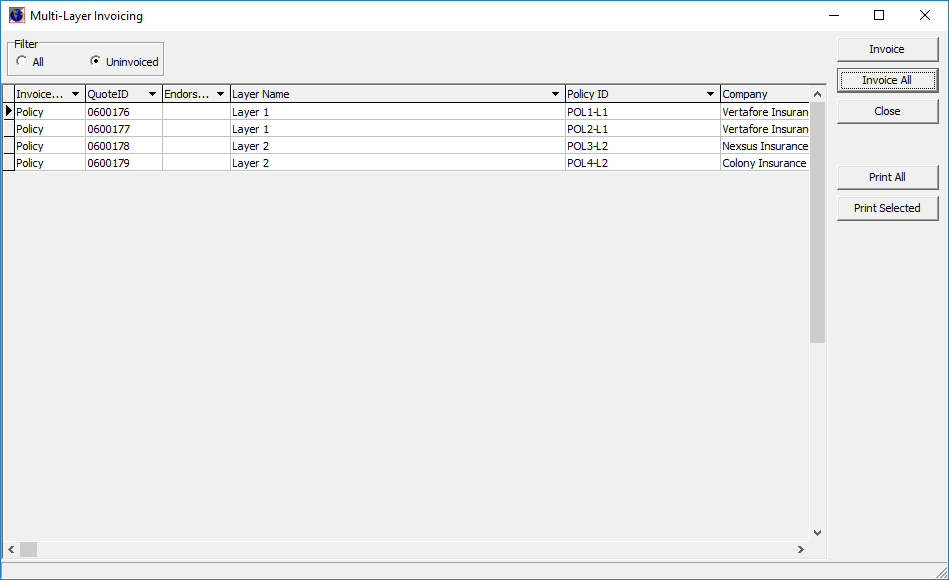
- In Multi-Layer Invoicing, either select a policy, and then click Invoice to bind a single policy, or click Invoice All to invoice all policies. Alternatively, you can click Print All to view all of the layers in a Crystal Report.
Note: To print the Crystal Report, copy the MultiLayerInvoice.rpt file from the AIM\ReportTemplate folder into the \AIM\Reports folder on your AIM network share. This file must be present in AIM\Reports to print the report.
- In the Invoice Transaction Header dialog box, click OK.
- In the Invoice Screen dialog box, click Post.
- If you clicked the Invoice All button, the Invoice Transaction Header and Invoice Screen dialog boxes for each policy will be presented. Repeat the steps above for each policy.
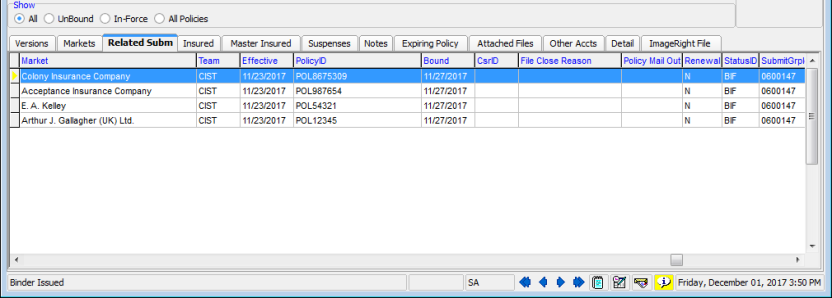
Upon binding, the individual policies added to the layered policy schedule are added to the Related Subm tab.
Invoice Later
If you want to bind the layered policy but delay invoicing, you can come back and invoice the policies later. You can also use this method to invoice an endorsement to a policy.
- Bind the policy as explained earlier but do not click the Invoice or Invoice All buttons.
- When you are ready to bind, locate the main policy in AIM, click the Policy menu, and then click Endorsement. Alternatively, you can right-click the policy, and then click Endorse.
- Click the Open Invoicing button.
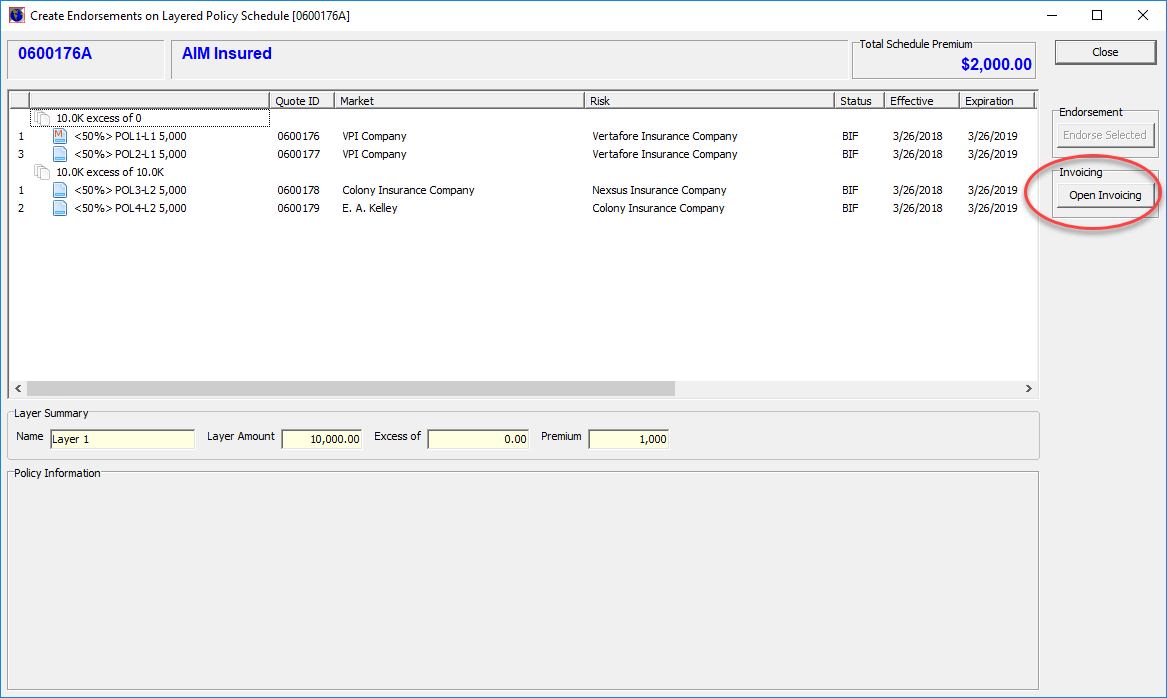
- In the Filter pane, select All to view all policies in the layered policy including previously invoiced policies or click Uninvoiced to view only those policies that have not yet been invoiced.
- Click Invoice to invoice a single policy, or click Invoice All to invoice all policies. Alternatively, you can click Print All to view all of the layers, including previously invoiced policies, in a Crystal Report or click Print Selected to view the selected layer in a Crystal Report. If you don't want to invoice now, see the steps shown in Invoice Later.
Note: To print the Crystal Report, copy the MultiLayerInvoice.rpt file from the AIM\ReportTemplate folder into the \AIM\Reports folder on your AIM network share. This file must be present in AIM\Reports to print the report.
Endorse a Layered Policy
If you need to make changes to the layered policy, you can do so using the following process.
- Select the main policy in AIM.
- On the Policy menu, click Endorsement. Alternatively, you can right-click the policy, and then click Endorse.
- In the layered policy schedule, select the policy that you want to endorse, and then click Endorse Selected.
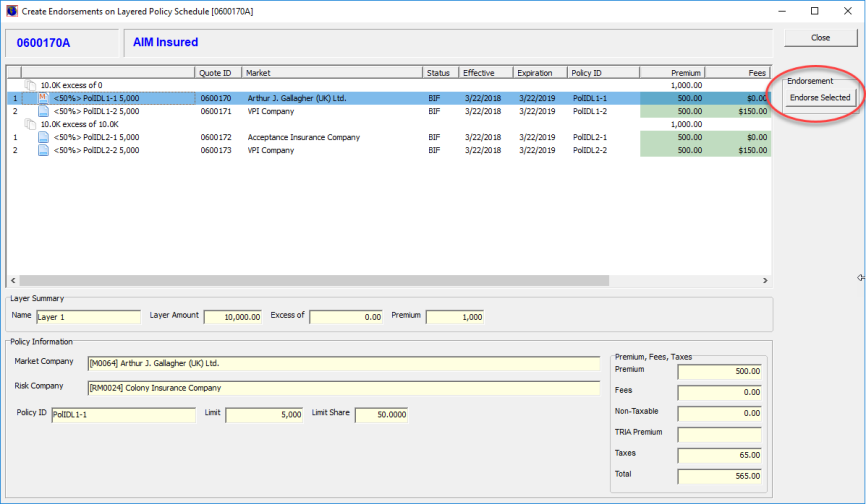
- Endorse the policy as you normally would. Refer to the Endorsement topic if you need to know more about the process of endorsing a policy.
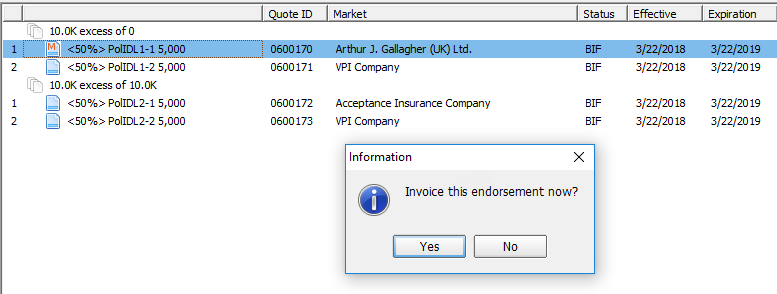
- If you have changed the premium amount, you will be prompted to invoice the endorsement. Click Yes to invoice now, or click No to Invoice Later.
- Repeat these steps for any other policies within the layered policy that need to be endorsed.
If you opted to invoice the policy later, you can do so when you are ready by opening the main policy and clicking the Policy Data tab.
- On the Policy Data tab, look on the Endorsements tab and locate the endorsement change that needs to be invoiced.
- Right-click the endorsement, and then click Invoice. If you want to invoice the policy later, follow the steps shown in Invoice Later.
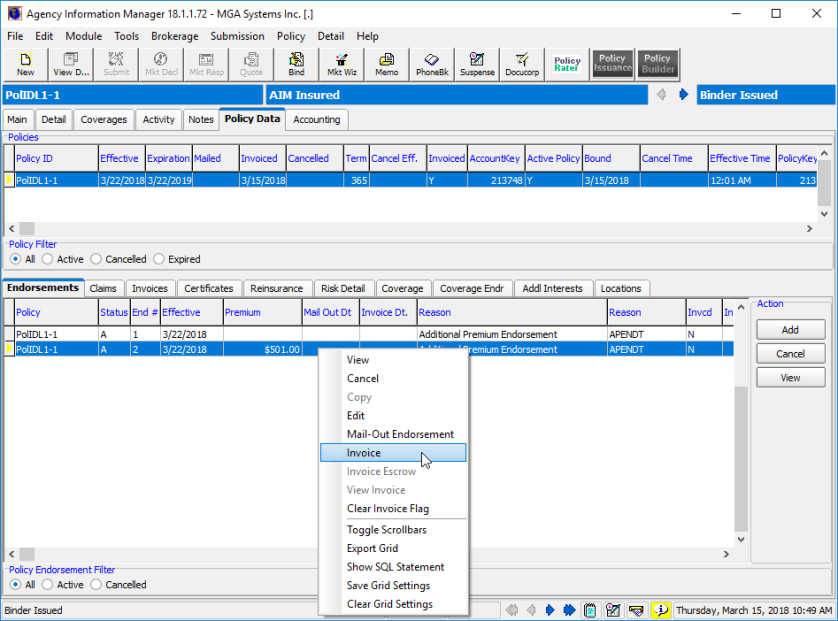
- Invoice and post the endorsement as you normally would.
Add a Bound Policy to a Layered Policy
If you have a bound layered policy that you need to add an additional policy to, you can add a bound policy to the layered policy using the steps below as a guide.
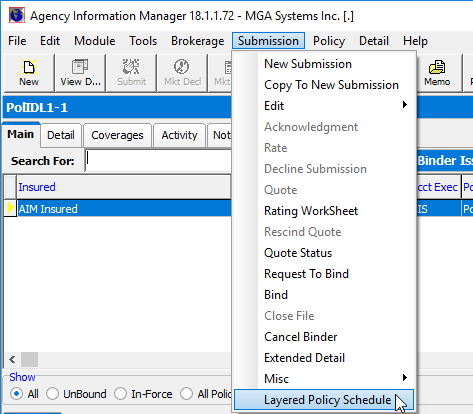
- Select the main layered policy in AIM.
- Click the Submission menu, and then click Layered Policy Schedule.
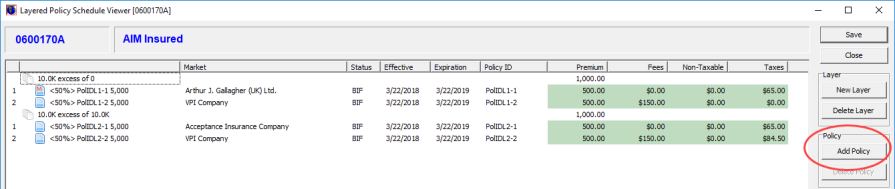
- In the layered policy schedule, select the layer where you would like to add the policy.
- click the Add Policy button.
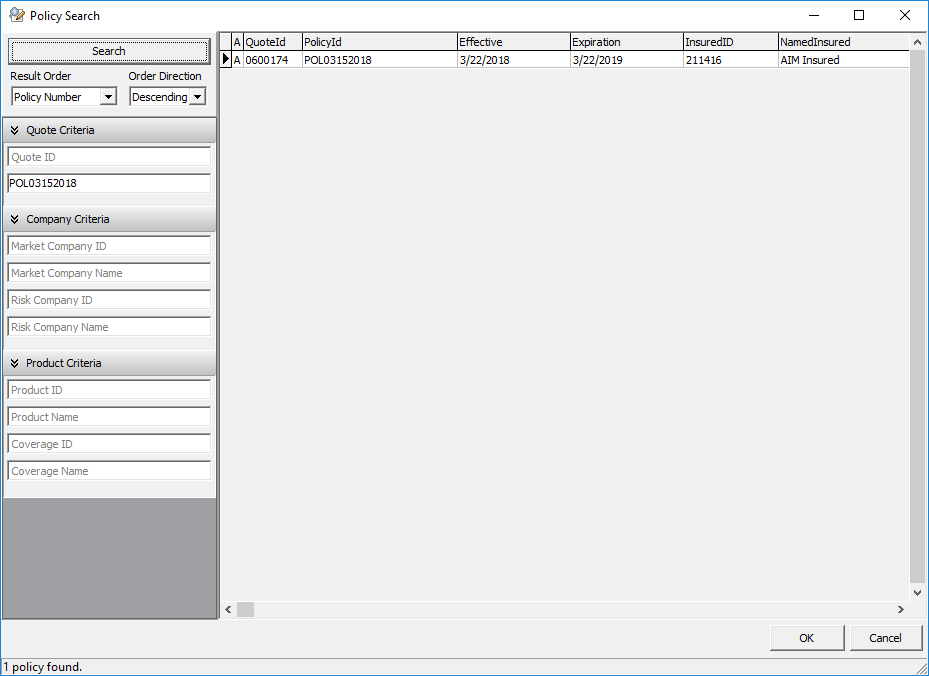
- In Policy Search, enter the search criteria to find the policy that you wan to add. You can enter as many or as few of the search criteria needed to perform the search. Leaving all of the criteria blank, returns all policy numbers.
- You can select the sort order of the search results by making selections in the Result Order and Order Direction list.
- In Quote Criteria, enter the Quote ID or the Policy Number of the policy.
- In Company Criteria, enter the Market Company ID, Market Company Name, Risk Company ID, and/or the Risk Company Name.
- In Product Criteria, enter the Product ID, Product Name, Coverage ID, and/or Coverage Name.
- Click Search to perform the search.
- Select the policy from the resulting list, and then click OK.
- The new policy is added to the layer you selected. Select the new policy and enter the Limit and Limit Share information.
- Click Save to save your changes.
Delete a Policy from a Layered Policy
If you need to delete a policy from a layered policy, you can do so once the layered policy has been bound.
- Select the main layered policy in AIM.
- Click the Submission menu, and then click Layered Policy Schedule.
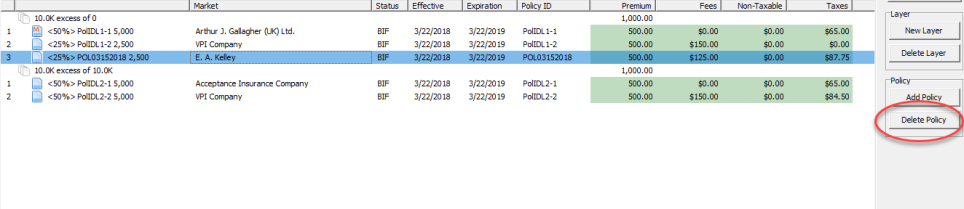
- Select the policy to delete, and then click Delete Policy.
- You may need to adjust the limit and limit share amounts on policies remaining in the layer.
- Click Save to save your changes.