In earlier topics, we defined the steps needed to run a variety of reports, including print and display options in most examples. In this section, we are going to explain other methods for printing and exporting reports. In our explanation, we are going to use the Trial Balance report. You can easily adapt our steps to print or export the reports below as well as others not listed:
- Trial Balance
- Income Statement
- Balance Sheet
- Sub-Ledger Report
- GL Reports
- Account Detail Report
- General Ledger
- Journal Entry Postings
- Chart of Accounts
- GL Posting Journal
- Production
- Broker/UW Production
- Premium Report
- Premium Bordereau
- Miscellaneous Reports
- SLT/Tax Report
- Invoice Register
- Trust Reconciliation Report
- Print 1099
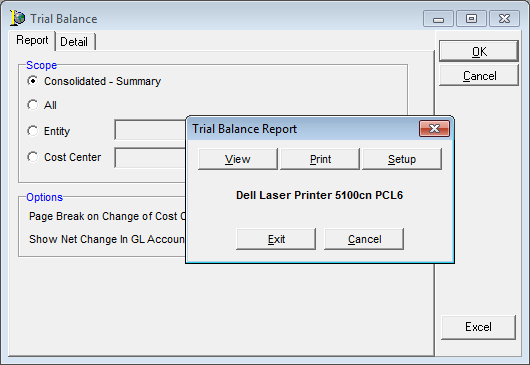
- Create the Trial Balance report as explained in Trial Balance.
- In Trial Balance Report, click View.
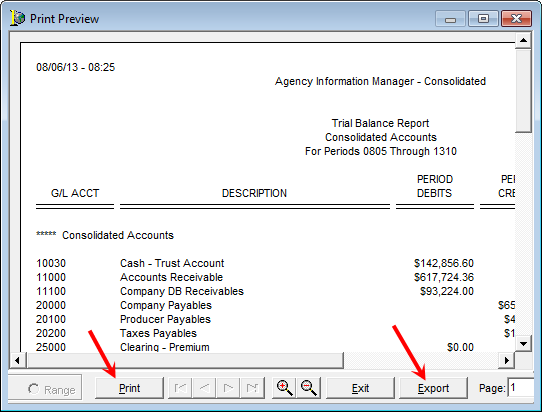
- To print the report, click Print in Print Preview.
- To export the report, click Export.
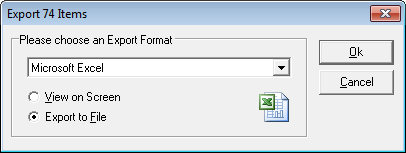
- Select the format to be used for the export, Microsoft Excel in our example. The number in the title bar represents the number of items that will be exported.
- Select one of the following options:
- View on Screen – display report in the selected format
- Export to File – create and save file containing the report
|
The use of comma-delimited text (CSV) is often a good option to ensure that numbers are transferred as numerical data rather than as plain text. |