Open topic with navigation
 S
S
 R
R
Broker Center
Use the Broker Center to set up broker accounts for attachment to customers, enter default commissions for brokers, access a broker's transaction list, view a broker's customer accounts receivable balances, and to initiate receipts, checks, journal entries, and certain reports involving broker accounts.
In AMS360, customers are flagged as a and the appropriate broker is selected in the Name & Address section of Customer setup. You must create the broker account in the Broker Center before attaching it to a customer.
 Accessing the Broker Center
To access the Broker Center, do one of the following:
-
Click Broker on the Center Button Bar.
-
If the Toolbox menu is available, choose Toolbox > Launch New Center > Broker.
From anywhere in AMS360 you can right-click over a center button and that center opens in a new window.
 Entering a New Broker Account
Before you can begin broker-related activities, you must set up accounts for brokers from which the agency accepts clients.
-
From the Broker Center, click New Broker. This takes you to the Broker setup form.
-
Enter all pertinent information for the broker, paying close attention to the required fields.
-
Once the broker information is entered, select Save and Close. This takes you back to the Broker Center where you can continue adding broker accounts, edit a broker account, or move on to another task.
 Searching for a Broker Account
 Basic Search
AMS360 returns a maximum of 100 brokers to the Broker Center results. By default the system displays 20 records per page, however you can change this in Agency Setup or User Options. The Agency Setup options are for the entire agency but you can override this by individual user, in the User Options form.
How to Narrow the Search Results
To narrow the search for a broker in a long (more than one page) list:
-
From the Broker Center, click the Name field and type a few characters of the broker's name. You can also use the asterisk (*) as a wild card. Enter the initial characters of the broker name, followed by the (*) and click Search to return a list of all brokers beginning with those alpha characters.
-
Select to include Firm or Individual brokers to narrow the search to one broker type.
-
Select to include only Active or Inactive brokers to narrow the search to one of these broker types.
-
Click Search or [Enter].
-
Use to select an item from the Search Results list.
A broker can be set to an inactive status by checking the Inactive box in the Broker Setup form.
 Advanced Search Options
|
Field Name/ Group
|
What is this?
|
|
Match On
|
Prefix
This is the default. To narrow the search, enter as many characters of the broker name as you know.
A Prefix search allows you to use the plus sign (+) as a wild card character, to search for proper names.
To narrow the search within common last names, enter a last name, the (+) sign, and the first character of the first name.
Keyword
Narrow your search based on specific keyword(s) within the broker name. This search is an exact word match.
Begin
Use this search option to begin the broker list with a specific letter of the alphabet.
|
|
Color Setup
|
Click Foreground to change the text colors of inactive brokers. Click Background to change the shading behind the text of inactive brokers.
Then, select the desired color from the Color Selector, and click Apply.
|
|
Apply
|
Click or .
|
|
Apply Default
|
|
Save as User Default Options
|
Check this box and click Apply, to store new Match On and/or Color Setup settings as your user default.
|
 Selecting and Opening a Broker
You must open a broker in view mode to initiate activities such as posting broker receipts and paying commissions to a . To open a broker, click the broker's name in the list.
Displaying Search Results
The broker search displays, by default, 20 brokers per page. Number of rows to display can be adjusted in Tools > System Administration > User Options. To move to another page of search results use the Next button in the upper left:

OR the page numbers in the upper right.

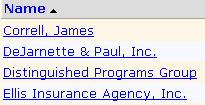
You can also sort the list in ascending or descending name order by clicking the arrow on the Name button. The direction of the arrow identifies the sort order of the list. In the example below the names are sorted in order.

What's Next?
Once the broker is selected, consult Viewing a Broker to learn about other actions available in the Broker Center and to view existing broker records.
![]() Searching for a Broker Account
Searching for a Broker Account
![]() Selecting and Opening a Broker
Selecting and Opening a Broker