
BenefitPoint 2017 R3 Release Notes
February 23, 2018
Vertafore is pleased to release BenefitPoint 2017 R3.1 into our Multi-Tenant Production Database.
 Ideas Submission
The following table summarizes the most important enhancements in this release:
|
Enhancement |
Description |
|---|---|
|
Multi-Factor Authentication |
We are including the option for firms to require Multi-Factor Authentication. |
|
Affordable Care Act Age-Banded Rates |
We are Include starting ages of 15 and 1 for age-banded rates. |
| Fully Insured Rate Tier Default |
We have changed the default tier for fully insured medical, dental, and vision rates from 3 tier to 4. |
Multi-Factor Authentication (MFA) is a security process for authenticating users across more than one method of information. Rather than simply having users log in with a password, MFA requires that users log in across two methods. By using more methods than just a username and password, you can support stronger security practices for users accessing your applications.
Authenticating a user is done to help ensure only authorized users are able to get into an application. A user name and password is the typical way to have users gain access, but in certain scenarios you may want to require more security steps than that.
A user name and password is something unique that only an authorized user would have. This is secret knowledge to them, and is considered a Knowledge Factor. There are other types of factors to consider, and for a login process to be defined as MFA you need to use at least two factors across three factor categories. The categories are:
- Knowledge Factors – Something you know
- Possession Factors – Something you have
- Inherence Factors – Something you are
As mentioned earlier, a user name and password counts as a knowledge factor. This is something only a user should know. To be MFA you would also have to require a secondary factor in the Possession or Inherence categories. Here are the examples of the secondary factors that are available with our MFA feature:
- Emailed Security Token
- Smartphone App (provided by Ping ID)
- Voice call with temporary token
The three examples above are all possession factors, as the temporary tokens and the smartphone app count toward ‘something you have’. Any one of the above combined with a username and password will qualify for our Multi-factor Authentication as Knowledge Factor (password) and Possession Factor (temporary token) are being used to authenticate.
Options
After your organization has turned on the feature, any users upon logging in will be sent to a screen to register for MFA. During the registration users can select one of the following for the second factor:
- Smart Phone App
- Voice Call
Smart Phone App
Our smart phone app is provided by PingID, and it can be downloaded from the iOS and Android stores. Search for “PingID” and look for the app called PingID. Look for the icon:

Voice Call
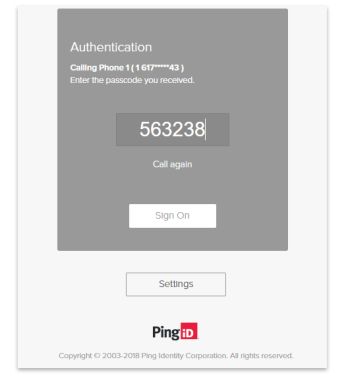
You can register a phone number to obtain your second factor. This will authenticate during login by calling your phone number with an automated voice call telling you a code to enter. Enter the code into the screen and submit to complete your log in session.
Use an email address to obtain your second factor. This will send your temporary code to an email address during log in. Enter the code into the screen to complete your log in session.
MFA - Trusted Device
After you authenticate successfully using MFA, your device (i.e. laptop, desktop computer, mobile phone) will be recognized for a 30 day period as a trusted device. Trusted devices are those that have been used to log in successfully using the MFA feature. You will be required to run the MFA login process every 30 days for trusted devices, as the MFA trust will expire at that time. Additionally anytime you log in from a new device for the first time you will be required to run through the MFA login process.
Step 1 - Turn on MFA for your organization
Multi-Factor Authentication is available for opt-in as a firm setting. The MFA feature is by default not turned on. To enable the firm setting, please call Vertafore Support.
Step 2 – Register a secondary factor with Ping
Once MFA is turned on for your organization, any of your users will be required to register and log in using one of the secondary factors (Smartphone App, Voice Call, Email).
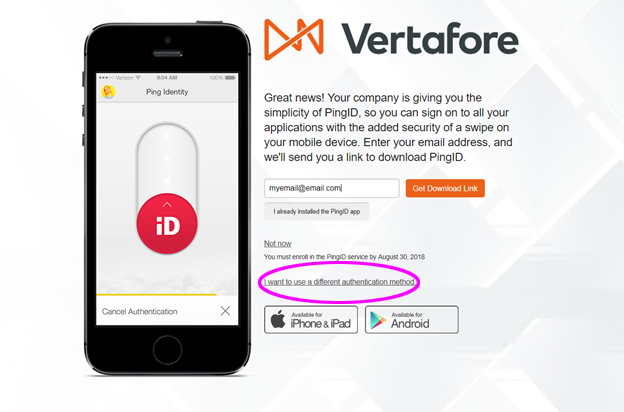
The registration screen will recommend the PingID app as your secondary method; however, click on the link (I want to use a different authentication method) to register a phone number or email. Once a user is registered then they will be sent through the MFA process to authenticate.
Step 3 – User Flow
- A user goes to BenefitPoint to log in as normal.
- User enters their name and password.
- During login attempt, the screen runs the MFA feature and asks the user to select from the factors they had registered:
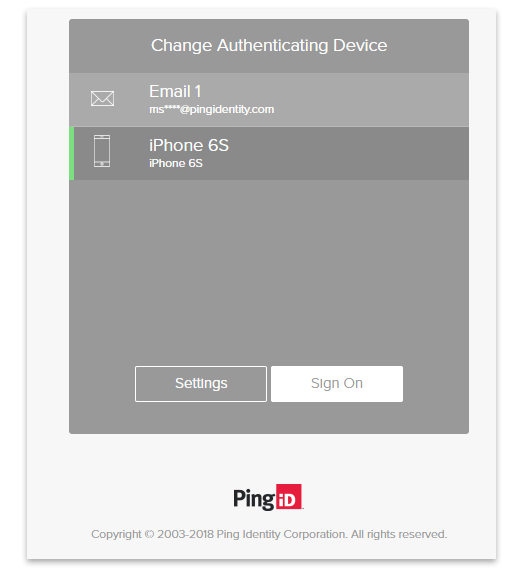
- A.) If a smartphone is selected, the PingID application will send you a push notification for you to unlock your phone and open the app. The screen will show a “switch” that you need to swipe up to confirm access:
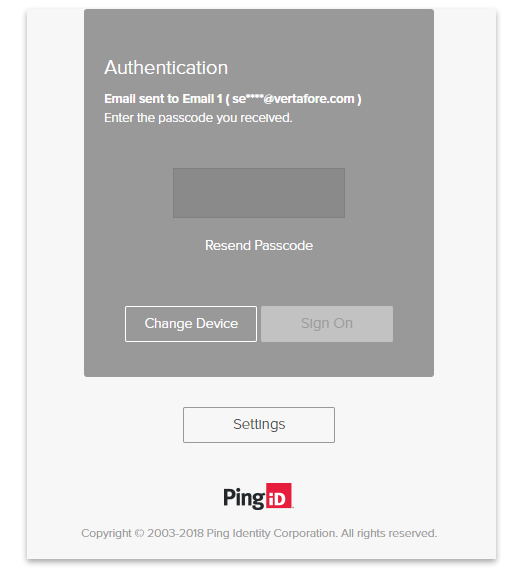
B.) If you select the Voice call or Email method, then you will receive a call or email giving you a temporary code to enter. Enter the code in the following screen: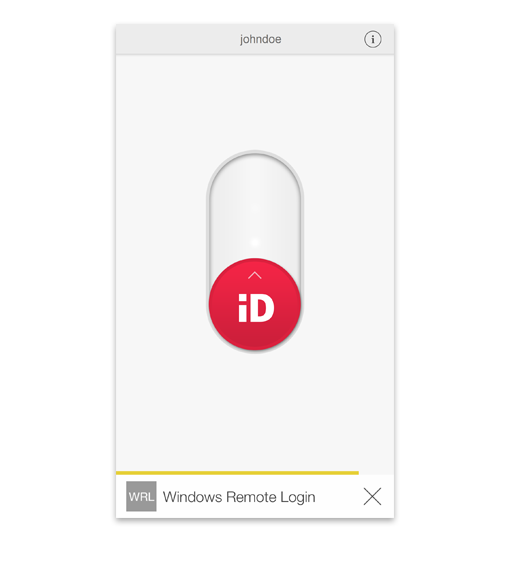
- When you complete the secondary factor you see a success screen:
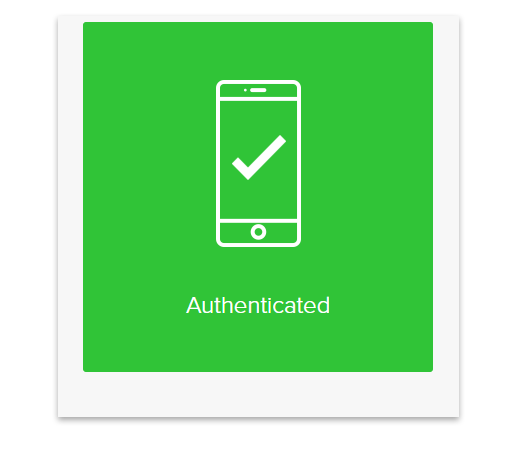
- Congratulations you have authenticated through MFA. You will now be redirected to your product.
Registration Process
As mentioned earlier, when your agency has opted-in for MFA, users will be required to register with Ping ID. This registration will have to be done for each Vertafore solution you use. Here is the registration process
Step by Step
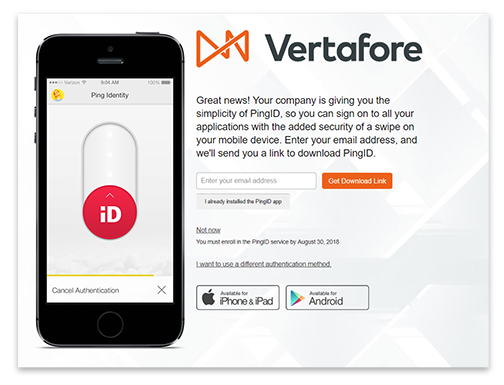
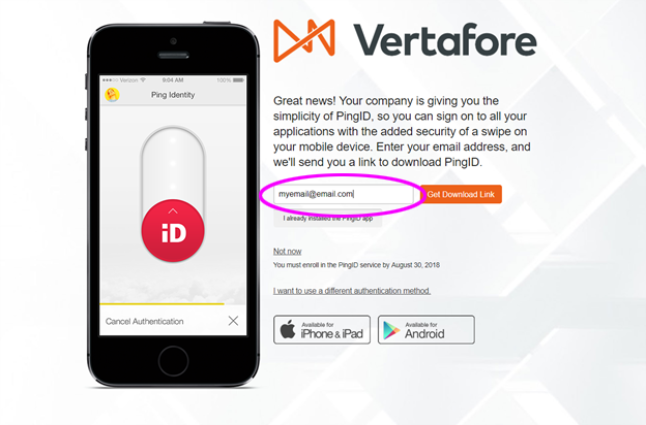
- First time users are sent to the registration page:
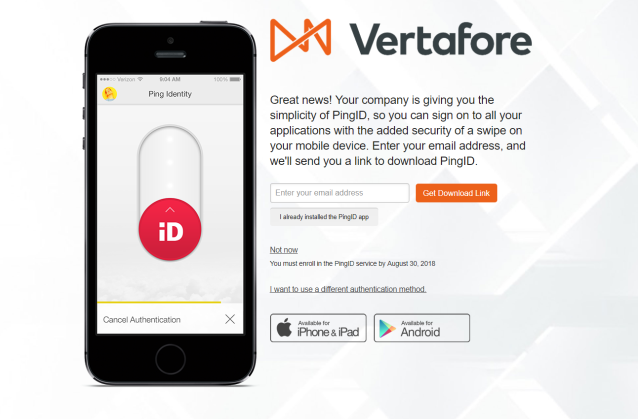
- If you want to use the Ping ID app, enter your email address to get a download link for your application. Use the same email address that you use to log in to your Vertafore application.
- You will be taken to the “Finish Pairing Ping ID” page:

- On this page you can open the Ping ID mobile app that you previously downloaded (iOS or Android store) and use the Manual Auth option to QR scan the code on the page.
This will finish pairing your Ping ID app with your registration.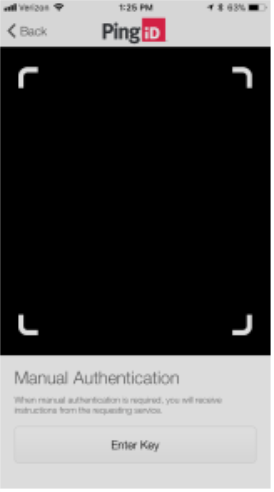
- Additionally, instead of using the app code reader you can go to your email inbox on your mobile phone to review the registration email. Tap on the green button to finish pairing your device.

Registering Your Email or Phone Number
If instead of using the Ping ID app you would prefer to get a temporary code via email address or phone call, you can also register one of those as your second factor.
Step by Step
- When registering, click on the “I want to use a different authentication method” link.
- This will allow you to select voice call or email:
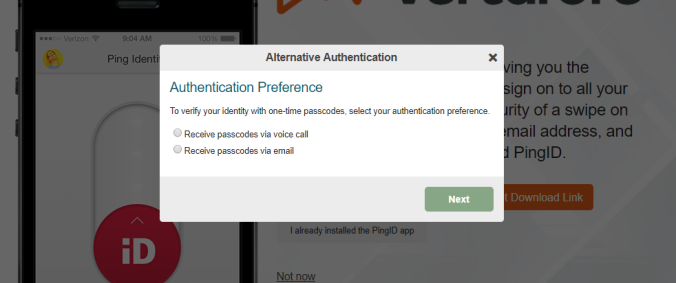
- Make your selection, and then verify using the code that is provided to you by voice call or email.
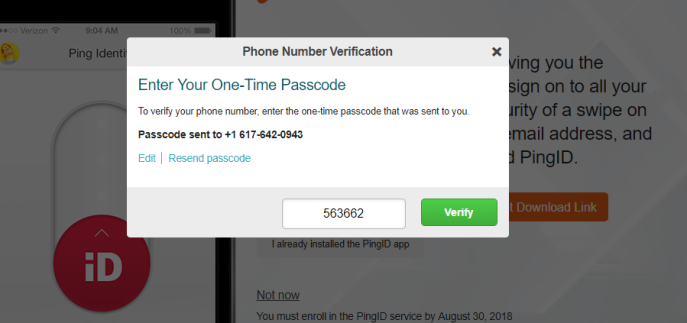
- Now any time you need to authenticate using these methods simply enter the code that is given to you on your voice call or at your email address.
Changing Your Settings
- At any time you attempt to authenticate using MFA, you will see a settings button at the bottom of each authentication screen.
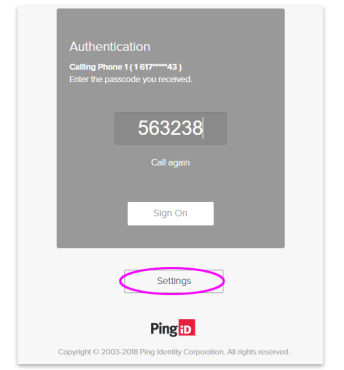
- Click this button to enter the settings area of your Ping account. Remember each Vertafore solution that you use will have a separate registered account, so make sure you click the settings page that shows for each Vertafore Solution that you attempt to log in to.
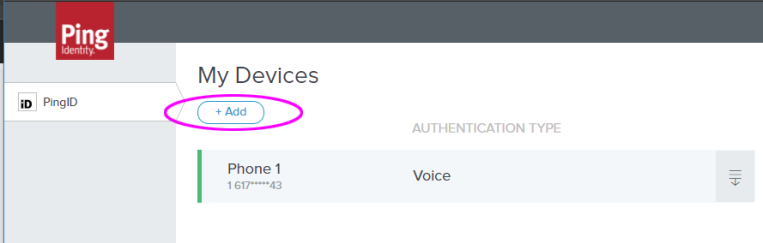
- On the settings area you can add another factor to your options. This way you can ensure you have more than just one secondary factor available to use.
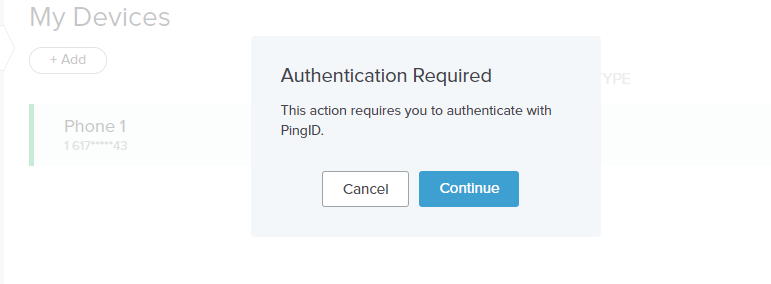
- To delete an existing registered method, click on the menu icon on the right for the given method.
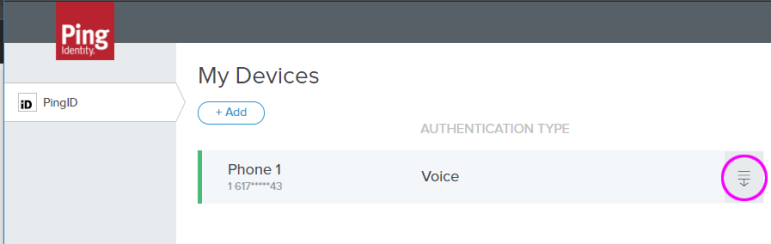
- You will have to authenticate the existing registered method to approve editing and deleting.
|
To enable the firm setting, please call Vertafore Support. |
We have added 1 and 15 to the age start drop down for age-banded rates to allow capture based on recent ACA changes.
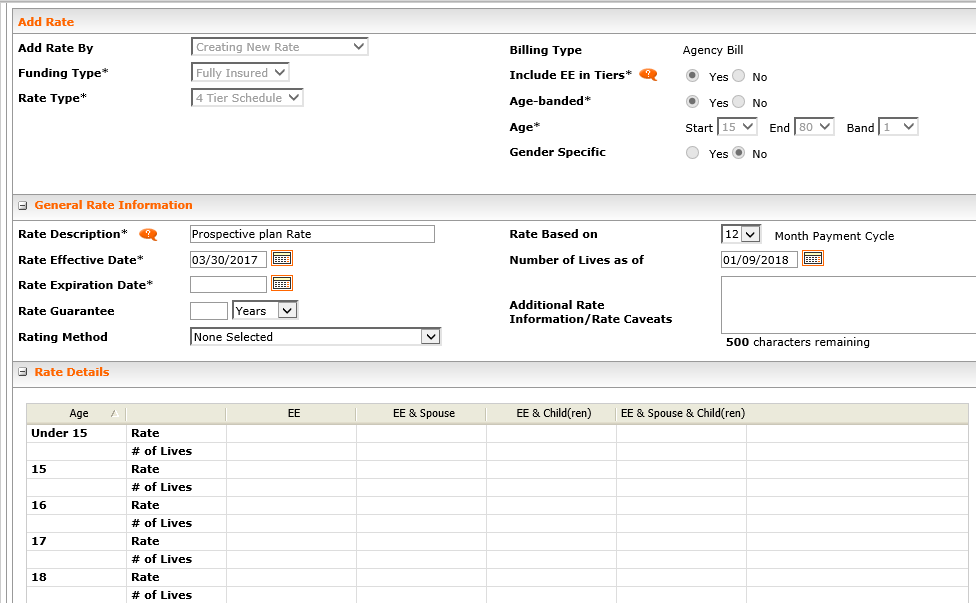
Figure: Age-banded rate start age 15
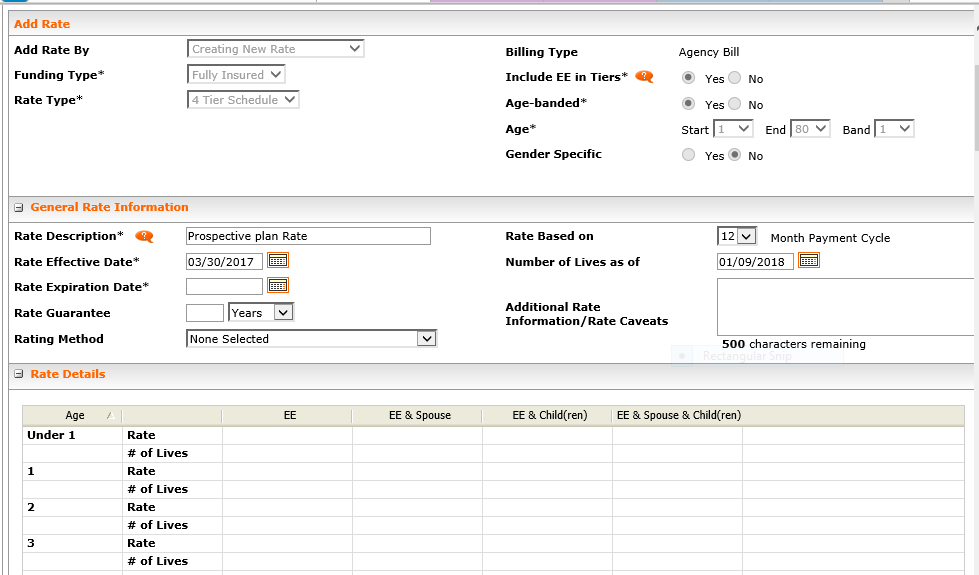
Figure: Age-banded rate start age 1
We have changed the default selection when adding a fully insured medical, dental, or vision rate from 3 Tier to 4 Tier.
As we continually strive to reduce our backlog of production defects, here is a list of defects that have been fixed since the last major release (BenefitPoint 17R3).
|
Defect Number |
Description |
|---|---|
|
193623 |
Broker Admins were receiving an Access Denied error when accessing audit log for user templates. We fixed the access error. |
|
193609 |
Employer Access - Unable to download attachments. Employers were unable to download an attachment on a plan when the broker had set it to Show Employer. That has been fixed. |
|
191677 |
BBI: Number of lives was not calculating correctly on the Plan Listing report for member-based and Medicare Eligible rate types. |
BenefitPoint 2017 R3 Notes
Vertafore is pleased to release BenefitPoint 2017 R3 into Multi-Tenant Production. With each release, we are incrementally improving and updating BenefitPoint to provide you with the best possible experience.
Throughout the release notes, the following symbols identify features that were developed based on your feedback and enhancement requests:
 Your Feedback
Ideas Submission
Enhancement Overviews | Requirements
The following table summarizes the most important enhancements in this release:
|
Enhancement |
Description |
|---|---|
|
Plan Listing Page |
The rewrite and UI/UX updates of our list pages continue with the Plan Listing page. The Plan List page now includes the following fields:
Also included are additional options for current, pending, and archived (per year) filtering. A firm setting now hides organizational information filters for firms that don’t use them with eligibility rules. |
|
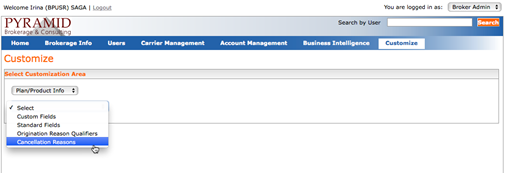
Custom Cancellation Reasons |
This new firm setting enables custom cancellation reasons. Available actions with this firm setting selected are editing existing reason names and adding new names. New cancellation reasons are available to map to existing integrations where mapping is supported (Sagitta and TAM) BCE implications (see notes) |
The following table summarizes minor enhancements in the release:
|
Hardware/Software |
Minimum Requirements/Recommendations |
|---|---|
|
Firm Settings |
|
|
Agency Bill – Agency % on Additional Installments |
For Sagitta Integration users, BenefitPoint’s Agency Bill Feature offers a new firm setting, Agency Bill: Additional Line Item Agency Percent |
|
Exclude from Purge Indicator |
For firms who use our Purge feature, you can now exclude accounts from purge if required for legal reasons. |
|
BenefitPoint Business Intelligence (BBI) enhancements |
|
|
Additional Products |
Several additional products are now available. |
|
Production Defects Fixed |
This release includes production defects fixed since the release of BenefitPoint 2017 R2. |
For information about recommended and supported system configurations for all Vertafore products, see the Supported Configurations Matrix on My Vertafore. You must be registered with My Vertafore and signed in to access this document.
For optimal performance of the application, we recommend the following as a minimal configuration:
|
Hardware/Software |
Minimum Requirements/Recommendations |
|---|---|
|
Processor/CPU Speed |
Recommended: i5, i7 or Multi-core: 2.6 Ghz or above Minimum: Core 2 Duo: 2.3 Ghz or above Not Supported: Single Core, Reduced feature CPU's such as Celeron or AMD Sempron |
|
Memory |
Recommended: 4GB Minimum: 2GB |
|
Hard Drive Space |
Minimum: 150Mb of local disk space per user |
|
Video |
Minimum: Resolution 1024x768 with 16 bit high color or better |
|
Operating System |
Recommended: Windows 7 (64 bit) Minimum: Windows 7 (32 bit) |
|
Microsoft Office (Word, Excel) |
Recommended: Office 2010 Professional *Excel 2007 Professional or Higher |
|
Microsoft Internet Explorer |
Optimized for Internet Explorer 11. |
Feedback 
https://support.vertafore.com/
We value your feedback to ensure we are working on what is most important to you. Please use My Vertafore to provide feedback. We appreciate your input, whether positive or negative, on any visible change.
The updated Plans page shows current, pending and one, two, three or more years of archived/cancelled plans and products on a single list. Additional icons identify plans or products that have been renewed or replaced. If your firm uses RTM, an indicator now points out plans and products without associated posting records.
Before 17R3, plans and products were displayed in red text for 30 days after their renewal date. Now, only those plans that have not been renewed or replaced for 30 days display in red. Once you renew or replace it, the red will go away.
We have also included a firm setting to hide the organizational information filters when your firm does not specify location, division, class, or employee types in plan eligibility rules. When selected, your users will not see those filters.
Your selections on the Plans listing page persist for all accounts you access.
Click the image to change its size.
The new Plan List page

The List View menu below shows the new archived options for plan selection. 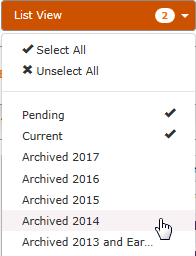
|


The Custom Cancellation Reasons firm setting now lets you customize cancellation reasons for your firm’s plans and products.
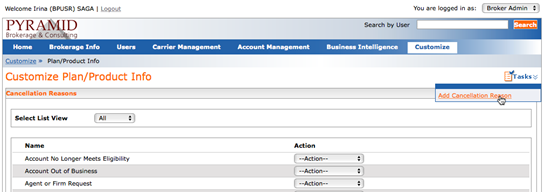
- With the firm setting enabled, broker administrators can navigate to the current Plan/Product Info Cancellation Reasons screen:
- Broker administrators will see a new Tasks menu with Add Cancellation Reason as a selection:
- Click Add Cancellation Reason to display a dialog box where you can enter your new cancellation reason.
Add Custom Cancellation Reason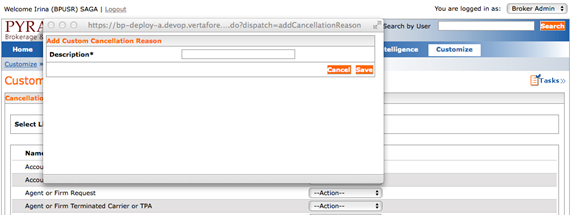
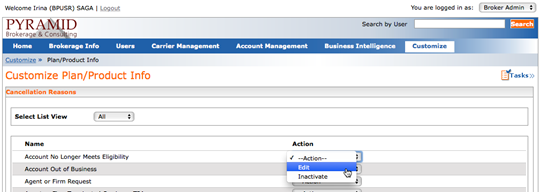
- You can also now edit any existing cancellation reasons.
- If your firm uses BenefitPoint integrated with Sagitta or TAM, you can map those new cancellation reasons on the current mapping pages:
Policy Status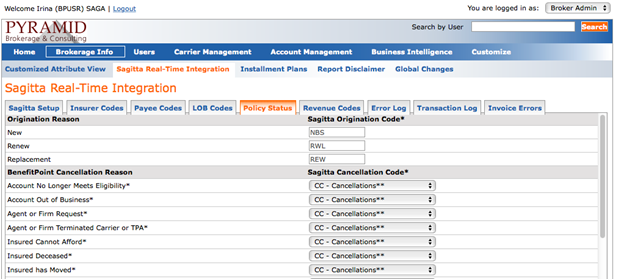
BenefitPoint - Broker Content Extract (BCE) Considerations
If your firm uses cancellation IDs from the BCE for other external systems or processes, be aware that the following is true when you also use the new custom cancellation reasons feature:
- The “common” reasons will be copied to a new table with different IDs. The old IDs will also be copied for reference purposes.
- Each firm has its own copy of the “common” reasons, with unique IDs from other firms.
- BCE will show the reason’s description and IDs in the same fields but with the new IDs.
- BenefitPoint Web Services have changed to include an additional field for custom reasons and will expect new IDs. A new method has been added to retrieve a map of description to new ID. The call will fail if the old reason filed is used.
- Mapping data will be provided in BCE that maps new ID to description.
|
To enable the firm setting, please call Vertafore Support. |
See also the Create Custom Cancellation Reasons instructions on the Custom Fields page.
For Sagitta Integration users, BenefitPoint’s Agency Bill Feature offers a new firm setting,
Agency Bill: Additional Line Item Agency Percent
- To enable the firm setting, please call Vertafore Support.
- This feature requires Sagitta version…
We have added an indicator on the Account Information edit page when :
Figure 9: Account Information > Status = Inactive
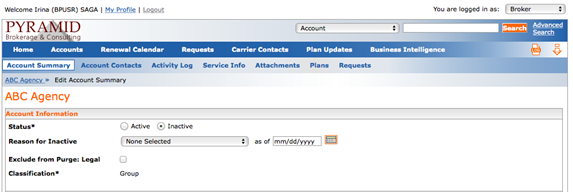
The following new Account firm settings:
- Accounts: Require an Inactivation Reason on an Account. When enabled, a reason must be selected when inactivating an Account. The Web Service method for updating an account includes this logic.
- Accounts: When inactivating an account, check that the inactivation date is greater than any cancellation or expiration dates of plans and products.
To enable the firm settings, please call Vertafore Support.
The following additional products are now available:
- Benefits Shared Services
- Benefits Shared Services Subsidy
- Alternative Delivery
- Case Management
- Concierge Services
- Decision Support
- Dependent Care Assistance
- Disease Management
- Employee Discounts
- Employer Discounts/Purchasing Power Program
- Ergonomic Consulting
- Executive Physicals
- Flu Shot
- Genetic Testing
- Lactation Support
- Maternity/Infertility
- Nutrition/Lifestyle Health
- Population Health
- Second Medical Opinion
- Sleep Study
- Student Loan
- Subrogation Carve-Out
- Temporary Loans – Medical
- Translation Services
The following names are now correct:
- Financial Products – Nonqualified Deferred Compensation
- Financial Products – Nonqualified Deferred Compensation BOLI
- Financial Products – Nonqualified Deferred Compensation COLI
- Financial Products – Nonqualified Deferred Compensation Mutual Fund
- Financial Products – Nonqualified Deferred Compensation Service Fee
To enable any of these additional products, call Vertafore Support.
The following updates have been made to BBI reports:
- Account Listing
- Book of Business - Detail
As we continually strive to reduce our back-log of production defects, here is a list of defects that have been fixed since the last major release (BenefitPoint 17R1).
|
Defect Number |
Description |
|---|---|
|
177424 |
Delete Record System Error - The fix is to delete task before deleting record. |
|
178624 |
BBI: Monthly premium on Plan listing report with multiple rates. Corrected report. |
|
179948 |
BBI: Plan listing report not taking rate effective date into account causing number of lives to show incorrectly. Corrected Report. |
|
181257 |
BBI: Plan Listing report - Monthly Premium on Basic Employee + Dependent Life rate not calculating correctly. Corrected Report. |
|
181563 and 182078 |
Agency Bill: incorrect amounts in multi-line invoice. Fixed and enhanced (see enhancement) |
|
181671 |
BBI: Login Audit Report - When editing Account Team Roles names, on roles supplied by BenefitPoint, users show up duplicated in the Login Audit Report. Fixed. |
|
182360 |
Issues with BenefitPoint Outlook Plugin with Outlook 365 - Windows 7 and Windows 10. This turned out to be an Outlook 2016 issue fixed with a Microsoft update: version 1705 build 8201.2102. |
|
183557 |
Activities showing up incorrectly in the home page list. Fixed. |
|
184401 |
Broker Admin > Users without Edit Firm Security permission who save the Brokerage page will wipe out IP Restrictions. Fixed. |
|
184465 |
Errors running Plan Listing Report – we fixed this by increasing the characters returned for Additional Product notes. |
|
185041 |
Attachments: Performance issues when using Update / Archive buttons. Fixed the issue that was causing poor performance. |
|
185075 |
Book of Business-Details report is now showing Producer names with and without a space after the comma. Fixed. |
|
186354 |
Renewal Calendar creating duplicate products. Fixed the condition that was causing duplicate products to be created while renewing via the Renewal Calendar. |
|
186458 |
Request feature does not properly update Policy/Group number as entered in the RFP accept process. Fixed so that Policy/Group number added via the Request process is correctly added to the new plan. |
|
186897 |
BBI > Subscription Manager > Error message when using 'Add New' or 'Look Up Existing' in all GA roles. This was fixed. |
|
187015 |
BBI > RTM Book of Business - Details > Falls into new calculation fails with date after 2050. Fixed. |
|
183163 |
Activity Log Record - Add Note - Disable the save button in the popup once the note is submitted. This will help prevent duplicate notes from being created. |
|
183284 |
When copying a user, the Permissions sometimes do not copy over. Fixed the issue. |
|
188748 |
When getting a client from AMS360, the SIC code was not mapped to the correct field. Fixed the mapping. |
Questions?
If you encounter problems or have questions concerning this release, Vertafore offers the following helpful resources:
- Search the Knowledge Base on My Vertafore.
- Open a case at My Vertafore (myvertafore.vertafore.com).