In this topic, we are going to explain how to add a team using the Division/Team command located on the Tables Menu.. You can easily adapt our steps to change an existing team. Before you begin, you might find it helpful to review the definitions of a division and a team in the Division Team topic.
You should also consider two important points as you prepare to add or change teams. We recommend that:
- The Custom INS Team that was included in the AIM installation should not be deleted. Deleting the team may negatively impact the ability of AIM product support to assist you when needed.
- You do not modify the team ID when changing an existing division. Modification of the ID can create problems with referential database integrity.
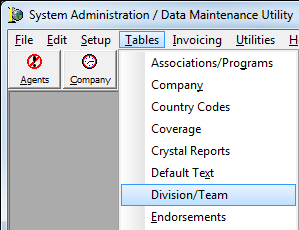
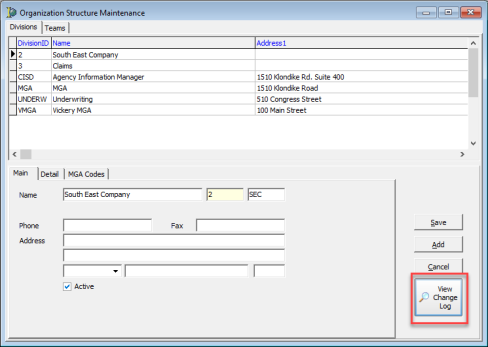
- On the Tables menu, click Division/Team to open the Organization Structure Maintenance dialog box.
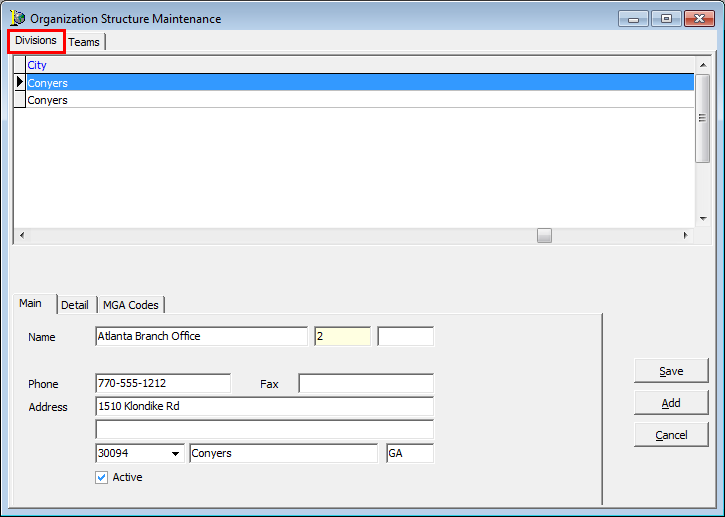
- On the Divisions tab, select the appropriate division, or click the Teams tab.
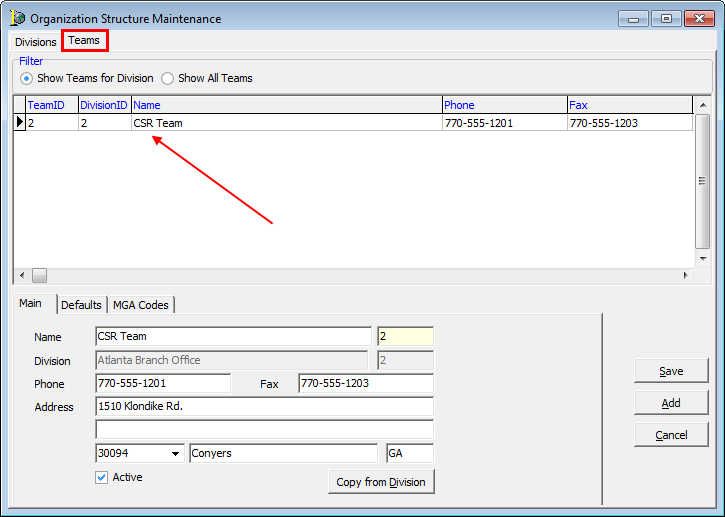
- On the upper portion of the Teams tab, you will see information in a grid about the teams that have already been added to the division that you selected on the Divisions tab.
- In the
Filter pane, you can filter the list of teams shown in the grid by selecting
one of the following filter options:
- Show Teams for Division – show teams based on the selected division.
- Show All Teams – show all departments and teams.
- Use the buttons defined below to add new teams, save changes, etc.
| Button | Function |
|---|---|
|
|
Save changes to current record |
|
|
Add a new record |
|
|
Cancel changes without saving |
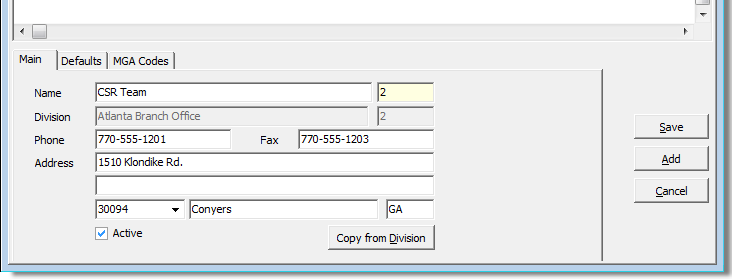
- On the
Main tab, enter information about the team. you can click the Copy from
Division button to copy the address and telephone information from the
selected division.
- Name – identifiable name of the team
- Unlabeled
box next to Name – unique team ID. The ID:
- Is alphanumeric.
- May be up to 8 characters.
- Must be entered in UPPERCASE.
- Division – name of the division you selected (filled automatically)
- Phone – main telephone number
- Fax – main fax number
- Address – mailing address. Two boxes are provided.
- Zip (unlabeled box) – zip code
- City and State (unlabeled boxes) – populated automatically
- Active – select the option to make the team active in your AIM system
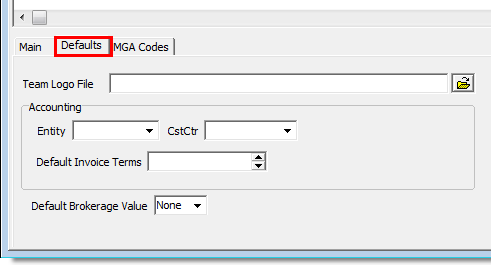
- On the
Defaults tab, enter the following information, if applicable:
- Team Logo File – Logo file for the
team, used in Document Designer. You can click
 to browse
to the logo file.
to browse
to the logo file. - Entity – The default AIM Accounting entity for the team.
- CstCtr – The default cost center for the team.
- Default Invoice Terms – The default invoice terms (in days) for the team.
- Default Brokerage Terms – the default selection for the Brokerage list in the Submission Entry – Quote Detail – Pg.2 dialog box
- Team Logo File – Logo file for the
team, used in Document Designer. You can click
- With the release of AIM 20.2, a Change Log feature has been added to the Org/Division/Team in the DMU > Tables menu to show changes made to those tables.
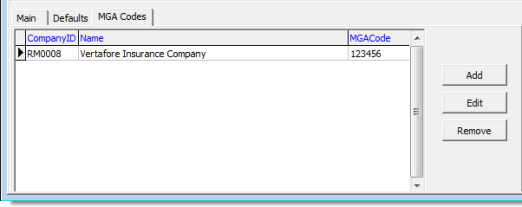
The process for adding MGA codes is explained in Adding a Division.