Audio Record
You may record phone conversations and audible notes using the Audio Record command and a properly connected microphone. You can add your recordings to any file, and generally speaking, you can treat them just as any other document, etc. You can move the recordings from one file to another, attach them to outgoing e‑mail messages, etc.
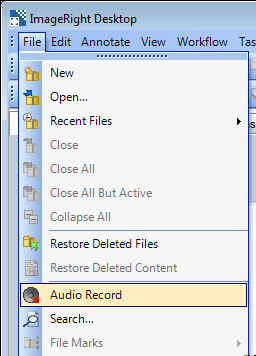
- On the File menu, click Audio Record to open ImageRight Voice Recorder. Typically, you will open the file to which you want to add the recording first; however, you may begin the recording process without opening a file.
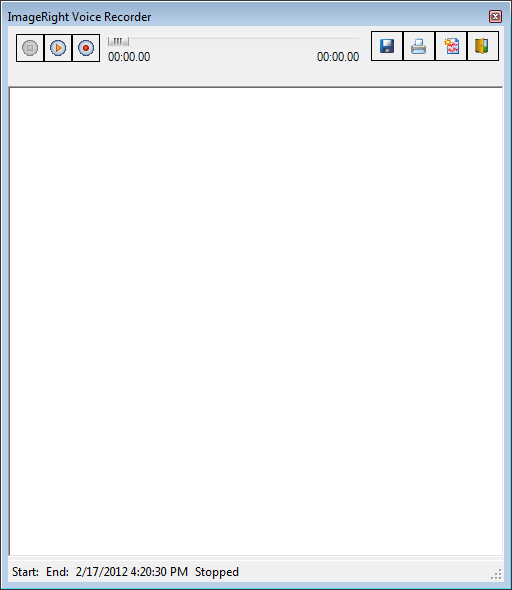
- Using
these Voice Recorder commands (by clicking the buttons) you may create,
play, and save recordings.
 –
Stop – stops the
recording or playback process
 –
Record – starts the
recording process
 –
Pause – pauses the
recording process
 –
Play – starts the
playback of a recording
 –
Pause – pauses the
playback of a recording
 –
Save – saves the
recording
 –
Print – starts the
process of printing the entered description
 –
New – discards the
current unsaved recording to prepare for a new recording
 –
Close – closes the
Voice Recorder.
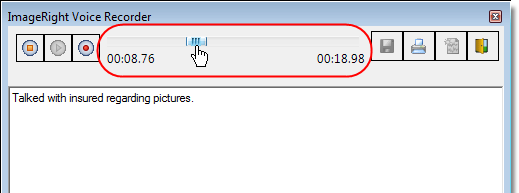
- You can
use the time counters to help you locate a specific area in the recording
during playback.
- The counter on the left registers the length (time) of the recording process while you are recording. In addition, the counter displays the elapsed time during a recording playback.
- The counter on the right registers the total time of a recording.
- You can drag the slider bar to search for a portion of the recording.
- After
connecting your microphone, click
 to start the recording.
 - To complete
the recording, click
 .
. - Before you save the recording, enter a description in the pane below the buttons that will be helpful in identifying the contents of the recording.
- Click
 to save the recording and open the Import dialog box used to make the recording part of the file. Enter the appropriate
information in the dialog box to define where the recording should be
filed.
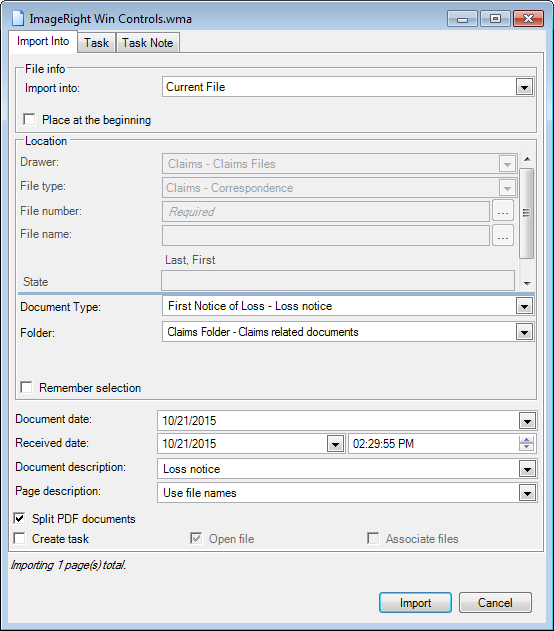
- In the Import dialog box, select the filing options you want to use to store the recording. You can even create a task based on the recording on the Task tab.
- Click Import to save your changes and complete the process. Click Cancel to return without saving your changes.
|
For more information about the options in the Import dialog box, see Import Dialog Box Explained. |
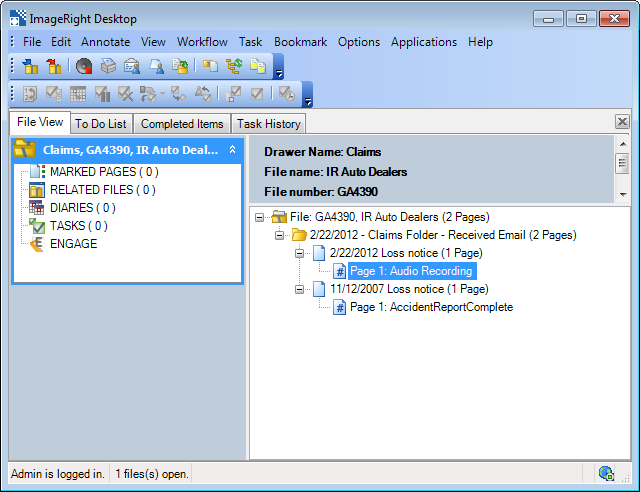
Now we will look at the appearance of an audio recording in Desktop and the playback process.
In our example, we changed the page description to identify the recording as Audio Recording. Then we selected the page.
The description saved with the recording is displayed in Image Viewer, and the playback controls are at the top of the window.
If you have speakers connected to your computer, you are ready to use these controls:
-
 –
Stop – stops the
playback process
 -
 –
Play – starts the
playback of a recording
 -
 –
Pause – pauses the
playback of a recording
You can use the time counters and slider bar to help you locate a specific area in the recording during playback.
- The counter on the left registers the elapsed time during a recording playback.
- The counter on the right registers the total time of a recording.
- You can drag the slider bar to search for a portion of the recording.
