You can configure the view that will be presented in the Import dialog box (see Import Dialog Box Explained). The options you select define the:
- Appearance of the section where you select the folder and document types to be assigned to imported items.
- Manner
in which items that you add to ImageRight using the following functionality
will be treated:
- Drag-and-drop
- Attach Files command
- ImageRight Printer
- Microsoft Outlook Add-In
- Windows Explorer Add-In
Folder/Document Selector Options
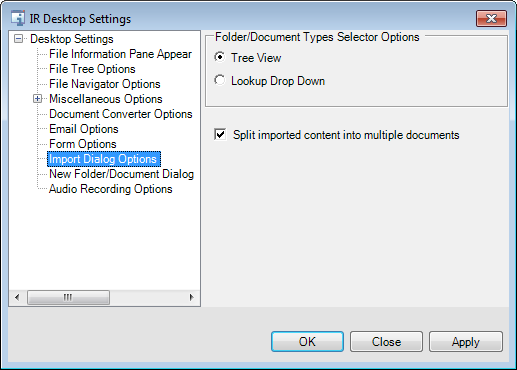
In the Folder/document types selector options pane, you can select from two options.
- Tree view displays a hierarchical tree view that can be expanded and collapsed as needed.
- Lookup drop-down displays list boxes in which selections can be made.
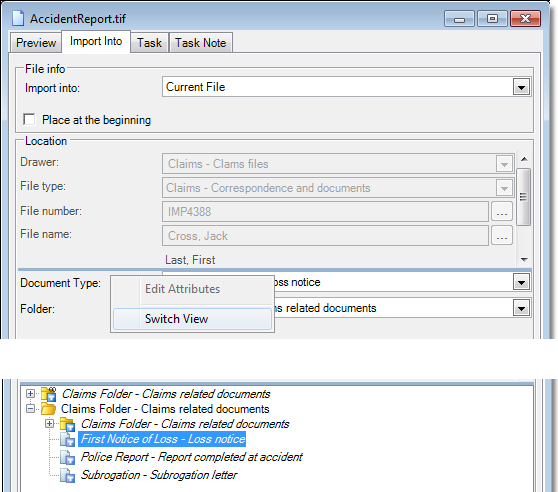
The drop-down list box option is shown in the top portion of the screen capture below. The menu that you can use to switch views is also shown.
The tree view is shown in the lower portion of the screen capture.
|
You can also change the view while the Import dialog box is open. To do so right-click the folder and document area and click Switch view. |
Split Imported Content
One of the most common ways to add e-mail messages, photos, files in their native format, etc., to ImageRight is to use a drag-and-drop operation, then choose the filing options. You can also add content using ImageRight Printer, the Adobe Plug-In, or the Microsoft Add-In functionality.
When adding multiple items (e-mail messages for example) with one action, you may need to separate each item into its own document instance, as opposed to importing the multiple items as one document. You can use the Split imported content into multiple documents option to dictate how the content added using the Import dialog box will be treated.

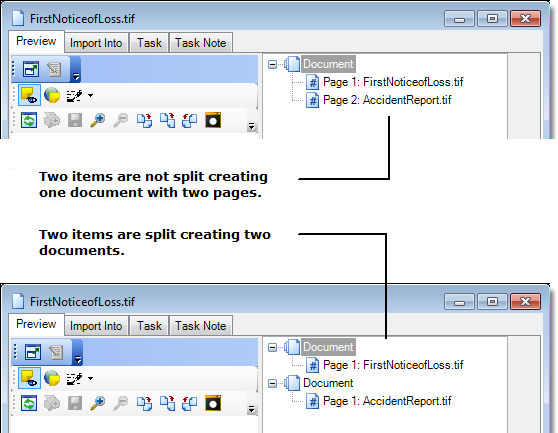
In the screen capture below, you can see the affect on the number of documents when the option is turned on and when it is turned off. In the example, we dragged two files from Windows Explorer to Desktop.
|
If you select the Split imported content into multiple documents option, the document date and received date cannot be changed when you drag items into the Import dialog box, as explained in Import Dialog Box Explained. |
With the option turned on, multiple items that you add in one action will be treated as defined next.
|
If you |
On the Preview tab, you will see |
|---|---|
|
Drag e-mail messages into a new file or an existing file |
Each e-mail message will be represented as a separate document. Attachments will be represented as pages. |
|
Drag files from a local directory into a new file or an existing file |
Each file will be represented as a separate document. |
|
Attach files to a new file or an existing file |
Each file will be represented as a separate document. |
|
Use Microsoft Add-In to add e-mail messages to a new file or an existing file |
Each e-mail message will be represented as a separate document. Attachments will be represented as pages. |
|
Use Windows Explorer Add-In to add multiple files to a new file or an existing file |
Each file will be represented as a separate document. Multi-page documents converted to images will be represented as multi-page TIFFs. |
|
Use ImageRight Printer to add content to a new file or an existing file |
Each file will be represented as a separate document. |
|
Use any of the methods to add content to a new temporary file |
Each item will be represented as a separate document (and pages as noted earlier). Each imported item will be put in a separate temporary file. |
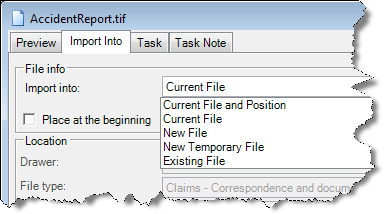
The treatment of the multiple items being attached will be determined by the Import into option you select on the Import Into tab of the Import dialog box.
|
If you select |
Multiple items will be added |
|---|---|
|
Current File and Position |
As pages to the selected document. |
|
Current File New File Existing File |
As separate documents. |
|
New Temporary File |
In separate new temporary files (one file for each item). Only the last file created will be opened. |