You can import e-mail messages in Microsoft Outlook directly into ImageRight Desktop by following our steps. You can import messages that have been sent or received as well as attachments based on settings that you configure.
Before we explain how to import an e-mail message, we are going to explain how to configure the settings that will dictate in what format the message and attachments will be imported when you use the Quick Import option. These same settings will also be applied each time you start Microsoft Outlook. You can, however, change the settings if needed by using the Import option, as explained later.
|
In our examples, we are using Microsoft Outlook 2010. If you are using Outlook 2007 or Outlook 2003, the appearance will be different; however, you should be able to easily adapt our steps. If you are using Outlook 2003 and do not see the ImageRight toolbar, right-click the toolbar/menu area and click ImageRight on the menu. |
- Start Microsoft Outlook.
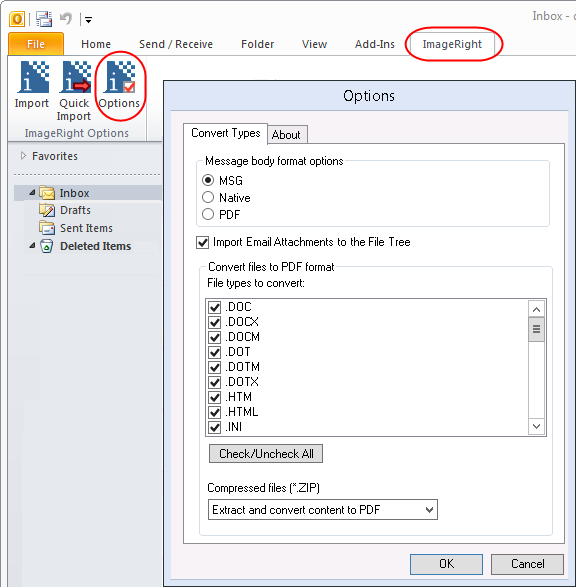
- Click the ImageRight tab to display the ImageRight ribbon.
- Click Options on the ribbon.
- In the
Options dialog box, you can configure the settings that determine the
manner in which you want the message and any attachments to be imported.
- The options you select will be applied each time you use the Quick Import option.
- The options you select will remain unchanged until you change them again; therefore, you do not have to select these options each time you import a message using Quick Import.
- The options you select will be applied to the Import option each time you start Outlook.
- On the
Convert Types tab, select the option in the Message body format options
list to be applied to the body of the e-mail message text.
- EML – the message body will be imported in EML format.
- Native – the body of the e-mail message will be kept in its native format, HTML for example, as opposed to being converted to an image, PDF, or other format.
- PDF – the message body will be converted to PDF format.
- Select the Import e-mail attachments option if attachments should be imported into Desktop. If this option is not selected, only the text in the message will be imported.
- In the
File types to image list, select the extensions for those files that should
be converted to an image. If an extension is not selected, the file will
be imported in its native format.
- .doc – Microsoft Word document
- .docx – Microsoft Word open XML format document
- .docm – Microsoft Word open XML format document with macros enabled
- .htm – Hypertext Markup Language
- .html – Hypertext Markup Language
- .ini – Initialization/configuration file
- .log – Log file
- .mdi – Microsoft Office document imaging file
- .ppt – Microsoft PowerPoint presentation
- .pptx – Microsoft PowerPoint open XML format presentation
- .pptm – Microsoft PowerPoint open XML format presentation with macros enabled
- .ppsx – Microsoft PowerPoint open XML format slide show presentation
- .ppsm – Microsoft PowerPoint open XML format slide show presentation with macros enabled
- .rtf – Rich text format
- .tif – Tagged Image File Format
- .tiff – Tagged Image File Format
- .txt – Text file
- .vsd – Microsoft Visio drawing
- .xls – Microsoft Excel workbook
- .xlsx – Microsoft Excel open XML format workbook
- .xlsm – Microsoft Excel open XML format workbook with macros enabled
- .xlsb – Microsoft Excel binary workbook
- .xml – Extensible Markup Language
- In the
Compressed Files (*.zip) list, select the manner in which you would like
compressed files to be processed (extracted).
- Do not extract content – The files will not be extracted. The file will be imported with the .zip extension.
- Extract and convert content to PDF – The files will be extracted and converted based on the selections you make in the Convert files to image format list.
- Extract but leave content in native format – The files will be extracted and imported in their native format.
|
For more information about the Import dialog box discussed later, see Import Dialog Box Explained. |
With the settings configured, you have two options for completing the import. You can use either Import or Quick Import to:
- Import messages from the main Outlook window.
- Import a message while you are reading it.
Clicking the About tab displays information about the version of Microsoft Add-in you are using.
Import
In our first example, we are going to import a message from the main Outlook window using the Import option. Later, we will explain how to import a message that you are reading using the Quick Import option. Just remember you can use either import option at any time.
- Start Microsoft Outlook and locate and select the message that you want to import. Just remember the message must have been sent or received. You may select multiple messages in a list using Shift+click or Ctrl+click.
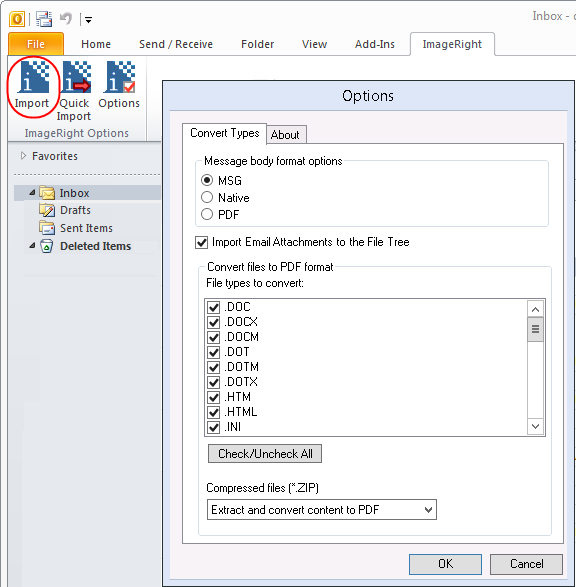
- Click Import on the ImageRight ribbon to open the Options dialog box.
- Select the desired options as explained earlier. These selections will be saved and used each time you click Import unless you change them again or close and restart Outlook.
- Click Import.
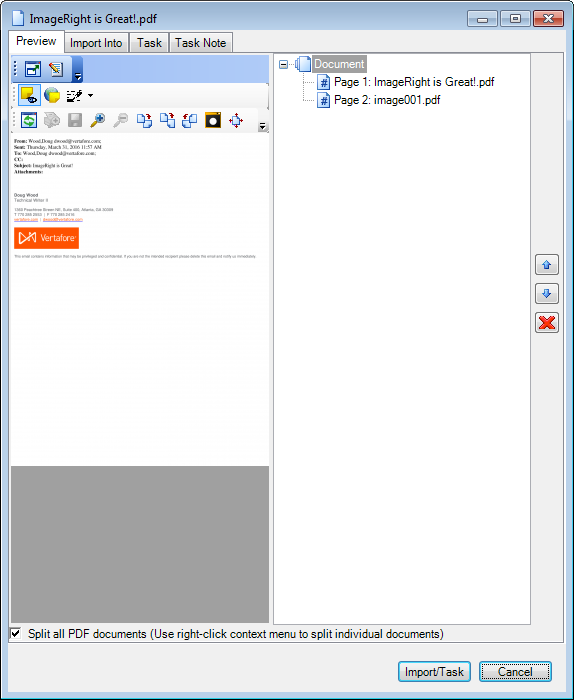
- When the Import dialog box opens, configure the import options as explained in Import Dialog Box Explained.
Quick Import
In this example, we are going to import a message while it is being read using the Quick Import option.
- Open the message that you want to import.
- Click Quick Import on the ImageRight ribbon.
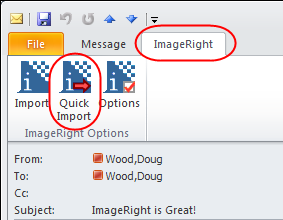
- When the Import dialog box opens, configure the import options as explained in Import Dialog Box Explained.

Microsoft Office Backstage View
Depending on the version of Outlook that your are using, you may be able to use the import options in the Microsoft Office Backstage view.
- Open an e-mail message or view the main window, and click the File tab to see the Backstage view, and then click ImageRight.
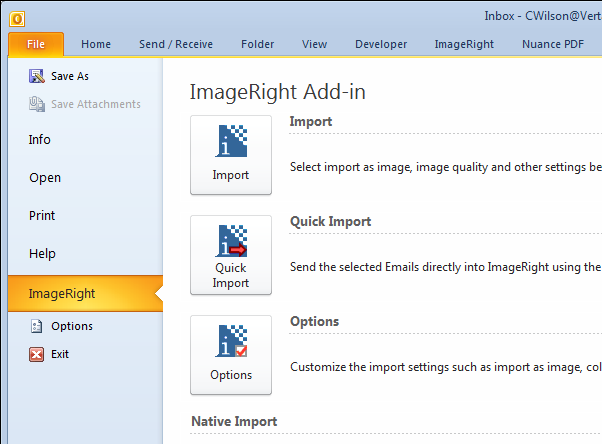
You can manage the import of your message by adapting the steps explained earlier. To quickly return to your message or the main window, click the Home tab or press ESC on your keyboard.