Properties on the Edit Menu
Using the Properties command, you can update certain aspects of file information and apply security settings to a file, folder, or document. In addition you can view details related to the file like the date the file was last opened.
- To view or change the properties
of a file, the first step is always the same. Select the appropriate level
and do one of the following to open the Properties dialog box:
- On the Edit menu, click Properties.
- Right-click the selected level, and then click Properties.
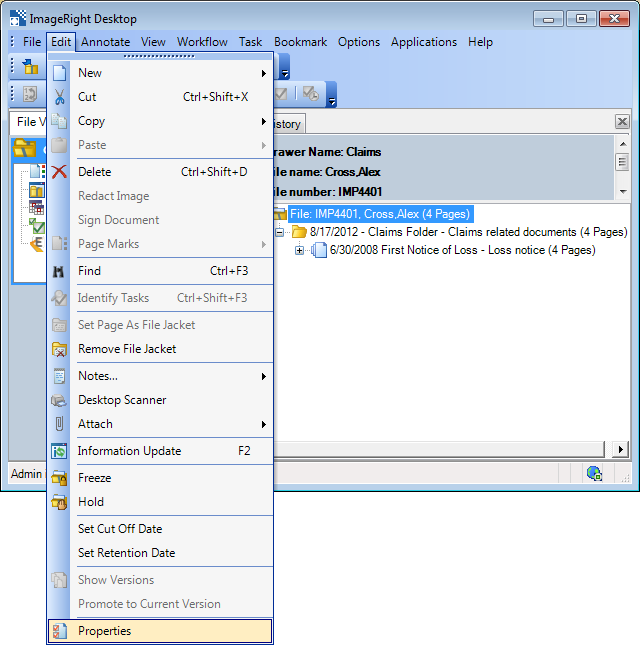
The appearance of the Properties dialog box will change based on the level of the file (file, folder, document, or page) that you select before you click the Properties command.
File Level
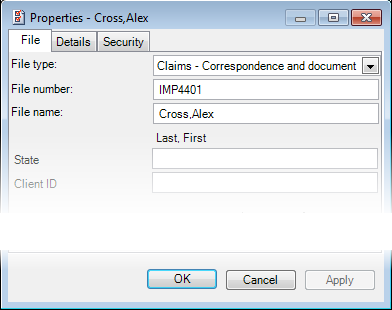
On the File tab, you can change the values in the File type, File number, File name, and attributes (State and Client ID in our example) boxes.
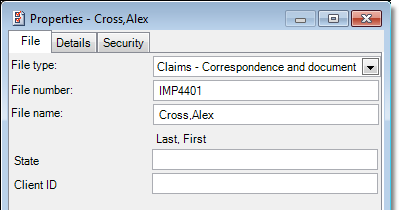
The file type, which is configured and maintained in ImageRight Enterprise Management Console, controls the file structure. That is, the file type defines the document types and folder types that can be added to the file.
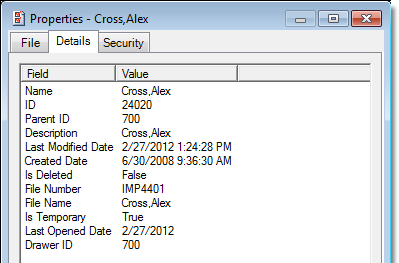
On the Details tab, you can view file specific information related to name, system dates, and ID values.
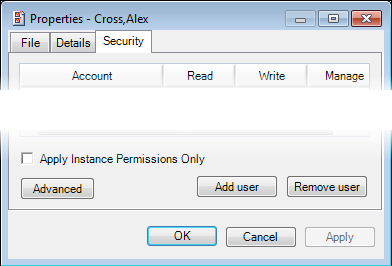
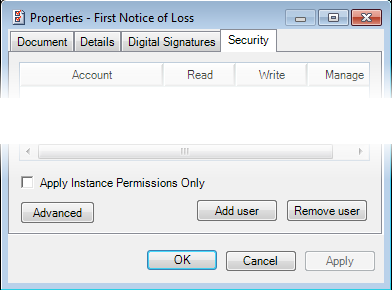
On the Security tab, you can apply security to the file level. The settings that you configure will dictate whether a person can open and view a file or make changes to other levels in the file. We will explain the steps to configure security later.
Folder Level
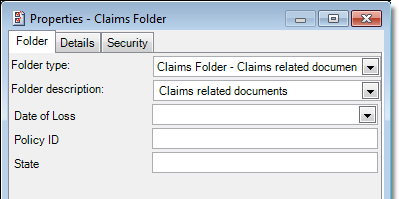
On the Folder tab, you can change the folder type that is associated with the selected folder level. Basically, the folder type, which is maintained in Enterprise Management Console, controls the appearance of attributes (Date of Loss, Policy ID, and State in our example) and security. You can select the type in the Folder type list.
You can also change the text description of the folder that is displayed in ImageRight Desktop and update any attributes associated with the folder level. Enter the new description in the Folder description box.
You can change any folder level attributes (Date of Loss, Policy ID, and State in our example) that appear.
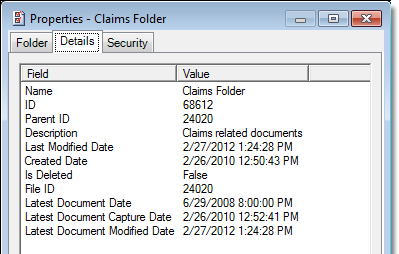
On the Details tab, you can view folder specific information related to the name, ID, and system generated dates.
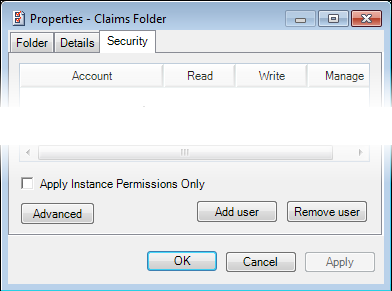
On the Security tab, you can apply security to the file level. The settings that you configure will dictate whether a person can open and view documents in the folder or make changes to documents in the folder. We will explain the steps to configure security later.
Document Level
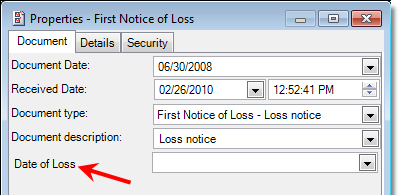
On the Document tab, you can change the document date, received date and time, document type, and document description. If your organization associates attributes with documents (Date of Loss in our example), you can change them also.
The value in the Document date box represents the date the document was added to ImageRight. You might want to change this date to represent the date the document was received in the office, as opposed to the date it was added to (scanned into) ImageRight.
The value in the Received date box may be the same as the document date. However, the date typically relates to the date e-mail messages were received. If the document is a Microsoft Outlook e-mail message that was added to ImageRight using a drag-and-drop operation or that was processed by ImageRight E-Mail Receiver Service, the received date represents the date the message was received by the e-mail program server. The time is converted to the current time of the computer being used to view the message.
To change the document date or the received date, select the date value to be changed and type the new value or use the arrow keys to set a new date. Alternatively, you can click the arrow to open a calendar and pick the date.
You can change the received time using the arrows or by typing the new time value. You might need to change the received time to change the order in which two e-mail messages are displayed in the Desktop file tree.
To change the document type, select the new type in the Document type list.
Type a new description to be displayed in Desktop in the Document description box. You might change the description to make it easier to identify and locate the document.
The display of the document description entered here in the Desktop file tree is optional. The display is turned on using the settings in Desktop Settings on the Options menu.
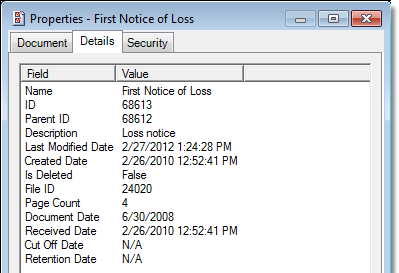
On the Details tab, you can view document related information, for example, the ID and system generated dates.
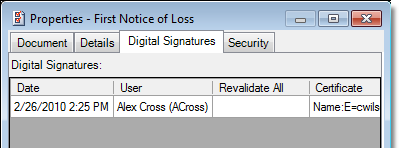
On the Digital Signatures tab, you can view information related to the person who signed the document, the date the document was signed, and the digital certificate that was used. This tab will not be displayed if a digital signature has not been added to the document (see Sign Document).
On the Security tab, you can apply security to the document level. The settings that you configure will dictate whether a person can open and view the document or make changes. We will explain the steps to configure security later.
Page Level
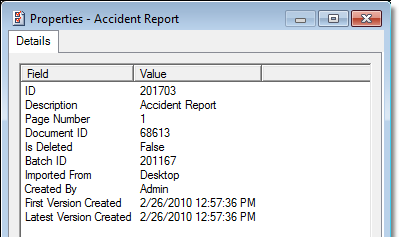
At the page level, you can view the information on the Details tab related to system generated IDs, dates, etc.
Security
Permissions define the type of access granted to manage or control the properties of a file. Typically, permissions are managed in ImageRight Enterprise Management Console. However, it is possible to manage certain permissions at the file level within Desktop.
|
The ability to change security permissions is usually reserved for the ImageRight system administrator; therefore, you may not be able to change permissions as explained here. If you have questions about changing permissions for your organization, contact your ImageRight system administrator. |
We are going to explain how to change the permissions at the file level. The steps for changing the permissions at the folder and document levels are essentially the same. As with all our examples, you can modify the steps and apply the features to your own needs.
As you review our example and consider changing permissions in Desktop, you should keep in mind that the permissions that you configure in Desktop will take precedence over those configured in Enterprise Management Console.
Before we begin, it may help to explain these concepts as they relate to ImageRight:
- Types
- Instances
- Parent instances
- Child instances
A type is a classification we use to differentiate the characteristics of one entity from another. Insurance files are classified by type, that is, Claims, Underwriting, Human Resources, Accounting, etc.
An Underwriting file, for example, has several known characteristics. The file contains information about the insured, the coverage of the policy, and the endorsements made to the original policy.
An instance is a specific object of a type. In ImageRight, examples of instances are specific policy numbers (files), insured names, folders, or documents in the file.
A policy number in an Underwriting file is considered an instance of the Underwriting file (type).
Permissions that are set at the type level control access to the type itself and all instances of that type. Therefore, permissions granted on an Underwriting file type, for example, will be granted on all policy numbers in the Underwriting files.
Parent and children instances pertain to the relationship between nodes or branches in a hierarchical data structure in which the parent is one step higher than the child. For example:
- A file is a parent of a folder; a folder is a parent of a document, etc.
- A folder is a child of a file, a document is a child of a folder, etc.
- Open the (File) Properties dialog box as explained earlier and click the Security tab if it is not already displayed. In our example, we selected the File level, and then clicked Properties on the Edit menu.
- On the Security tab, you can grant or deny permissions for individuals, groups, or roles. When you grant permissions, the respective users will be able to see and manage the information in the file.
- To remove a member from the list, that is, terminate all of a member's permissions, select the member and click Remove User.
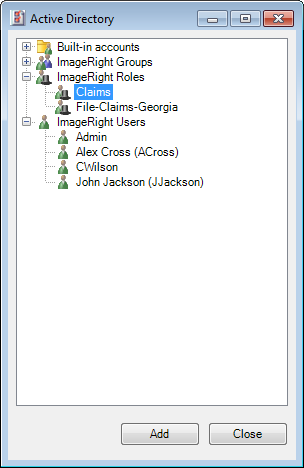
- To add a new member to the list, click Add User to display the Active Directory dialog box.
- Expand
or collapse the list by clicking
 or
or  . Select the member that you would like to add to
the Security tab and click Add. As an alternative, you may double-click
the member to add it. Repeat the process until all members have been added.
You can pick from these items:
. Select the member that you would like to add to
the Security tab and click Add. As an alternative, you may double-click
the member to add it. Repeat the process until all members have been added.
You can pick from these items:- Built-in Accounts – system default users that can access ImageRight programs
- ImageRight Groups – a collection of user accounts often called members
- ImageRight Roles – a collection of individual users or groups
- ImageRight Users – individual people who can access ImageRight programs
- Click Close to dismiss the dialog box after you have added all the members.
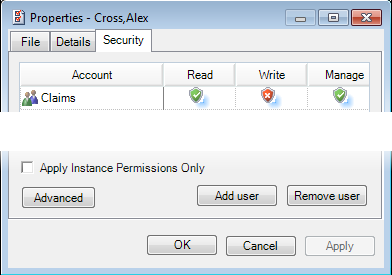
- The members you added will appear in the Account column. In our example, we added the Claims group. This means that every member of the group will have the permissions that are granted to the group.
- You can
grant permissions in one of two ways—
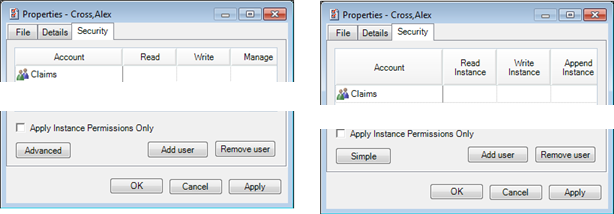
simple (left portion of the screen capture below) or advanced (right portion
of the screen capture). The Simple settings are a subset of the Advanced
permissions. Click the Advanced or Simple button to switch between the
different settings. The permissions you grant dictate the manner in which
a person may change the file, folder, or document properties. The definitions
of the permissions follow.
- Simple
settings
- Read – User can view the instance in the various ImageRight programs, for example, ImageRight Scanner (combination or Read Type and Read Instance).
- Write – User can change the properties of the instance: add new items, delete items, or modify existing items (combination of Write Instance, Append Instance, Child Append Enable, and Child Write Enable).
- Manage – User will have these permissions (defined later as advanced settings): Append Instance, View Instance Permissions, Change Instance Permissions, Child Append Enable, and Child Write Enable.
- Advanced
settings
- Read Instance – User can view the instance in the various ImageRight programs, for example, ImageRight Desktop.
- Write Instance – User can change the properties of the instance: add new items, delete items, or modify existing items. This permissions supersedes the Append Instance, Child Append Enable, and Child Write Enable permissions.
- Append Instance – User can add child content to an instance.
- View Instance permissions – Using ImageRight Desktop functionality, user can view granted permissions for the instance.
- Change Instance Permissions – Using ImageRight Desktop functionality, user can grant permissions related to the instance.
- Child Append Enable – User can append items at child levels below the level where this permission is granted. Append Instance or Write Instance permission must also be granted at the child levels.
- Child Write Enable – User can change instances at child levels below where this permission is granted. Append Instance or Write Instance permission must also be granted at the child levels.
- Simple
settings
- Select the Apply instance permissions only option to restrict access to an existing file, folder, or document level. Once the option is selected, only those people who appear in the Account column for which you grant explicit access will be able to view content in the file, folder, or document instance. You might apply instance level permissions for files containing personnel files, sensitive or confidential files, or policies or claims involving company employees.
- Click
(repeating as necessary) the area under the column headings to change
the permissions. As an alternative, you can double-click the name in the
Account column to change the status of all items at once. The icon descriptions
follow:
- Blank
– No permission is
granted.
 –
Permission is denied.
 –
Permission is granted.
 –
Multiple items are selected, and the permission status is not the same
for all items.
- Blank
– No permission is
granted.
- Click OK or Apply to save your changes. Click Cancel first to return without saving your changes.
